Crunchy Sourdough Breadsticks (Grissini)

Crunchy sourdough breadsticks (grissini) are a quick and easy sourdough appetizer. The dough can be made and baked on the same day, making this recipe perfect when you need something quick!

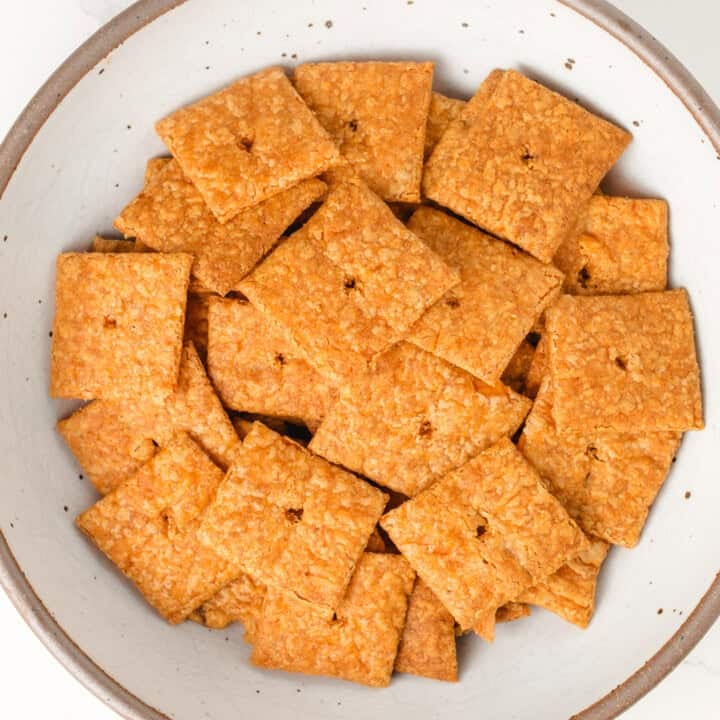
If you’re looking for a way to use leftover sourdough discard or impress guests at your next gathering, these crunchy sourdough breadsticks are a must-try. Crispy and delicious, they're the perfect addition to a charcuterie board.
Crunchy sourdough grissini are great for dipping into hummus, olive tapenade, or red pepper and feta dip. To jazz them up, sprinkle them with your favorite toppings, like sesame seeds, Parmesan cheese, or flaky sea salt, before baking for extra flavor.
Ingredients & Substitutions

- sourdough starter: Both active sourdough starter and discard work for this recipe, so use whichever you have.
- all-purpose flour: You can substitute bread flour or whole wheat flour.
- extra-virgin olive oil
- salt
- optional toppings: Use sesame seeds, herbs de Provence, dried basil, oregano, flaky salt, poppy seeds, grated Parmesan cheese, or even a sprinkle of garlic powder for extra flavor. Get creative and mix and match your favorites.
How to make Crunchy Sourdough Breadsticks

Step 1
Add the dough ingredients to a bowl and mix with your hands until the dough comes together and there are no dry bits in the bottom of the bowl. Cover the bowl with plastic and allow the dough to rest for 1 hour.
For a long ferment, allow the dough to rest at room temperature for up to 8 hours and transfer to the fridge until you are ready to bake.

Step 2
Using the dough hook attachment, mix the dough at a low speed, at a speed of 3 on a Kitchenaid stand mixer, for 5 minutes. The dough will become soft and elastic.

Step 3
Place the oven rack in the center position and preheat the oven to 350°F (176°C). Line two baking sheets with parchment paper or silicone baking mats.
Turn the dough onto a clean work surface and use your hands to stretch it into a 4” x 15” rectangle.

Step 4
Use a bench scraper or a sharp knife to cut ¼” x 4” strips of dough. You should end up with roughly 30 pieces.
Pick up a strip at each end, stretch it to the width of the baking sheet, and lay it down. Repeat, ensuring ½” of space between each strip of dough. You should be able to fit about 15 pieces on each baking sheet.

Step 5
Gently roll each breadstick in your choice of topping and place it back on the baking sheet. (Omit this step if you are not using any toppings.)

Step 6
Bake the dough for 20 minutes, flip the breadsticks, and bake for 15 more minutes.
Remove the baking sheet from the oven and allow the breadsticks to cool. They will continue to crisp up as they cool.

Carmyn's Tips
Use parchment paper or a silicone baking mat: Baking your grissini on parchment paper or a silicone mat keeps them from sticking.
Serve fresh: These breadsticks are best enjoyed within a few days of baking. If you are not using them as an appetizer, enjoy them with soups and dips throughout the week.
How to Store
To keep your grissini fresh and crunchy, store them in a glass jar or a metal tin.
Avoid using plastic bags and containers, as they can cause the breadsticks to lose their crispness much quicker.

more appetizer recipes


Subscribe to our newsletter and we'll send you more fresh recipes, valuable troubleshooting advice, useful tips, and other information we believe will be helpful to you!

Crunchy Sourdough Breadsticks
Before You Begin
INGREDIENTS
- ¼ cup (50 g) sourdough starter (fed or discard)
- 2 cups (240 g) all-purpose flour (bread flour or wheat flour, see notes)
- 2 tablespoons (30 g) olive oil
- ½ cup (120 g) water
- 1 teaspoon (5 g) fine sea salt
INSTRUCTIONS
- Add all of the ingredients to the bowl of a stand mixer and mix with your hands until the dough comes together and there are no dry bits in the bottom of the bowl. Cover the bowl with plastic and allow the dough to rest for 1 hour. (For a long ferment, allow the dough to rest at room temperature for 8 hours and transfer to the fridge until you are ready to bake.)
- Using the dough hook attachment, mix the dough at a low speed, at a speed of 3 on a Kitchenaid stand mixer, for 5 minutes. The dough will become soft and elastic.
- Place the oven rack in the center position and preheat your oven to 350°F (176°C). Line two baking sheets with parchment paper or silicone baking mats.
- Turn the dough onto a clean work surface and stretch it into a 4” x 15” rectangle.
- Use a bench scraper to cut ¼” x 4” strips of dough. You should end up with roughly 30 pieces. Pick up a strip at each end, stretch it to the width of the baking sheet, and lay it down. Repeat, making sure there is ½” of space between each strip of dough.
- Gently roll each breadstick in your choice of topping and place it back on the baking sheet. (Omit this step if you are not using any toppings.)
- Bake the dough for 20 minutes, flip the breadsticks, and bake for 15 more minutes. Remove the baking sheet from the oven and allow the breadsticks to cool. They will continue to crisp up as they cool.
NOTES
- Measuring Ingredients: Our recipes are developed using a kitchen scale for precise measurements. Measuring cups can lead to inconsistent results, so keep that in mind if you’re not using a scale.
- Flour: All-purpose flour can be substituted with bread flour or whole wheat flour. If you make this switch, you may need to adjust the hydration level slightly, as they absorb water differently than all-purpose flour. Add a little more or less water as needed to achieve the right dough consistency.
- Adjusting salt: We use Redmonds fine sea salt weighing 5 grams per 1 teaspoon. If using regular table salt, use ¾ teaspoon. If using flaky sea salt, use a heaping 1 ¼ teaspoon.
- Adjusting Your Baking Schedule: We test our recipes in a kitchen that’s 68-70°F. When planning your sourdough schedule, use our sample baking schedule as a guide, but adjust as needed. A cooler kitchen will require more time, while a warmer kitchen will speed up fermentation.
- How to Store: To keep your grissini fresh and crunchy, store them in a glass jar or a metal tin. Avoid using plastic bags or containers, as they can cause the breadsticks to lose their crispness faster.
Simply delicious 😋 snack!
I have made it few times and with different toppings 🫶🏼 big hit in our family and my hubby’s work colleagues 😊
Thank you Amy for hard work and foolproof recipes ♥️
Full disclosure I had celiac disease so I could not taste them myself. That said they got very good reviews! I made mine using discard which worked well. I found it much easier to shape my rectangle out, brush it with an egg wash and put the topping on prior to cutting the quarter inch strips. I got 45 sticks rather than 30 so I may have cut them more narrow but I was using a ruler. I also found they were almost impossible to actually turn over after 20 minutes due to the curling and shape. Additionally they cooked faster in my oven (I do use a thermometer in my oven) than the suggested time. I ended up doing about 25 total minutes. Will make them again.
Hi! Can I make this recipe without a mixer?
This is a great recipe. I have used LSF sourdough discard pizza dough for years, and that, too, is fantastic. Have made the discard pumpkin muffins- delish. The grissini are the perfect combo of crunchy and delicate. I chose to add fennel seeds to the dough, and a tiny bit of Maldon salt on top before baking. Just so good. I was concerned with hand shaping the dough, and "pulling" sticks to length- too fussy for me. Cheated with a quick roll with the pin, then used my hands to roll out and lengthen sticks. Not sure if this toughened the dough, but the end result was so good that I can't imagine that they could be any better, Bravo again, Little Spoon Farm!
Delicious crunchy breadsticks. I rolled them in poppy seeds with a tiny smattering of salt.
Great recipe!