Gluten-Free Sourdough Bread

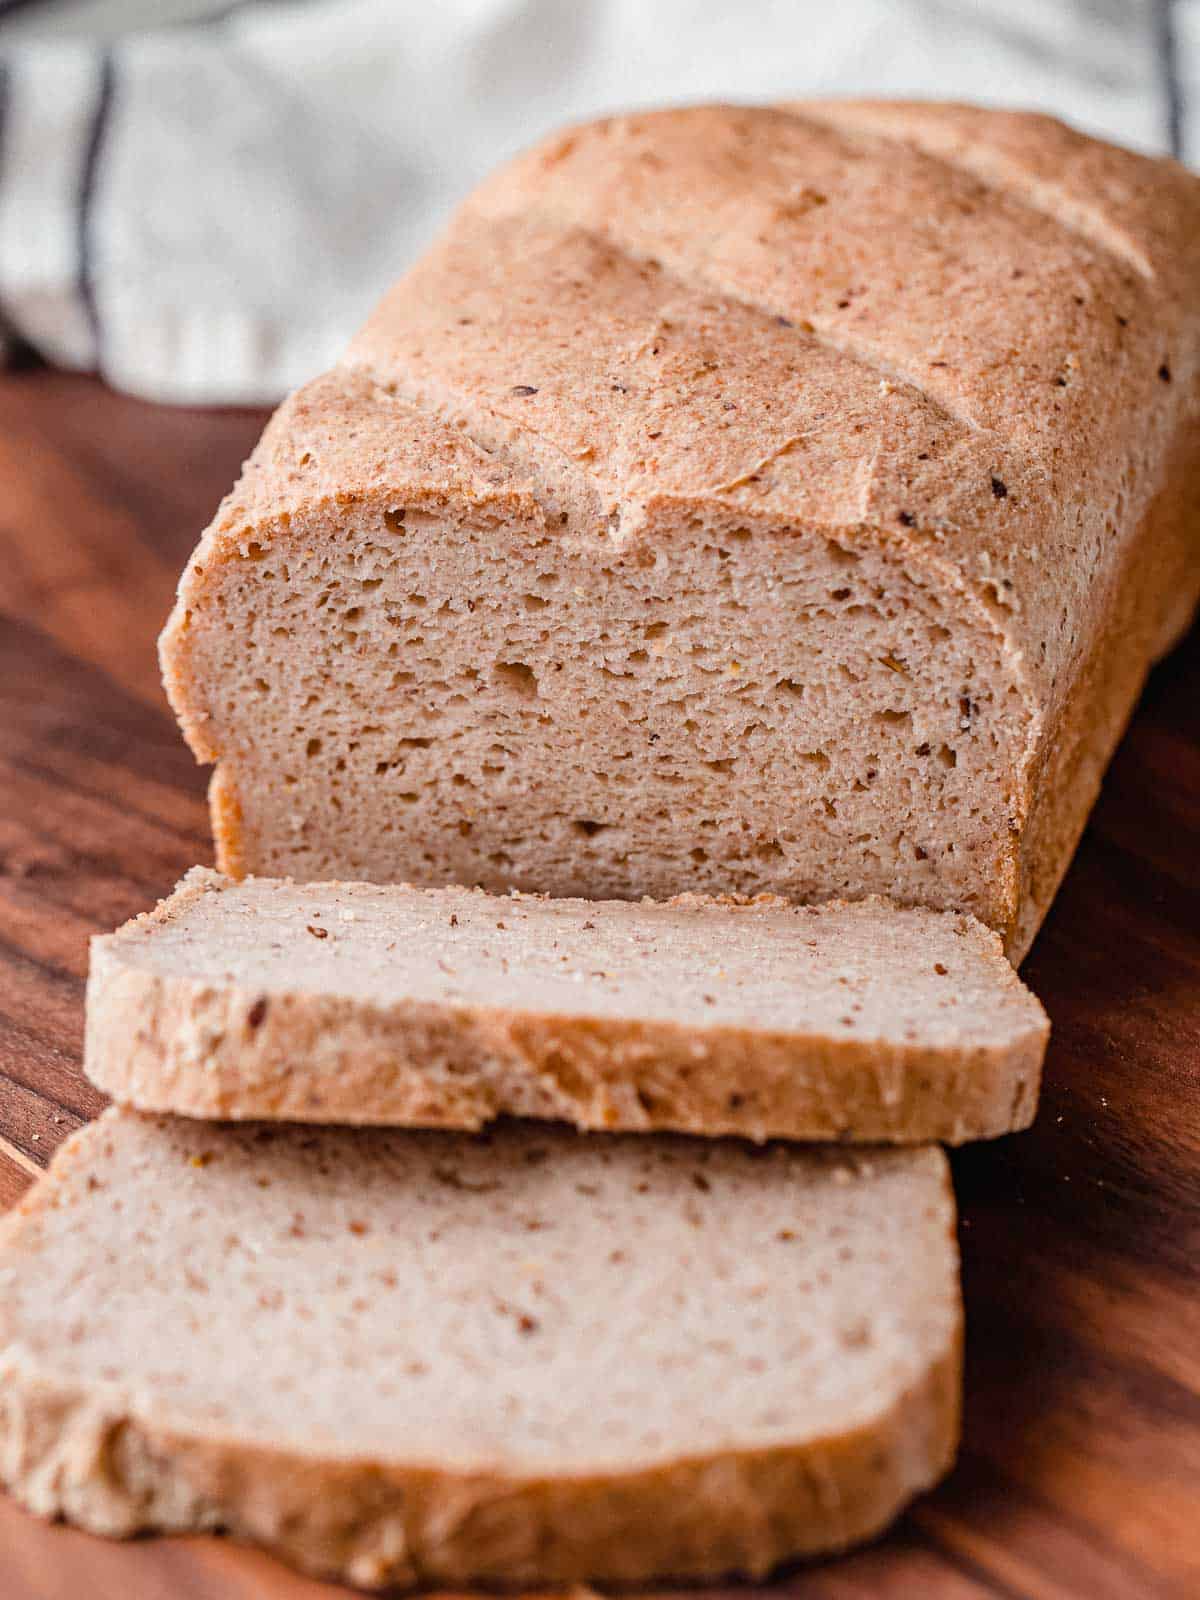
This is hands down the best gluten-free sourdough bread around! It's made with a gluten-free sourdough starter and gluten-free flour, but it is so soft and delicious that it tastes just like regular bread!
Hi everyone! We've received so many requests for a gluten-free sourdough bread recipe that we just had to create one we knew you would love.
This gluten-free sourdough bread is made without commercial yeast, so you'll need to make a gluten-free sourdough starter if you don't already have one!
Let's go ahead and get right into the details!
Ingredients and substitutes
- gluten-free sourdough starter
- brown rice flour
- tapioca flour
- corn starch or arrowroot flour
- psyllium husk powder - adds fiber and texture to the bread.
- xanthan gum - makes the bread chewy and helps give it structure to rise higher.
- salt
- baking powder - gives a boost to the rise of the bread.
- ground flax seed - helps bind the bread.
- honey or agave
- olive oil
- apple cider vinegar
How to substitute ingredients for King Arthur Measure for Measure GF Flour:
- 3 cups (372 g) King Arthur GF flour replaces the brown rice flour, tapioca flour, and corn starch in the recipe.
- Reduce the xanthan gum to 2 teaspoons.
- Adjust water to 1 ¾ cups (420g) total.
How to make gluten-free sourdough bread
The night before you mix the dough, feed your gluten-free sourdough starter to be active in the morning.
Line a 9" x 5" baking pan with parchment paper. If your oven has a bread-proofing setting, turn it on. If it does not, turn your oven to the lowest temperature it will register.

Step 1
Mix the wet ingredients in a small bowl.

Step 2
Measure out the dry ingredients in a stand mixer bowl. Use the paddle attachment to mix the dry ingredients thoroughly.

Step 3
Add the wet ingredients to the stand mixer bowl.

Step 4
Mix the dough at the lowest speed for 5 minutes. Don't skip this step. It's very important to mix the dough well, and this step also helps incorporate some air into the dough.
Use a hand-held electric mixer if you do not have a stand mixer.
The batter will be thick.

Step 5
Pour the dough into the pan and use a spatula to smooth the top.
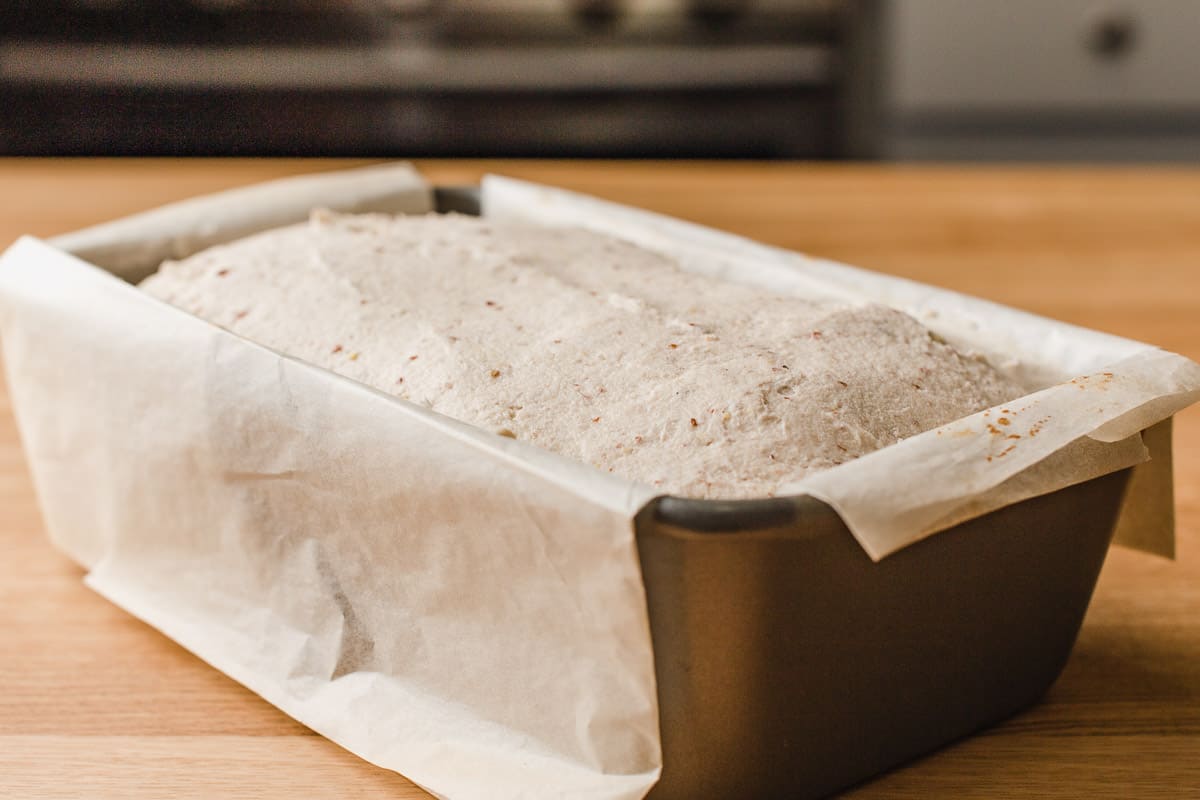
Step 6
Cover with plastic and let rise in the oven with the breadproofing setting ON. If you don't have that setting, at this point, turn the oven OFF.
Allow the dough to rise for 3 ½ to 4 hours or until it reaches the top of the pan.

Step 7
Remove the dough from the oven and turn the oven on to 375°F(190°C).
When the oven has come to temperature, score the top of the loaf with a razor or sharp knife to help improve the oven spring and give the loaf a decorative touch.
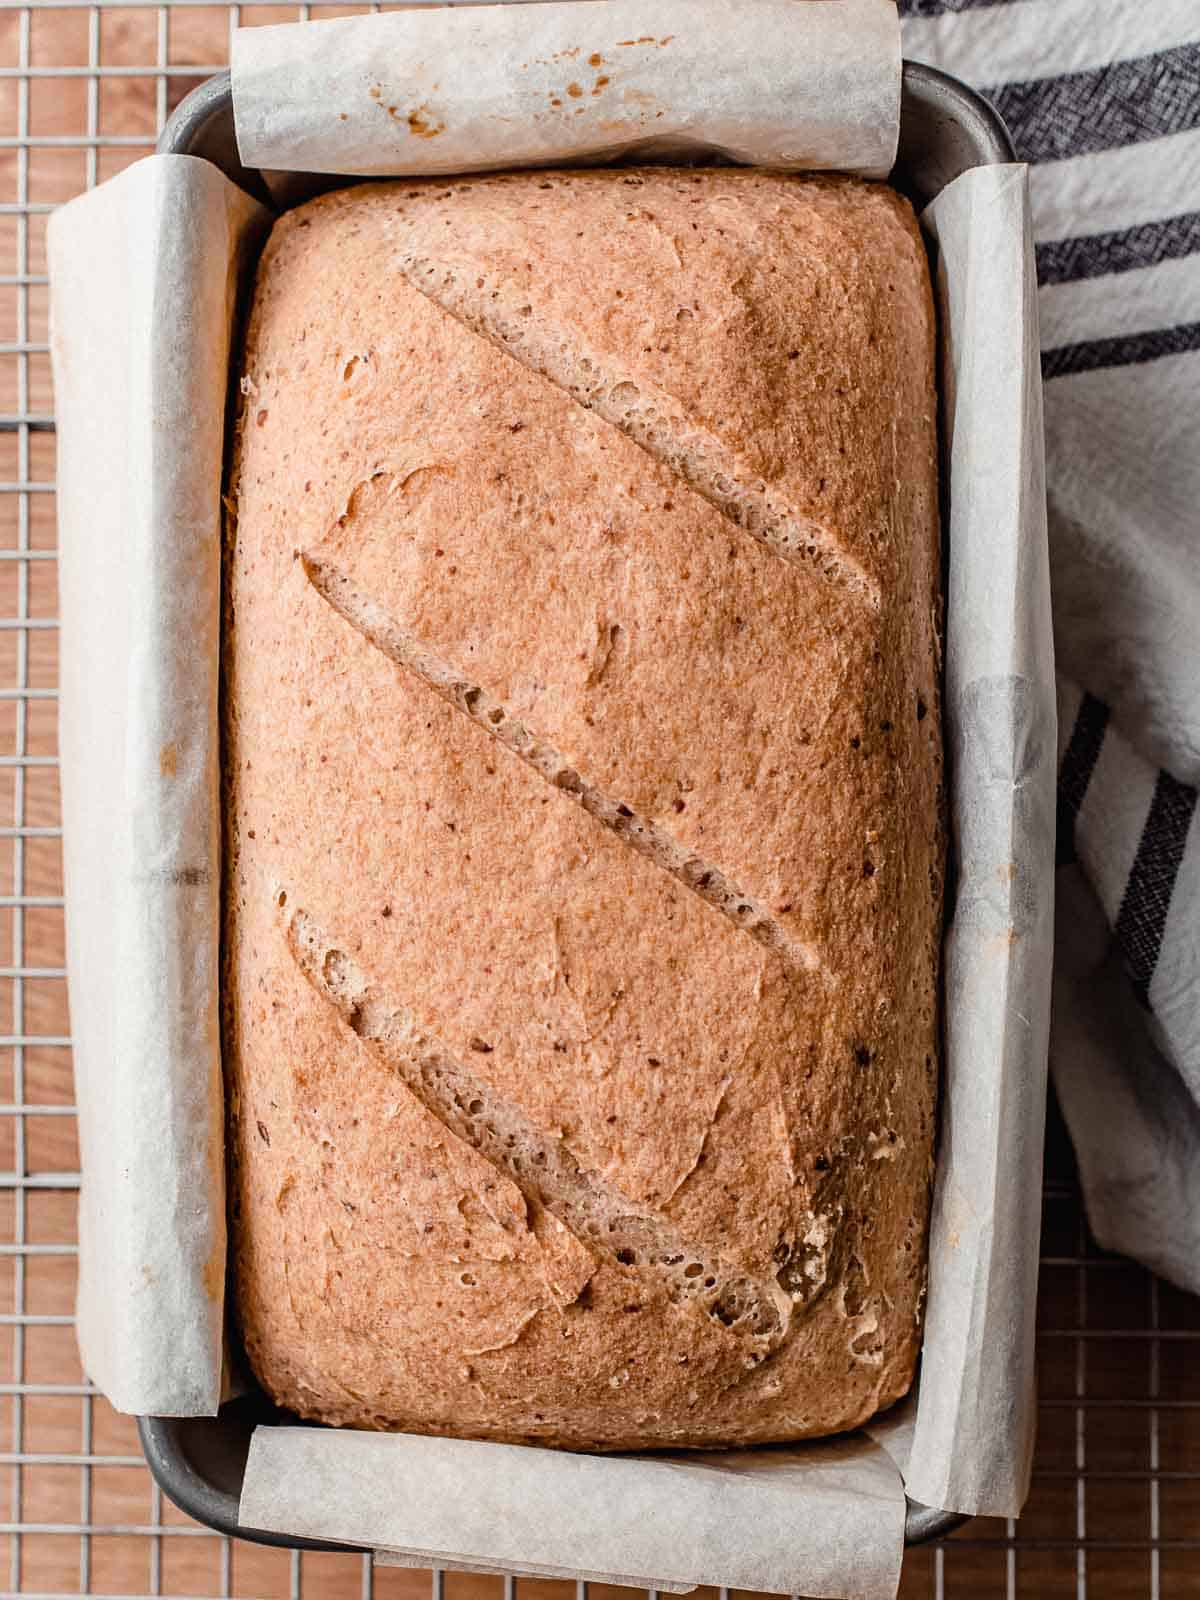
Step 8
Bake the loaf for 60 minutes.
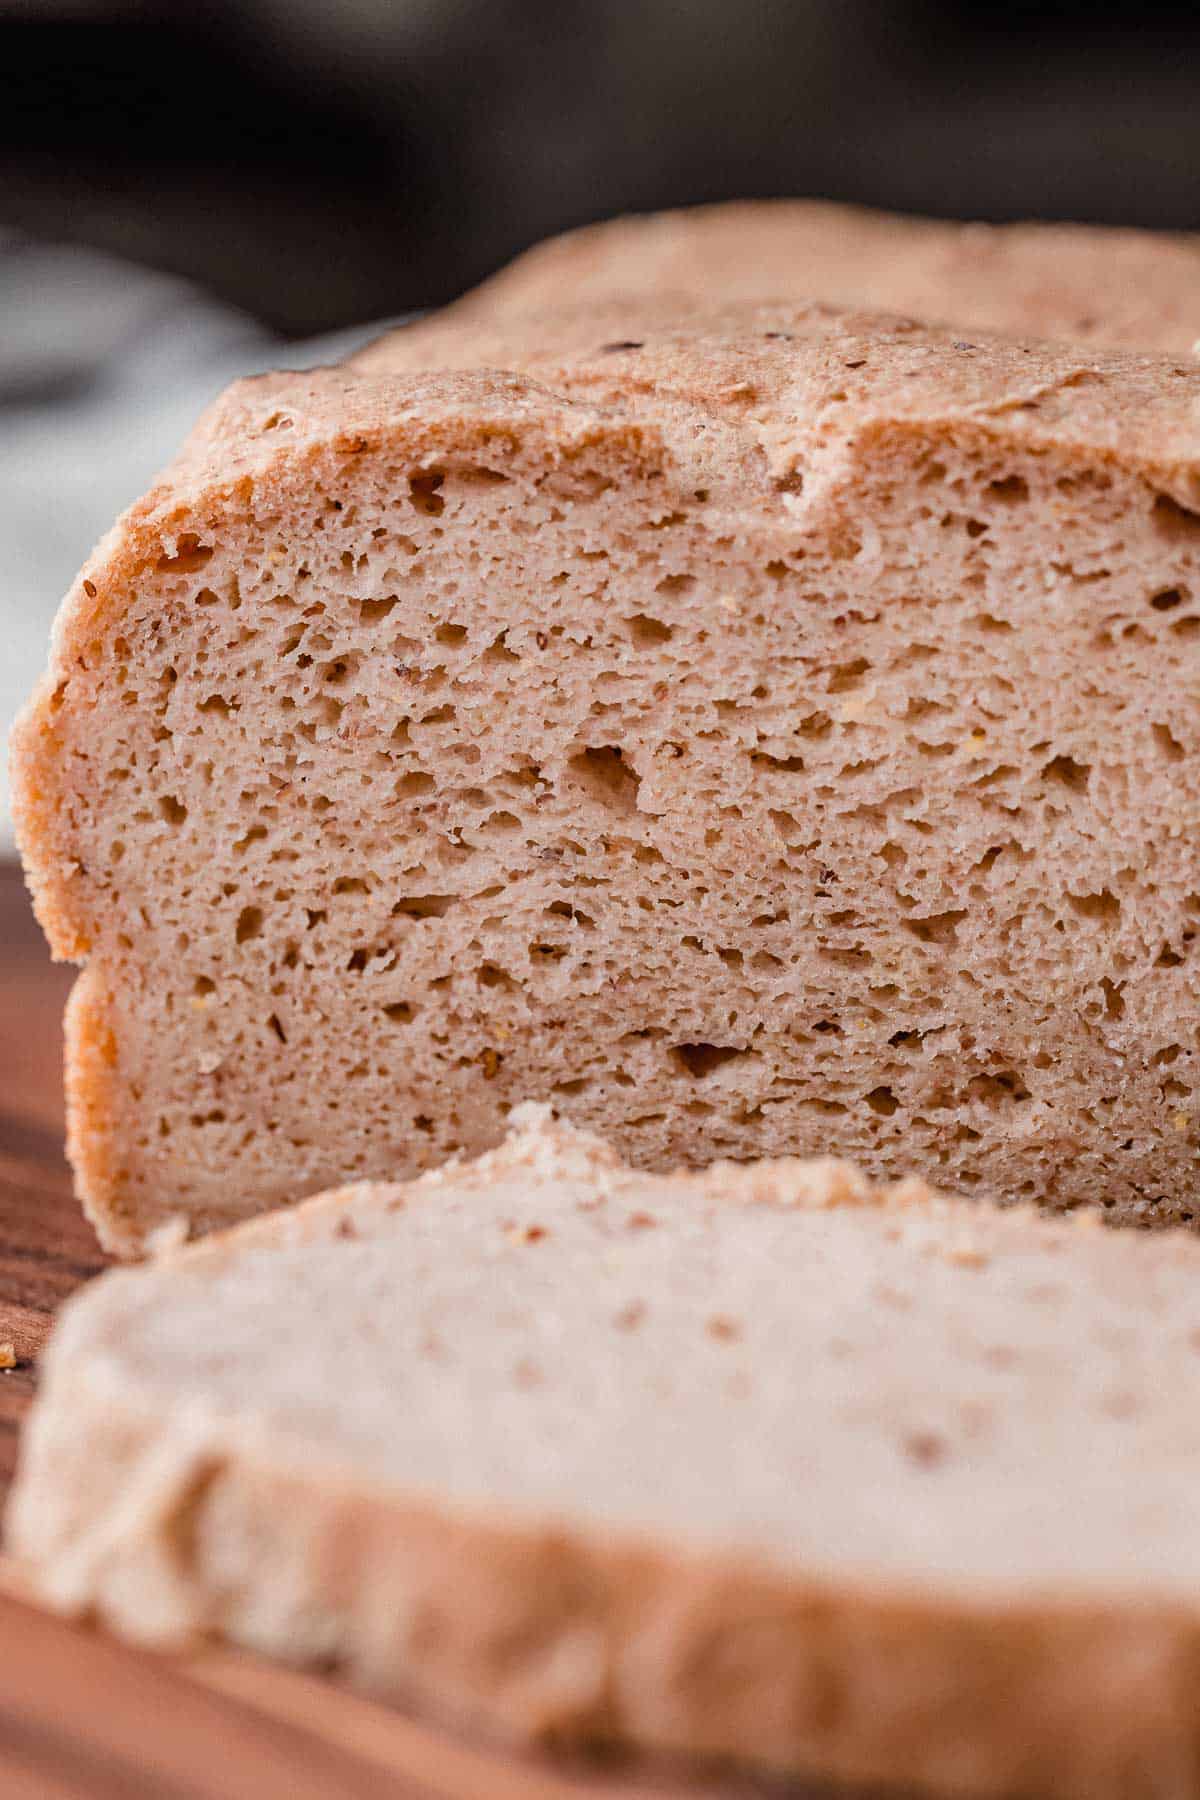
Remove the baked loaf from the pan and parchment paper immediately.
If you do not remove the parchment paper, the bottom of the bread will become soggy.
Allow the bread to cool completely on a cooling rack before cutting.
How to Store
You can store the bread at room temperature in a closed container for up to 3 days or freeze it for up to 3 months.


Subscribe to our newsletter and we'll send you more fresh recipes, valuable troubleshooting advice, useful tips, and other information we believe will be helpful to you!

Gluten Free Sourdough Bread
INGREDIENTS
Ingredients needed to make 1 cup (250 g) active starter
- ½ cup (125 g) unfed gluten free sourdough starter
- ½ cup (70 g) brown rice flour
- ¼ cup (60 g) water
Wet Ingredients
- 1 ½ cups + 2 tablespoons (390 g) water
- 2 tablespoons (10 g) ground flax seed
- 1 cup (250 g) gluten free sourdough starter
- 1 tablespoon (20 g) honey (or agave)
- ¼ cup (60 g) olive oil
- 1 teaspoon (5 g) apple cider vinegar
Dry Ingredients
- 1 ½ cups (210 g) brown rice flour
- 1 cup (120 g) tapioca flour
- ½ cup (60 g) corn starch
- 2 tablespoons (16 g) psyllium husks
- 2 ½ teaspoons (8 g) xanthan gum
- 2 teaspoons (10 g) salt
- 1 tablespoon baking powder
INSTRUCTIONS
Feed Your Starter
- 12 hours before you plan to mix the dough, add the ingredients to make 1 cup (250 g) of active sourdough starter to a clean jar. Stir until combined, loosely cover the jar and let the starter rise at room temperature. The sourdough starter is ready to use when there are plenty of bubbles on the sides of the jar and the starter has risen by 25-30%.
Make the Dough
- Combine the water with the ground flax seeds, active gluten free sourdough starter, honey, olive oil, apple cider vinegar in a mixing bowl and set aside.
- Combine the dry ingredients in the bowl of a stand mixer. Use the paddle attachment to mix them for 1 to 2 minutes making sure they are well incorporated. This step is very important.
- Pour the wet ingredients into the bowl of the stand mixture with the dry ingredients.
- Beat the dough on the lowest speed for 5 minutes, scrapping down the sides of the bowl as necessary. When you lift the paddle attachment, the dough should slowly fall off of the paddle. If it stays on the paddle, add 30 g of water at a time until you achieve the right consistency. The dough should be thick but not stiff.
Rise
- Line a 9" x 5" baking tin with parchment paper. Pour the dough into the tin and use a spatula to spread it evenly.
- Set your oven to the bread proofing setting. Allow the bread to rise in the oven for 3-4 hours or until it rises to the top of the baking tin. If your oven does not have this setting, let the oven preheat to its lowest temperature while you make the dough. Turn the oven off and allow the dough to rise in the oven. OR, cover the dough with a kitchen towel or plastic and allow to rise at room temperature until the dough has risen slightly higher than the top rim of the baking tin. This can take anywhere from 6-12 hours depending on the temperature of your kitchen.
Bake
- Remove the dough from the oven. Turn the oven on to 375°F (190°C). When the oven has come to temperature, score the top of the dough with a razor or sharp knife. Bake for 60 minutes.
- Remove the bread from the baking pan and parchment paper immediately. If you do not remove the parchment paper, the bottom of the bread will become soggy. Allow the bread to cool on a cooling rack completely before cutting.
- Store the bread at room temperature in a closed container for up to 3 days. Or freeze for up to 3 months.
NOTES
- King Arthur Measure for Measure GF Flour:
- 3 cups (372 g) King Arthur GF flour replaces the brown rice flour, tapioca flour and corn starch.
- Reduce the xanthan gum to 2 teaspoons.
- Adjust water to 1 ¾ cups (420g) total.
I made one loaf and will make more because it turned out beautifully. I used the King Arthur 1:1 flour substitution suggestions, too. I also used psyllium powder (it is what I had) and did 13g following the guidelines to reduce measurement by 80-85% if using powder vs husks. I used a Pullman loaf pan lined with parchment and removed it immediately to cool on a wire rack to prevent the gummy bottom. The only thing I would add is a step to make the top crust more browned/chewy like regular sourdough, if possible.