How to Make Sourdough Starter
This straightforward, easy-to-follow method is perfect for anyone who wants to learn how to make a sourdough starter the easiest way possible!
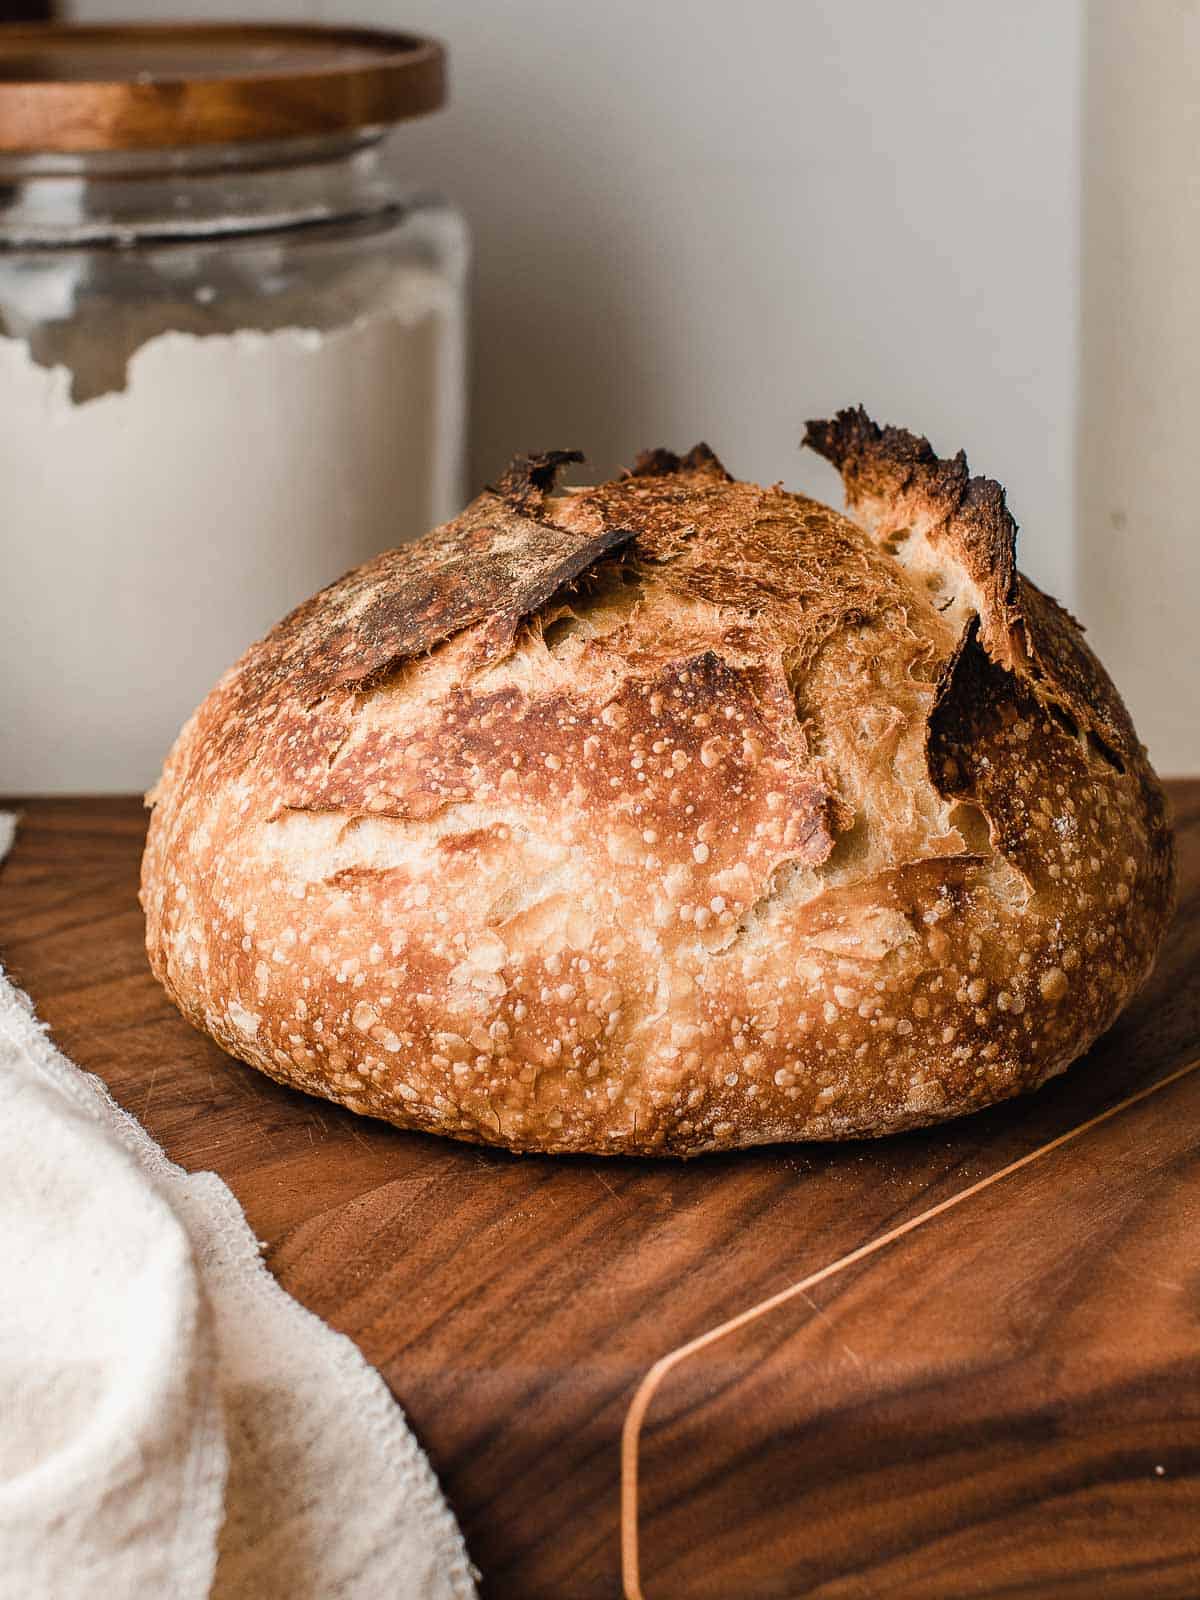
In no time you'll be baking your family the most delicious homemade sourdough bread, sourdough pizza, sourdough bagels and so much more!
I've been baking sourdough bread with my sourdough starter that I made with this exact recipe for several years now.
I'll never forget the feeling of accomplishment and pride I had the minute I pulled my very first loaf out of the oven!
I soon realized that not only could I bake healthy, delicious bread for my family, but I could also recreate all of our favorite yeast bread recipes into sourdough!
I've since made everything from pancakes, pasta, crackers, and tortillas, to cinnamon rolls and chocolate chip cookies.
Follow this easy tutorial and you'll be on your way to baking a variety of sourdough recipes that your family will love!
Jump to:
What is a sourdough starter?
A sourdough starter is a living culture of wild yeast and lactic acid bacteria that is used to make bread rise. It is created by combining flour and water and allowing it to ferment.
Over time, the natural yeasts and bacteria present in the environment and on the flour begin to feed on the mixture. A portion of active sourdough starter is added to dough in order to make it rise during the baking process.
Sourdough bread has a distinct and complex flavor profile that cannot be beaten. The natural fermentation process in sourdough gives the bread a tangy, slightly sour taste.
The fermentation process in sourdough also helps to make the bread easier to digest for some people that might be sensitive to gluten. (It does not remove gluten from bread.)
How long will it take?
Creating a healthy and vibrant sourdough starter can take anywhere from 7 to 14 days depending on several factors. The temperature of your kitchen is the most important factor to consider.
Starters thrive in a warm environment, ideally around 75°F (24°C). But, you can still create a sourdough starter in a cooler environment.
NOTE: I created my starter in a kitchen that was 68°F (20°C) with no issues. It only required a little more patience as it took about 10 days before I could bake with it.
Trust me, this process is totally worth it. Once you've got it going, a healthy and vibrant sourdough starter will reward you with delicious bread for years to come!
What you’ll need
flour and water
The first step in creating a sourdough starter is to prepare the flour mixture which will be used to feed the starter.
Mix 6 cups of all-purpose flour with 3 cups of whole wheat flour and store it in a container with a tight-fighting lid.
NOTE: A sourdough starter can be created with all-purpose flour alone but the addition of whole wheat flour will give the starter a boost in the fermentation process.
Bottled water, filtered, and most tap water can be used in your starter. To remove the chlorine from tap water by evaporation, fill a bottle with tap water and let it sit uncovered for 24 hours before using.
Tools needed
To make a sourdough starter, you'll need a few essential tools. (affiliate links)
- First and foremost, you'll need a container to hold and cultivate the starter. We recommend either a pint-sized mason jar, a weck jar, or a food-grade plastic container.
- Covering the container with a lid or a breathable cloth, like a cheesecloth or a kitchen towel, allows air circulation while preventing contaminants from entering.
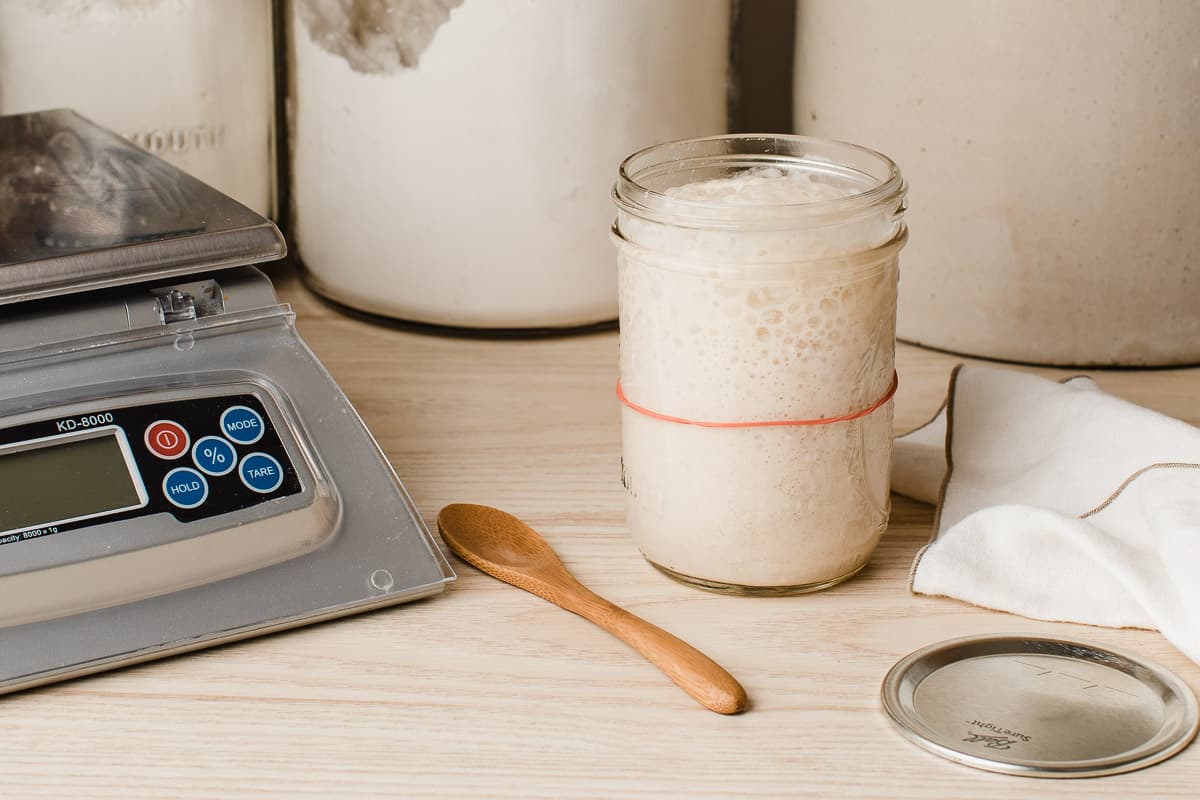
- It's also beneficial to have a rubber band to mark the starting point of the starter at feedings. This will allow you to see how much the starter has risen.
- A kitchen scale is invaluable for accurately measuring the weight of flour and water in precise ratios.
- A spoon or an offset spatula will come in handy for stirring and mixing the ingredients thoroughly.
- A digital thermometer can be helpful to monitor the ambient temperature of the room where you keep your starter.
Step-by-step instructions
You'll feed your starter once a day around the same time. Pick either morning or night depending on what is convenient for your schedule in order to stay consistent.
Day 1: Mix flour and water
Start by mixing 1 cup of the flour mixture with ½ cup of water. (120g flour + 120g water)
Stir the mixture thoroughly until all the flour is fully hydrated and no dry clumps remain.
Loosely cover the container with a lid or a thick breathable cloth, secured with a rubber band. (This allows airflow while keeping out contaminants.)
Place the container in a warm location.
Day 2: Stir
Wait 24 hours, then check on the mixture. Give it a stir to help incorporate a little air.
You should notice some initial bubbling or signs of activity.
Day 3-7: Discard and feed daily until active
Starting on day 3 you will discard most of the starter in the jar and feed it with flour and water.
Once a day around the same time, discard all but 2 tablespoons of the starter from the jar and feed it with ½ cup flour and ¼ cup water. (60g flour + 60g water) Mix thoroughly until well combined.
Repeat this daily, discarding and feeding, until your starter becomes active, bubbly, and doubles in size after each feeding. At this point, your sourdough starter is ready to use in recipes.
TIP: If your starter seems sluggish after the 4th day, start adding 2 tablespoons of flour along with 2 teaspoons of water into the jar, 12 hours after you fed it in order to help give it a boost.
How do I know when the sourdough starter is ready?
Knowing when your sourdough starter is ready to use in baking depends on a few factors. Here are some things to look for:
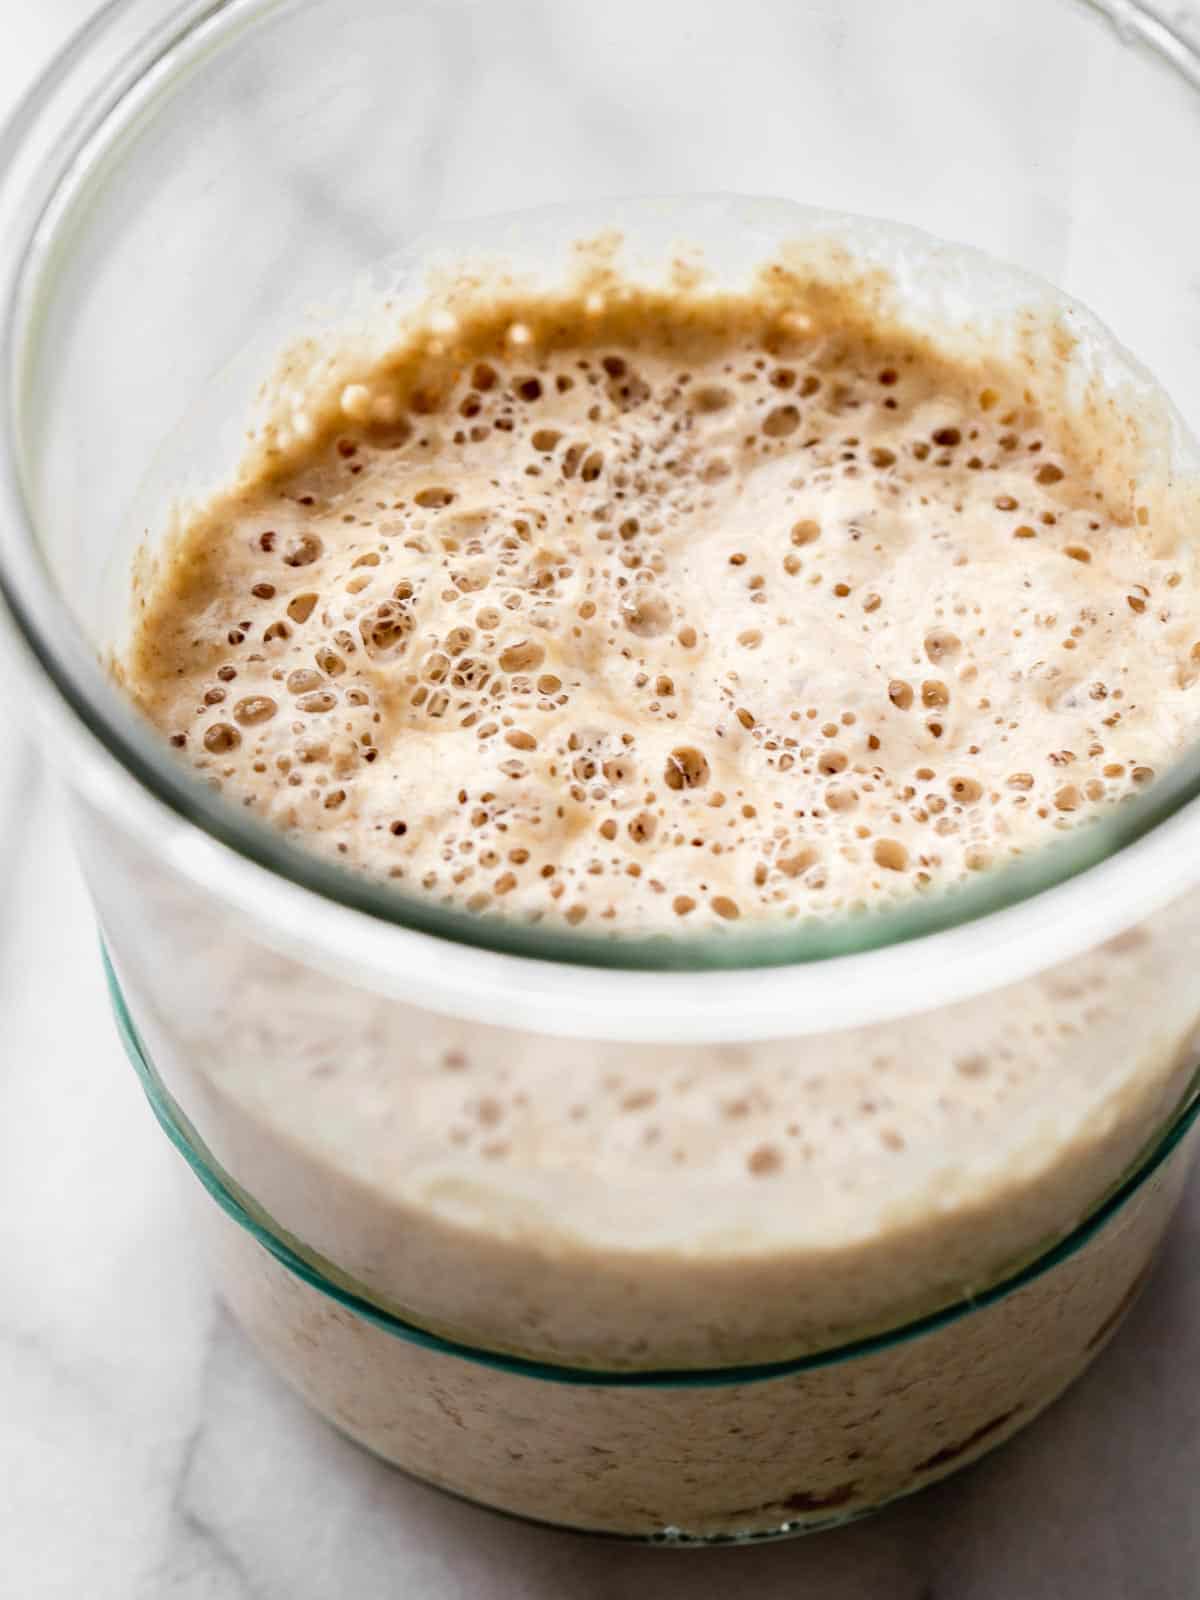
- A strong indication that your starter is ready to bake with is when it consistently rises and doubles after a few consecutive feedings.
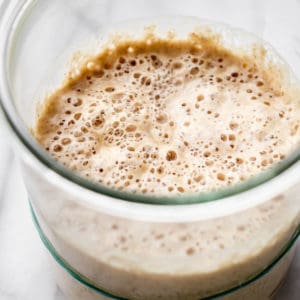
- An active starter will produce small bubbles visible on the surface and on the sides of the container.
- It will have a pleasant, slightly tangy, and mildly fermented aroma.
- The texture and consistency should generally be airy and fluffy.
- The starter passes the "float test". See below.
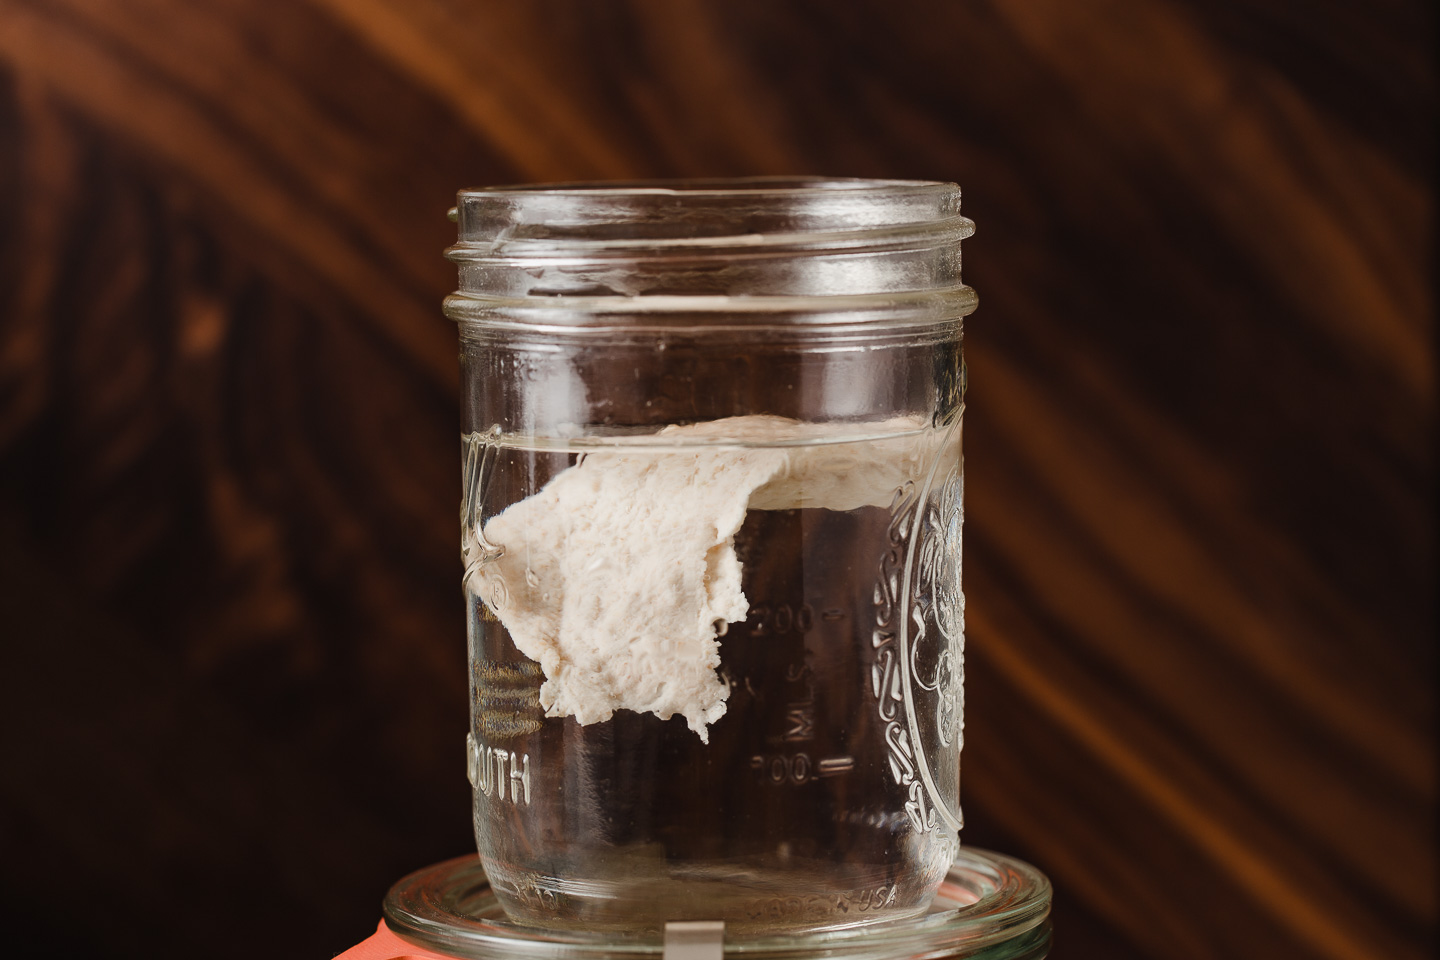
How to perform a float test
Performing a float test is a simple way to check the readiness of your sourdough starter before baking.
To do this, take a small amount of your active starter and drop it into a bowl or glass of water. If the starter floats on the surface, it indicates that there is sufficient gas production from the fermentation, suggesting that it is active and ready to leaven bread.
If it sinks or only partially floats, feed it a few more days and test again.
How to maintain a sourdough starter
I recommend continuing to feed your starter daily for the first two weeks after you've gotten it established. Daily feedings will keep building up the yeast and bacteria and you'll end up with a very robust sourdough starter.
I have written an article that provides guidelines and tips on maintaining a sourdough starter, covering things such as feeding schedules, temperature control and troubleshooting.
You'll find valuable insights and practical advice to help you keep your sourdough starter healthy and vibrant for successful baking every time.
Frequently asked questions
How can I create a warm spot in my kitchen for my sourdough starter?
Creating a warm spot in your kitchen for your sourdough starter can help facilitate fermentation. Here are a few methods you can try:
- Near the oven: Place your sourdough starter near the oven while it's preheating or while you're baking. The residual heat can create a warm environment for the starter.
- Use a proofing box: If you have a proofing box or a proofing setting in your oven, you can use it to create a controlled warm environment. Set the temperature to around 75°F (24°C).
- Use a heating pad: Place a heating pad set to the lowest temperature under the container holding your sourdough starter with a towel in between the two. Make sure to monitor the temperature to prevent it from getting too hot.
- Find a warm spot in your kitchen: Identify the warmest spot in your kitchen, such as near a sunny window, or on top of the refrigerator. These areas often provide a slightly elevated temperature.
What if my kitchen is too warm?
If your kitchen is consistently too warm for your sourdough starter, you can use a few strategies to create a cooler environment for fermentation:
- Find a cooler area in your home, such as a basement or a pantry, where the temperature is more suitable for your sourdough starter.
- When feeding your sourdough starter use cool water from the fridge.
- Consider refrigerating your sourdough starter between feedings. Place it in the refrigerator after feeding, and take it out a few hours before the next feeding to allow it to come back to room temperature. This slows down the fermentation process and helps maintain the vitality of your starter.
- Consider using a proofing box or a temperature-controlled appliance designed specifically for fermentation. These tools allow you to set and maintain the desired temperature for your sourdough starter.
Why do I have to discard or remove the starter when feeding?
While discarding a portion of the starter may seem counterintuitive, it is a necessary step for maintaining a healthy and well-balanced sourdough starter.
Discarding a portion of the starter helps keep the overall quantity manageable. It would require larger amounts of flour and water for feeding, and make maintenance way more challenging.
By discarding a portion of the starter and feeding it fresh flour and water, you help keep the bacteria and yeast balanced.
It also helps maintain a milder flavor profile and prevents the starter from becoming overly sour.
TIP: Collect the discard in a separate container in your fridge when you feed your starter. Once you have enough you can use it to make sourdough pancakes or waffles.
Making a sourdough starter and baking sourdough bread is a rewarding and fulfilling process.
The hands-on process of sourdough baking can be a relaxing and enjoyable experience!
Sourdough baking resources
- How to maintain a sourdough starter
- Signs that your sourdough starter is ready to bake with
- Essential tools for sourdough bread baking
- Sourdough glossary
- Baking conversion chart
Subscribe to our newsletter and we'll send you more fresh recipes, valuable troubleshooting advice, useful tips, and other information we believe will be helpful to you!
Beginner Sourdough Starter Recipe
EQUIPMENT
- Glass jar
- Offset Spatula
- Baker's Scale
INGREDIENTS
- 6 cups (720 g) organic all-purpose flour
- 3 cups (360 g) organic whole wheat flour
- water
INSTRUCTIONS
- Mix 6 cups of all-purpose flour with 3 cups of whole wheat flour and store it in an air-tight container. This is what you will feed your starter with.
- DAY 1: Add 1 cup of flour and ½ cup of water to a clean jar. (120g flour + 120g water) Stir the mixture thoroughly and cover the jar with a lid or breathable cloth, secured with a rubber band. Place the container in a warm location, around between 75°F (24°C) for 24 hours.
- DAY 2: Give the starter a stir to help incorporate a little air. Cover the jar and let it rest for another 24 hours in a warm spot.
- DAYS 3-7: Every 24 hours, discard all but 2 tablespoons of the starter and feed it with ½ cup fresh flour and ¼ cup water. (60g flour + 60g water) Mix thoroughly until well combined. Repeat this daily feeding routine, discarding and feeding, for about 7 to 10 days or until your starter becomes active, bubbly, and doubles in size within 4-12 hours of feeding.
Tip for a sluggish starter
- If your starter seems sluggish after the 4th day, begin stirring in 2 tablespoons of flour along with 2 teaspoons of water into the starter, 12 hours after you fed it. This will help to give it a boost until the next feeding.
What's next?
- I recommend continuing to feed your starter daily for the first two weeks after you've gotten it established in order to keep building up the yeast and bacteria. This will provide you with a very robust and mature sourdough starter.
- I have written an article that provides comprehensive guidelines and tips on maintaining a sourdough starter, covering aspects such as feeding schedules, temperature control, troubleshooting, and flavor development. It offers valuable insights and practical advice to help you keep your sourdough starter healthy and vibrant for successful baking adventures.
It is my second attempt at creating a starter, the first recipe from another website was much more difficult and the starter turned out bad. Your recipe is perfect! I appreciate all the detailed side notes. After reading many pages of comments, I was positive that my starter would turn out well, and it did! On the third day, it was sooo bubbly, then on days 4-7 it was pretty sleepy, so I did several days of 12-h feedings. Since day 8 it has been rising consistently and predictably. My kitchen temperature is always at 21C. I started collecting discard on day 4 or 5, and made discard crackers which were A HUGE hit, they disappeared immediately, hahaha. Thank you!
Amy! I did sourdough many years ago! I have lost those instructions. I gave your recipe a go, was concerned that the start of the starter was so thick. LOL. That was yesterday. Today, 24 hours later, I noticed it had grown some; 1/2 of an inch or so. I stirred it down some and set it back on the counter. That was 12 noon, it is now 6:22 pm and the starter has grown over the top! I stirred it down, and put it in a quart jar. Should I start removing some and feeding it now. I have NEVER had a starter take off like yours did!
Needless to say WOW and Thank you.
Yes go ahead and start discarding and feeding 🙂
I created my 9 cups of flour. I tared a clean pint mason jar. I put 120 g of the flour in, then added water, bottled to 240 g.
I do not remember my starter being this doughy?
I remember a liquid started.
Doing it by your recipe, we will see.
Hi Lizy, it will be doughy at first but it will become more liquid as it sits. You should see this when it's time to feed.
Hi! I’m on day 10 and starting to wonder if my starter will change. It does smell sour as expected but isn’t doubling in size or bubbling like crazy like I’d expect. Do you suggest a full feeding instead of the 2T/2t top off? Or should I start over? I’m using ingredients as directed + distilled water
Hi Lauren, don't start over if you see ANY activity. I would feed and discard twice a day for at least 3 days and then check back with me and let me know if it's working.
Hi Amy,
So do a full feed and discard instead of the 2T boost, correct? And I realized I’m actually using bread flour and not all purpose if that matters. Mixed with whole wheat of course as suggested. So far it’s the same. Some bubbles, sour smell as expected, rising maybe just 1/4-1/2” at MOST.
Bread flour is fine to use. Yes, do a full feed instead of the boost. What is the temp of your kitchen?
Great! Typically between 69-73 degrees. We keep on 72-73 in daytime and 69 at night when sleeping. This morning (now day 13), when I first took the lid off to feed it, it smelled like alcohol from fermenting I guess? When stirred it smelled mildly sour/normal.
That's normal, keep on going!
Hi! On day 3-7, it says feed with fresh flour. Does it matter which type of flour you use to feed? Which flour is better for faster fermentation?
I like to use a mixture of all-purpose and whole wheat flour. The instructions for mixing them is in the recipe card.
You did mention that in step. So sorry, I missed that. Thank you for pointing it out. Can’t wait to have my own starter.
No problem. Let us know if you have any questions!
I am curious if this will work with einkorn flour? I've tried to create a starter twice now and I'm not having much luck. The first time, I started to see mold on it (with very little sign of the starter working - only a couple bubbles) after about a week. I've been working on my second one now for about a week with zero signs of life....but no mold either. My house isn't super warm - right now it is about 70 degrees. Yesterday I pulled out a bean bag that I can heat in the microwave and used that and then last night put my starter in the microwave with the door cracked so the light would stay on and create a bit more warmth. Do you have any suggestions for me? Or can you tell if I am doing something detrimental? Should I be using regular flour to start? I was trying to stick with einkorn because my family has some gluten sensitivities. Thank you so much for all information on your site!
If you are having issues, you may want to use regular flour to start. Once it gets going, you can convert it to Einkorn easily.
1. Start the process again with regular flour, feed and discard daily for the first two weeks or until it is doubling in size for a few feedings in a row.
2. Take 50 grams and add it to a new jar with 100 grams Einkorn and 100 grams water, but keep the original jar in the fridge. Feed the new starter a few days in a row with Einkorn and see if it stays active. If it does great, just keep feeding and in a few days it will be converted to an Einkorn starter.
The discard in the fridge can act as a backup in case the new one doesn't take hold. That way you don't have to start all over again!
I will say my experience with my Einkorn starter is that it needs to be taken out of the fridge and fed a minimum of once a week to keep it healthy. Let me know if you have anymore questions. I'm happy to help! 🙂
Thank you so much for the help Amy! I am going to do as you suggest and start one with regular flour and see if that helps. Hopefully, I will have more success!
I do have one other question for you. When you discard all but 2 tablespoons of starter and feed it, do you recommend moving it to a new jar, or do you keep it in the same one?
Thanks!
You can keep it in the same or move it. I like to move it into a new jar because I like to use a clean jar every time, but that's just a personal preference. I find it REALLY hard to clean dried starter from jars!
Thank you so much!! I started my regular flour starter yesterday and it already seems way more active than my einkorn one. I really appreciate your help and can't wait to bake my first loaf in a couple of weeks!!
Let me know if you have any more questions!
this was the best article I have read for a beginner like me. I need all the help I can get and clear explanations of what I am doing and why. I read all sorts of articles but your was the clearest one so far. thank you. We'll see how it goes., fingers crossed.
I'm glad this was helpful for you Susan! Let me know if you have any questions!
I'm a little confused it says equal parts of the flour and water but then it says 1 cup flour & 1/2 cup water? Thats not equal. Can you clarify? Thank you.
Hi Ginger, it's equal parts in weight, not in volume. One cup of flour weighs 120 grams and 1/2 cup of water weighs 120 grams. I hope this make sense.
yes, thank you. I mixed the first cup of flour with 1/2 cup water but its thick, is that normal? looks like dough consistence I thought it'd look more liquid. Is this correct?
Yes, when you first mix the flour and water it is thick. As the yeast and bacteria feed on the flour, it will thin out and be more pourable when it's time for the next feeding.
Hi Amy. My dough is bubbling and smells sour but it doesn’t seem to be doubling in size. I’m using regular bread flour and bottled water. I’m into about the tenth day. I’m not giving up.
No don't give up. Sometimes it can take 14 days!
Hi Amy, I thought I bought "organic" whole wheat flour, it is King Arthur, but it actually doesn't say organic on it. I do have organic ap flour. Do I need to go back and get organic ww flour, or will what I have work?
What you have will work. It just depends on which you prefer, organic or non-organic. But either will work.