Sourdough Ciabatta Rolls


Looking for simple sourdough ciabatta rolls to make from scratch? Just like our other beginner sourdough recipes, this one is as easy as it gets!
Not only does ciabatta bread make delicious sandwich buns, they are perfect alongside classic pot roast or for dipping in warm bowls of chicken noodle soup.
You're going to LOVE this recipe for sourdough ciabatta rolls because of its simplicity. Seriously, it really doesn't get easier than this.
Whether you would like to mix the dough and bake the same day or allow for a long proof in the fridge, we've made an easy to follow baking timeline that you can adjust to fit your schedule.
The ciabatta rolls bake right on a baking sheet in 30 minutes, making them perfect for enjoying with dinner. We love to serve them with broccoli cheese soup, white chicken chili verde or even turn them into gourmet grilled cheese sandwiches.
What you need
The ingredients needed for this recipe are very few.
- sourdough starter
- organic bread flour - all-purpose flour can be used, but will result in a smaller crumb instead of a large, open crumb.
- salt
- water
Equipment needed
(Amazon affiliate links) - Check out my favorite kitchen essentials.
Sample baking schedule
I love sharing my baking schedule with you so that you can easily adjust your rise times according to the temperature of your kitchen. Kitchen temperatures vary all year long depending on the climate, so always keep it in mind when baking with sourdough.
The night before
7:00 PM - Feed your sourdough starter.
TIP: Feed your sourdough starter so that it is active and bubbly when it's time to mix the dough. Depending on the maturity of your starter and the temperature of your kitchen, this can take anywhere from 4-12 hours.
The next morning
7:00 AM - Mix the dough, cover and allow it to rest 1 hour at room temperature.
8:00 AM - Perform the first set of stretches and folds. Cover and rest 30 minutes at room temperature.
8:30 AM - Perform the second set of stretches and folds. Cover and rest 30 minutes at room temperature.
9:00 AM - Perform the third set of stretches and folds. Cover and rest at room temperature until the dough has risen by 50%. This can take 3-6 hours depending on the temperature of your kitchen.
12:00 PM - Transfer the dough to the fridge for a cold ferment, 8-36 hours. OR ...
NOTE: If you'd like to bake the same day, instead of a cold ferment in the fridge, divide and shape the rolls, let them rise until puffy and bake. (Because this is a high-hydration dough, it will be very sticky, so generously flour your work surface.)
8 to 36 hours later...
8:00 AM - Remove the dough from fridge. Flour your work surface and press the dough into a rectangular shape.
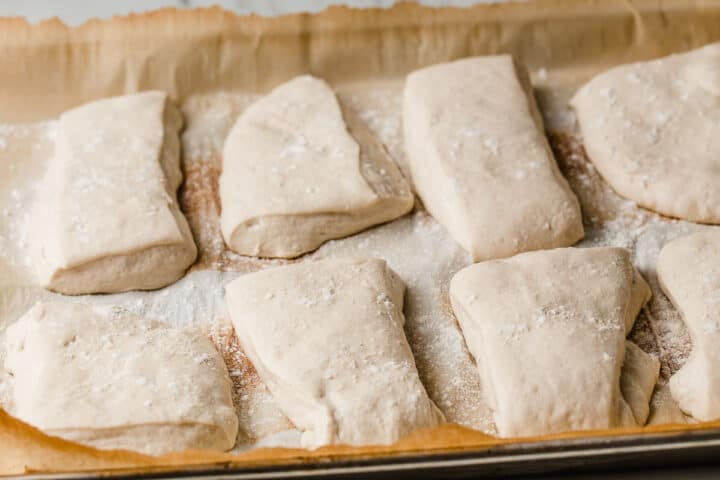
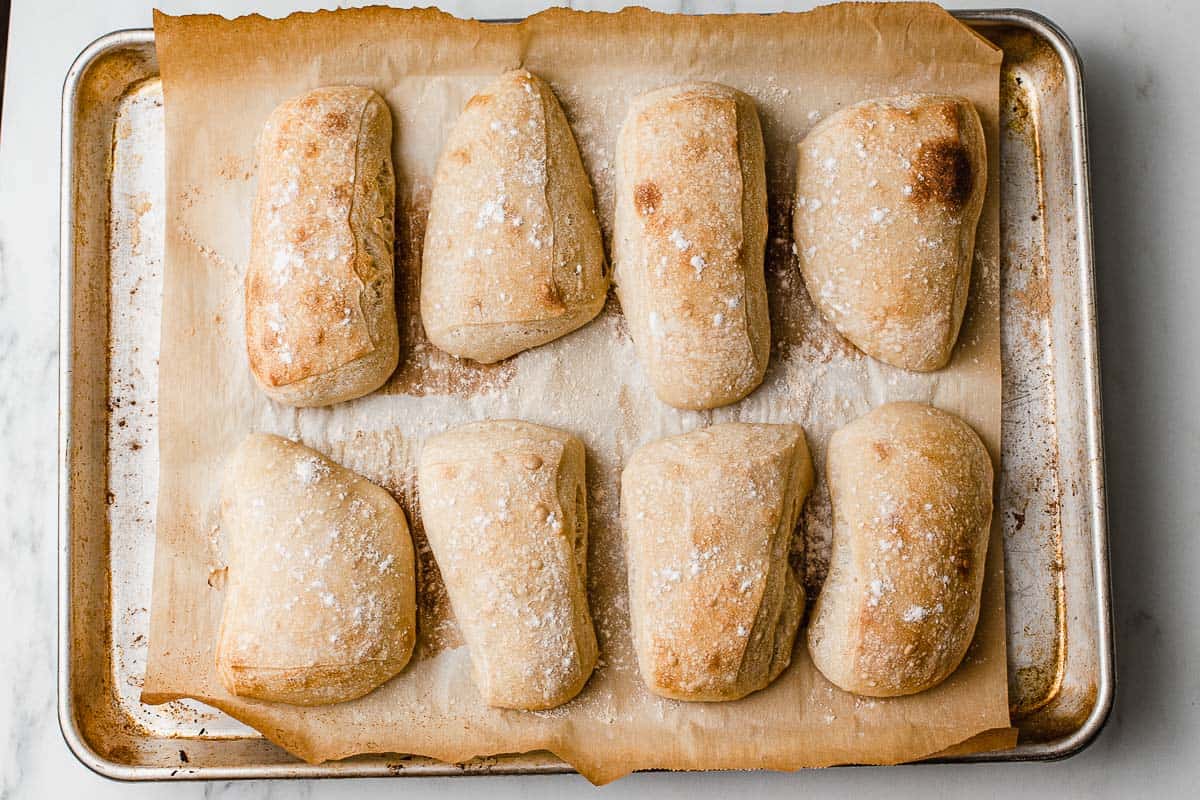
Use a bench scraper to divide the dough into 8 pieces and place them onto a parchment paper lined baking sheet.
NOTE: The dough can be sticky so do not be afraid to generously flour your work surface and the top of the dough when you go to divide and shape the rolls. Any extra flour on the dough can be brushed off after baking if desired.
Cover the dough with a kitchen towel and allow to rise until puffy, about 2 hours.
9:30 AM - Preheat your oven to 475°F (246°C).
10:00 AM - Bake the rolls for 10 minutes. Turn the oven down to 425°F (218°C) and bake for an additional 20 minutes.
TIP: Allow the bread to cool down about 30 minutes before slicing to prevent it from being gummy inside.
Tips for success
Baking with a sourdough starter may seem a little overwhelming, but we want you to know that you CAN be successful! Here are some tips to keep in mind before you begin putting this sourdough ciabatta dough together.
How to calculate rising time
On our final testing for this recipe, our kitchen was 72°F (22°C) and it took 3 hours for our dough to rise to 50% in volume during the first rise at room temperature.
At 70°F (21°C) check around 3 ½ hours and at 68°F (20°C) check at around 4 hours.
These times will also depend on the strength of your sourdough starter. Please note that these times are only a rough estimate in order to help guide you through the process and not overproof the dough. Results will vary in EVERY kitchen.
Dividing and shaping the dough
This dough is considered a high-hydration dough because of the amount of water used. This type of dough can be hard to work with, especially if you are new to baking with sourdough.
This is one of the reasons we recommend dividing and shaping the dough while it's cold, as soon as you take it out of the fridge. When the dough is cold, it is firm, making it much easier to handle.
How to store and freeze
Keep the sourdough ciabatta rolls wrapped in a kitchen towel or in a bread bag at room temperature for up to 3 days.
If you'd like to freeze the rolls, place them into a freezer-safe container and keep in the freezer for up to 3 months.
More easy sourdough recipes
- sourdough hawaiian rolls
- sourdough sweet potato rolls
- beginners sourdough bread
- soft sourdough dinner rolls

Sourdough Ciabatta Rolls
INGREDIENTS
Ingredients to make ½ cup (100 g) of Active Sourdough Starter
- 1 tablespoon (15 g) sourdough starter
- ⅓ cup + 1 tablespoon (50 g) all-purpose flour
- 3 ½ tablespoons (50 g) water
Ciabatta Dough Ingredients
- ½ cup (100 g) active sourdough starter
- 4 cups + 2 tablespoons (500 g) bread flour
- 1 ⅔ cups (400 g) water
- 2 teaspoons (10 g) salt
INSTRUCTIONS
Feed Your Sourdough Starter
- 12 hours before you plan to mix the dough, add the ingredients to make ½ cup (100 g) of active sourdough starter to a clean jar. Stir until combined, loosely cover the jar and let the starter rise at room temperature. (The ingredients will create a total of 115 g active starter but, because some of it will stick to the sides of the jar during the transfer, we are making a little more than needed.) The sourdough starter is ready to use when it has doubled in size and there are plenty of bubbles on the surface and sides of the jar.
Make the Dough
- Mix the dough. Combine the active sourdough starter, bread flour, water and salt in a large mixing bowl. Use a stiff spatula or your hands to incorporate the ingredients, making sure there are no dry bits left in the bowl. Cover the bowl and let the dough rest at room temperature for 1 hour.
- Stretch and fold. Perform 3 sets of stretches and folds, 30 minutes apart. Keep the bowl covered in between each set.
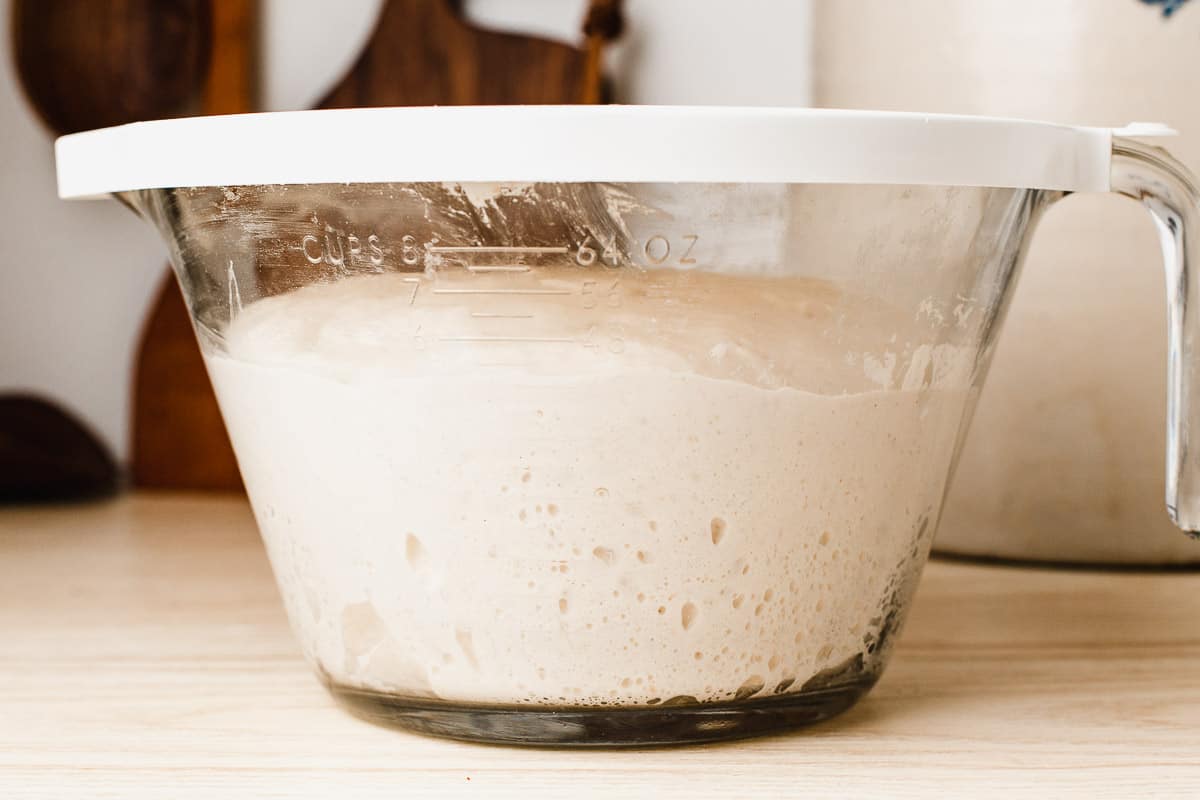
- First rise. Cover the dish and allow the dough to rise about 50% in volume,. This can take anywhere from 3-6 hours at room temperature. Warm kitchens will take less time, cold kitchens will need more time. See notes for rising times.
- Second rise. Place the covered bowl of dough in the fridge for 8-36 hours for a long ferment OR proceed to the next step and shape the dough.
- Shape. Remove the dough from the fridge and generously flour your work surface before turning the dough out onto it. Flour the top of the dough and use your hands to form it into a rectangular shape. Be careful not to press the air from the dough. Cut the dough into 8 pieces and place them on a parchment lined baking sheet. Cover with a clean towel and allow the dough to rise at room temperature for 2 hours or until puffy.
- Bake. While the dough is resting, preheat your oven to 475°F (246°C). Bake the ciabatta dough for 10 minutes, turn the oven down to 425°F (218°C) and bake for an additional 20 minutes or until the crust is a deep golden brown. Allow the ciabatta bread to cool on a cooling rack for 30 minutes before slicing.
Hi Amy,
I’m going make these tomorrow and was wondering if I could just split into 2 pieces or dose it need to be cut into 8 pieces for this recipe to turn out right?
Thank you.
Hi Carol, yes you can split into 2 pieces!
Thank you Amy
I made up my dough yesterday and had to put it in the refrigerator overnight, this morning I put them in the oven not expecting them to turn out so well as I haven’t ever worked with dough so sticky, but to my surprise these turned out beautiful and tasted Great!
Thank you so much for the step by step video, I have sense the. Signed up in your YouTube and can’t wait to try more of your recipes!
Thank you again 😊
That's great to hear Carol! You are very welcome 🙂
These turned out beautifully. I’ve have made several batches now and they do keep well in the freezer.
Thank you for sharing your recipes!
We love these ciabatta rolls for their easy of use! They can work in so many meals and freeze well for big batches. I am wondering if I could safely substitute some rye flour for flavor diversity? Would I need to make other adjustments?
Hi Alyssa! I've never tried adding rye but I think it would be delicious. I would replace 50 grams of bread flour with rye and see if that gives you the flavor variety you are looking for and then adjust next time if needed! 🙂
I’ve made these several times now and they are so great! These are our go to for school lunches now!
Pulled these out of the oven a few hours ago and they are perfect! The dough is the same texture as focaccia, a little stickier and wet than normal bread dough. I find that in my area I often need 1/2-1 c. less of flour, especially if I'm using more whole wheat/spelt for sourdough recipes.
Got some turkey, provolone, tomato, and pesto and I'm excited to make paninis with these rolls! Thanks!
Amy
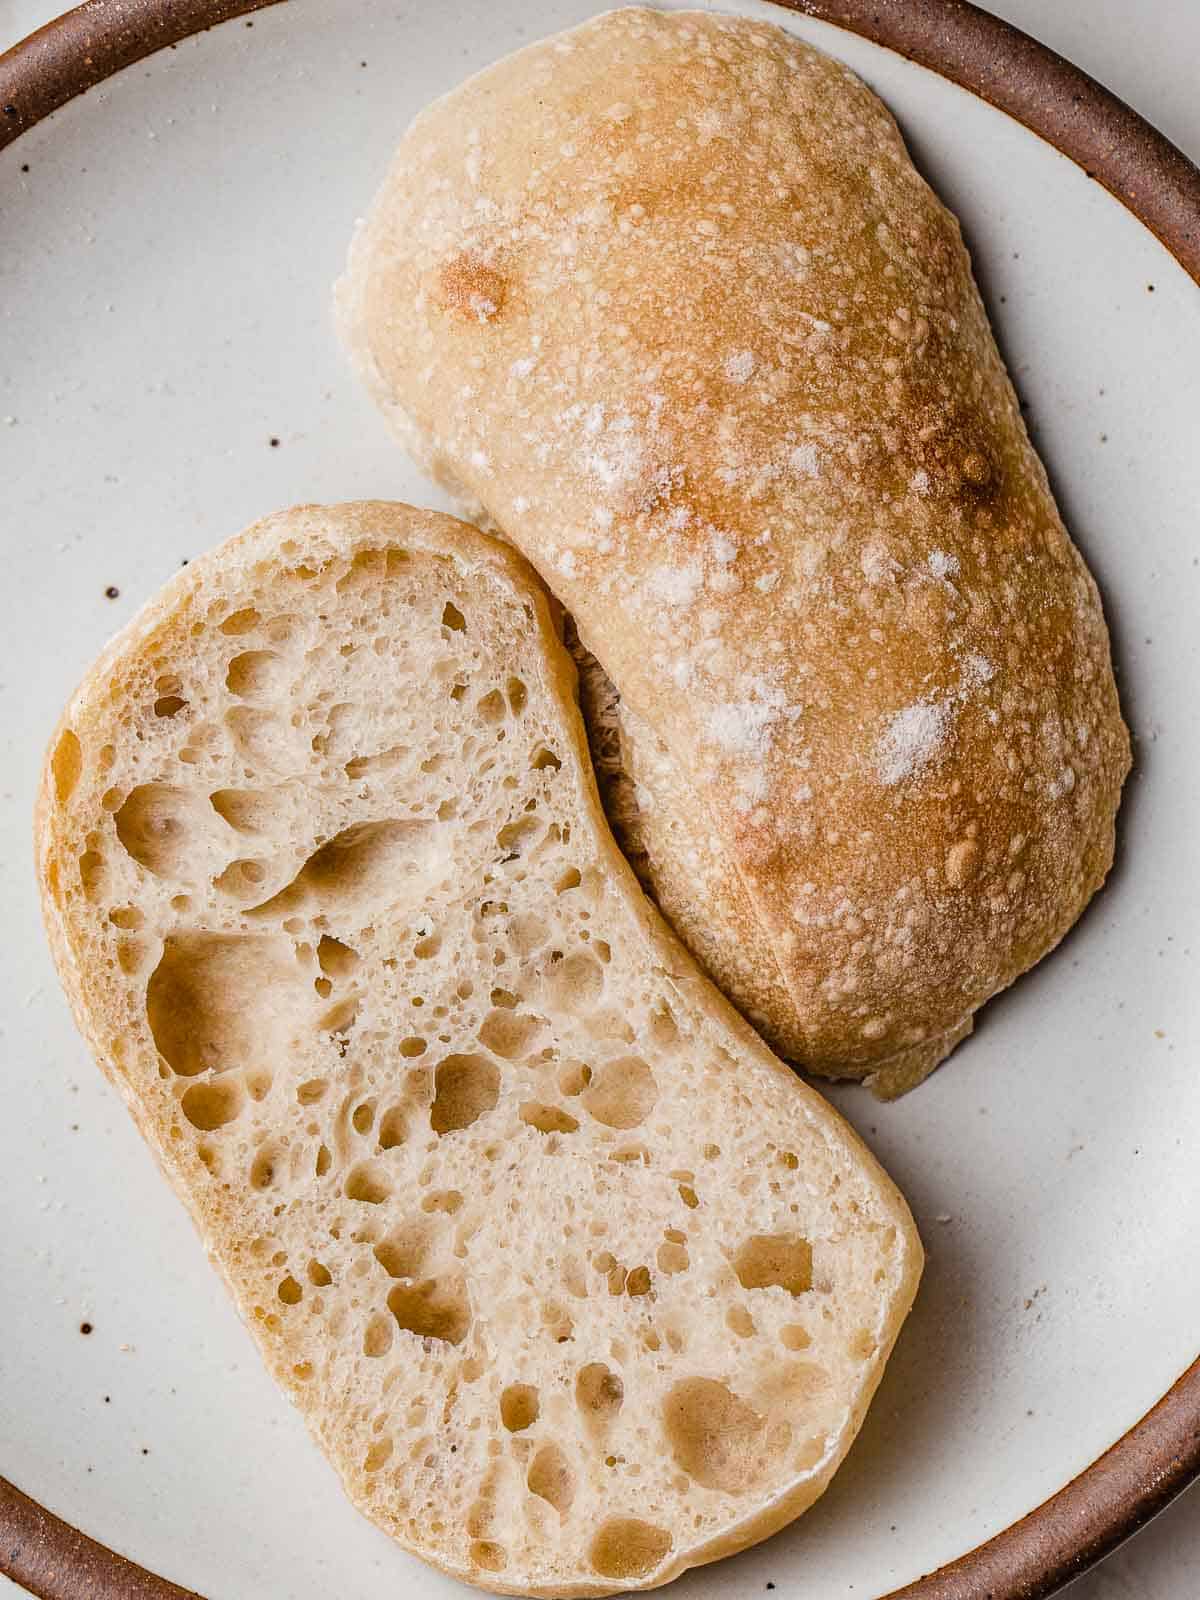
I tried this recipe over the last weekend. I love the open Crumb when you split the rolls the outside of the roll holds The soup you are dipping into or peanut butter and jelly or anything else you want to use with that Bread it’s really amazing!
One more way to use sourdough!
Another winner Amy! At first I thought it wasn’t going to work because they didn’t get fluffy after I cut them and placed them on the pan for the second rise. After they went in the hot oven however they puffed up beautifully. Could barely wait for them to cool before trying. Awesome!
I used 100g of organic spelt along with the 400g of organic white.
Thanks so much for sharing these lovely recipes with us ♥️
First time making it, one quedtion instead of 8 pieces I am making 4 longer ones. Do the baking time is the same?
Love your recipes, all arecso easy to make
Thanks
The baking time should be the same!
Perfect! I had to let a little more time pass between stretch and folds (1 hr) and baked directly. It still worked great, nice big holes!
I just made these and the whole process was easy and the dough was beautiful but the bottoms burned! I was so upset because they are perfect otherwise. I'm not sure if it was the extra flour on the bottom, or my oven was too hot, but I followed the instructions to a T. I will try a silpat sheet instead of parchment next time. Do you have any other suggestions to avoid this?
PS - Have you ever used this same recipe to make 2 or 4 ciabatta bagettes instead of 8 buns? I was wondering if that would work, in your opinion. Thanks!
Hi Meghan, was the oven rack positioned in the center or closer to the bottom? Also, is your baking sheet light or dark colored? I think silpat will definitely help with the issue.