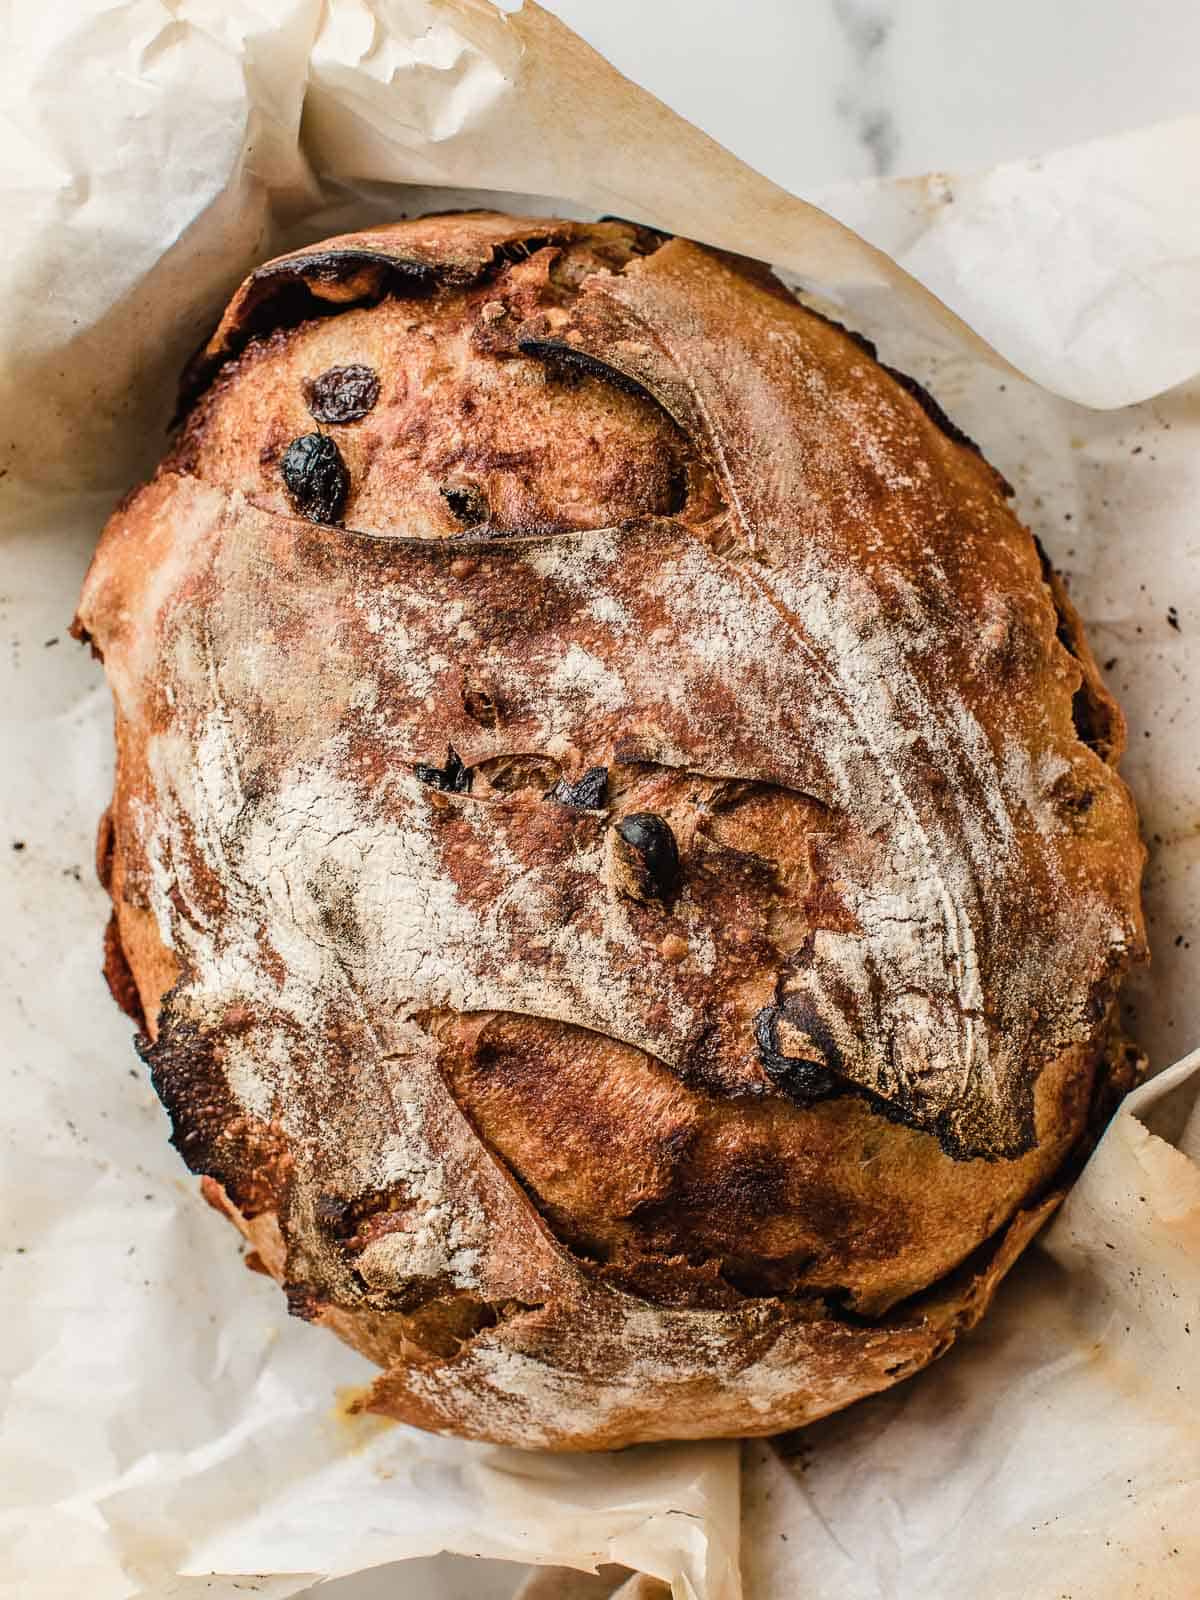
Cinnamon Raisin Sourdough Bread
Learn how to make cinnamon raisin sourdough bread the easy way, without a stand mixer. Sweetened swirls of cinnamon and brown sugar combined with plump raisins and walnuts are irresistible!
Bake the same day or allow the dough to ferment in the fridge overnight for even more flavor!
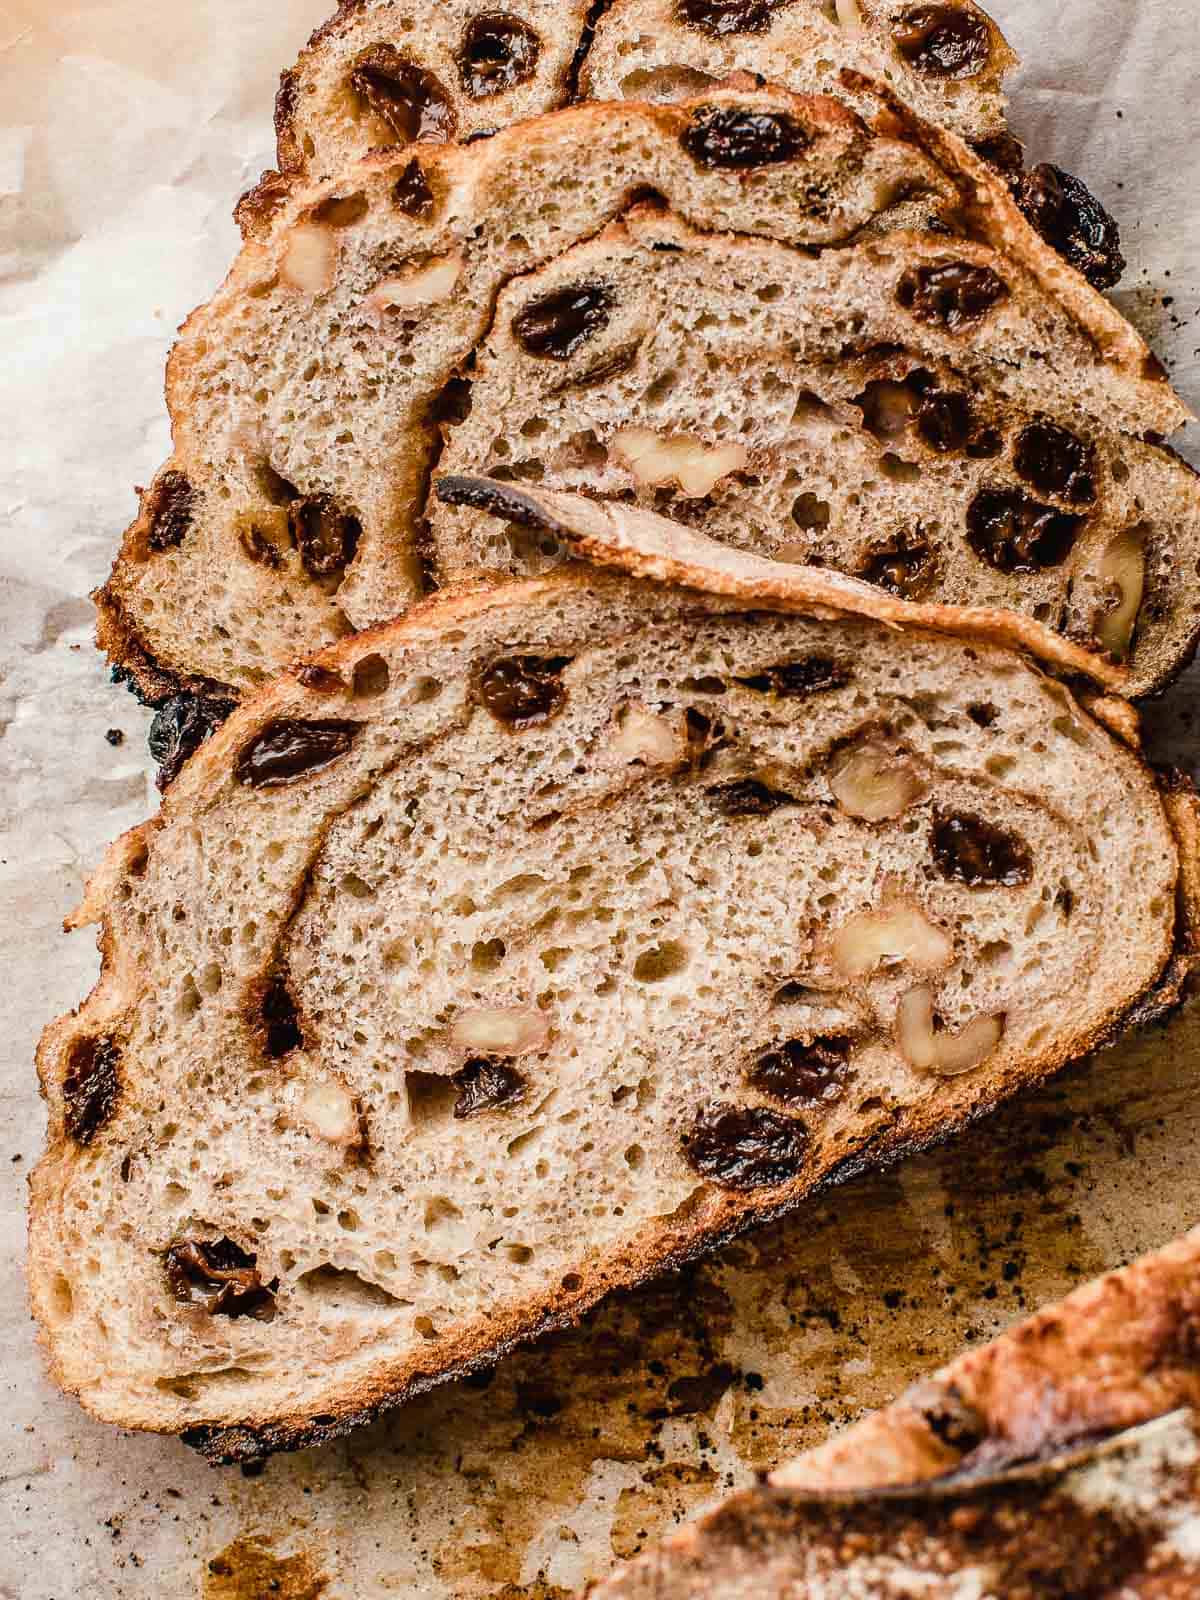
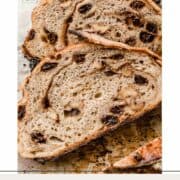
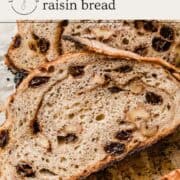
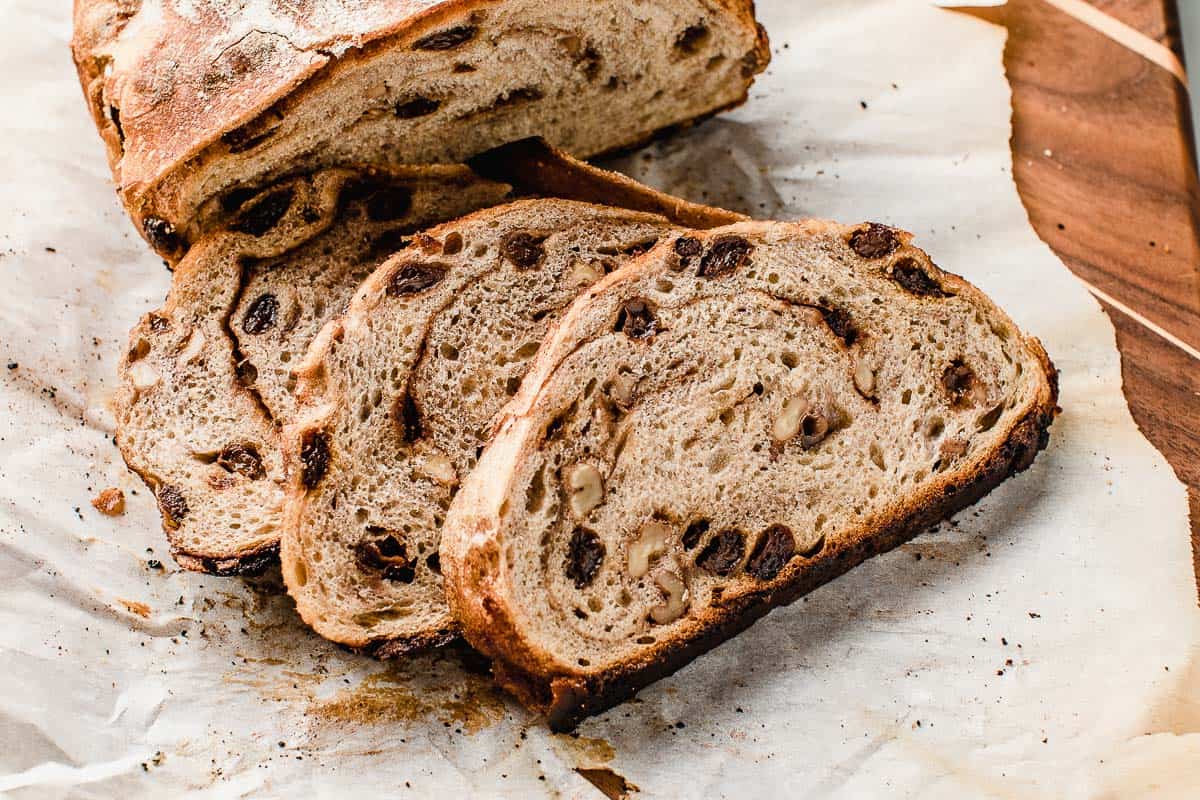
This sourdough cinnamon raisin bread is soft, moist, and full of flavor and textures.
Toast thick slices and slather them in butter or use them to make decadent sourdough french toast instead of traditional sourdough bread!
Ingredients needed
- active sourdough starter
- organic bread flour
- organic whole wheat flour
- organic rye flour - if you don't have rye flour sub it with bread flour
- water
- salt
- raisins
- walnuts
- butter
- brown sugar
- cinnamon and nutmeg
- vanilla extract
Sample baking schedule
- 7:00 PM: Feed your sourdough starter.
- 7:00 AM: Mix the dough, cover, and let rest for one hour. Soak raisins and walnuts in warm water.
- 8:00 AM: Perform one set of stretches and folds. Cover and let the dough rest for 30 minutes.
- 8:30 AM: Drain the raisins and walnuts and work them into the dough. Cover the dough and let rest at room temperature until it has risen by 30-50%. Take butter out of the fridge to soften at room temperature.
- 1:00 PM: Make the cinnamon butter spread. Spread onto dough, shape, and let rise in the banneton. (Let rise at room temperature and bake the same day OR cold ferment in the fridge and bake the next day.)
- 7:00 AM: Bake.
This recipe was tested in a kitchen with an ambient temperature of 70°F (21°C). Cooler kitchens will need more time and warmer kitchens will need less time.
How to make cinnamon raisin sourdough bread
Step 1: Feed your starter
12 hours before you plan to mix the dough, add the ingredients to make ½ cup (100 g) of active sourdough starter to a clean jar. Stir until combined, loosely cover the jar and let the starter rise at room temperature.
Step 2: Mix the dough
In a large mixing bowl stir together 100 grams of active sourdough starter, 375 grams of water, and 10 grams of salt. (This step will ensure the starter is evenly distributed throughout the dough.)
Next add 50 grams of whole wheat flour, 50 grams of rye flour, and 400 grams of bread flour to the bowl.
Use your hands to combine the ingredients until there are no dry bits and the dough looks like a shaggy mass.
Cover the bowl and let the dough rest on the counter for one hour.
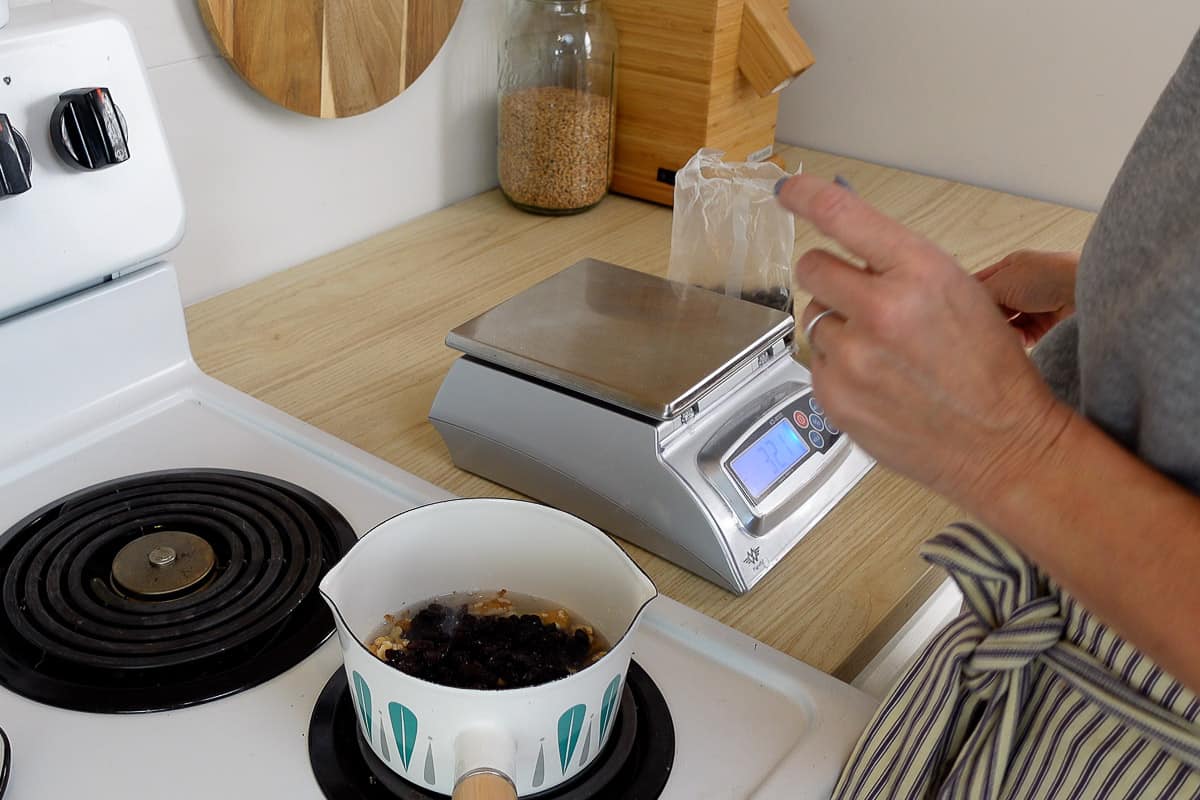
Step 3: Prepare the walnuts and raisins
While the dough is resting, prepare the raisins and walnuts. Bring a small pot of water to a simmer and turn the burner off.
Add ½ cup of walnuts and ½ cup of raisins to the pot, making sure they are covered by the hot water.
Allow them to sit in the hot water until it's time to mix them into the dough.
Step 4: Stretch and fold
Perform one set of stretches and folds to the dough. To perform a set, while the dough is still in the bowl, pick up one side with a wet hand.
Pull it up and over itself. Turn the bowl and repeat this action on 4 sides of the dough until the bowl has come full circle.
Cover the bowl and let the dough rest for 30 minutes.
Step 5: Add walnuts and raisins to the dough
Drain the water from the raisins and walnuts and then add them to the bowl of dough.
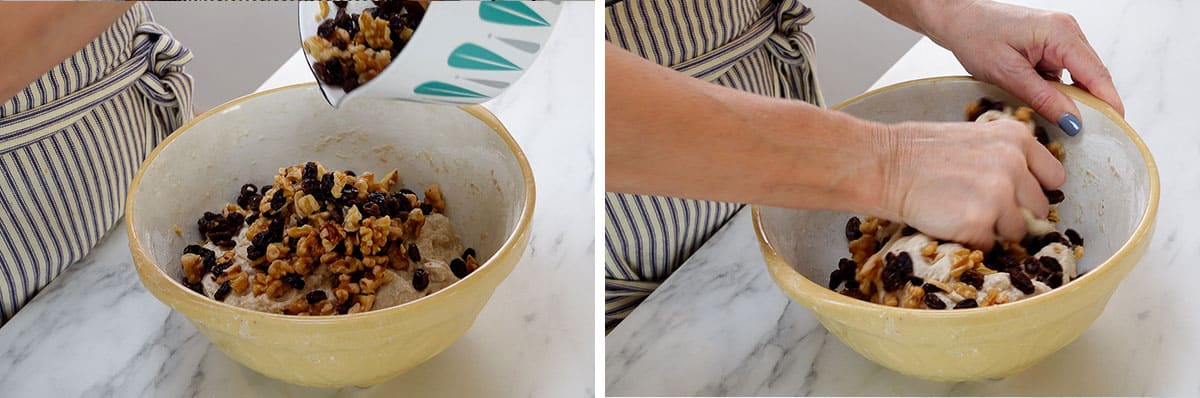
Use your hands to mix them into the dough until they are evenly incorporated.
Cover the bowl and let it rise 30-50% at room temperature, for 3-5 hours depending on the temperature of your kitchen. This is the bulk fermentation stage.
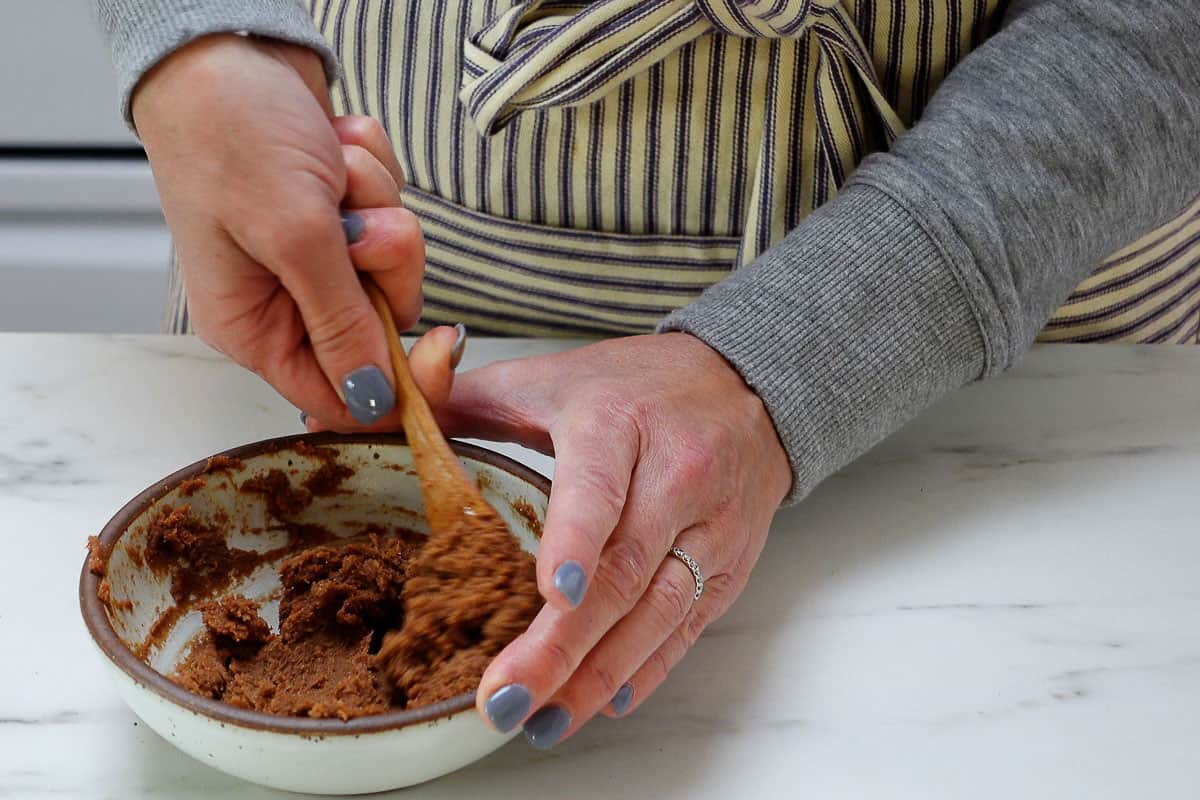
Step 6: Prepare the butter spread
Right before the dough is ready to shape, mix 4 tablespoons of softened butter with ¼ cup of brown sugar, 2 teaspoons cinnamon, ½ teaspoon vanilla extract, and a pinch of nutmeg. Set aside.
Step 7: Spread the butter mixture on the dough
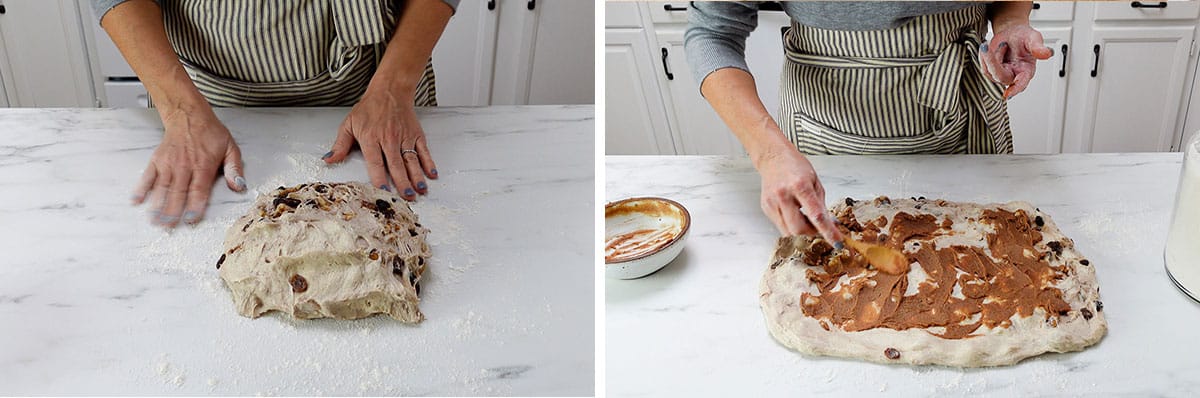
Turn the dough out onto a floured work surface. Use your hands to gently press the dough out into a 12 x 10"rectangle. Flour your hands to prevent the dough from sticking. (There's no need to use a rolling pin.)
Spread the butter mixture over the dough being careful to keep it 1-1 ½ inches from the edges.
Step 8: Fold the dough
Pick the right side of the dough up and fold it towards the center and repeat with the left side. (photos 1-2)
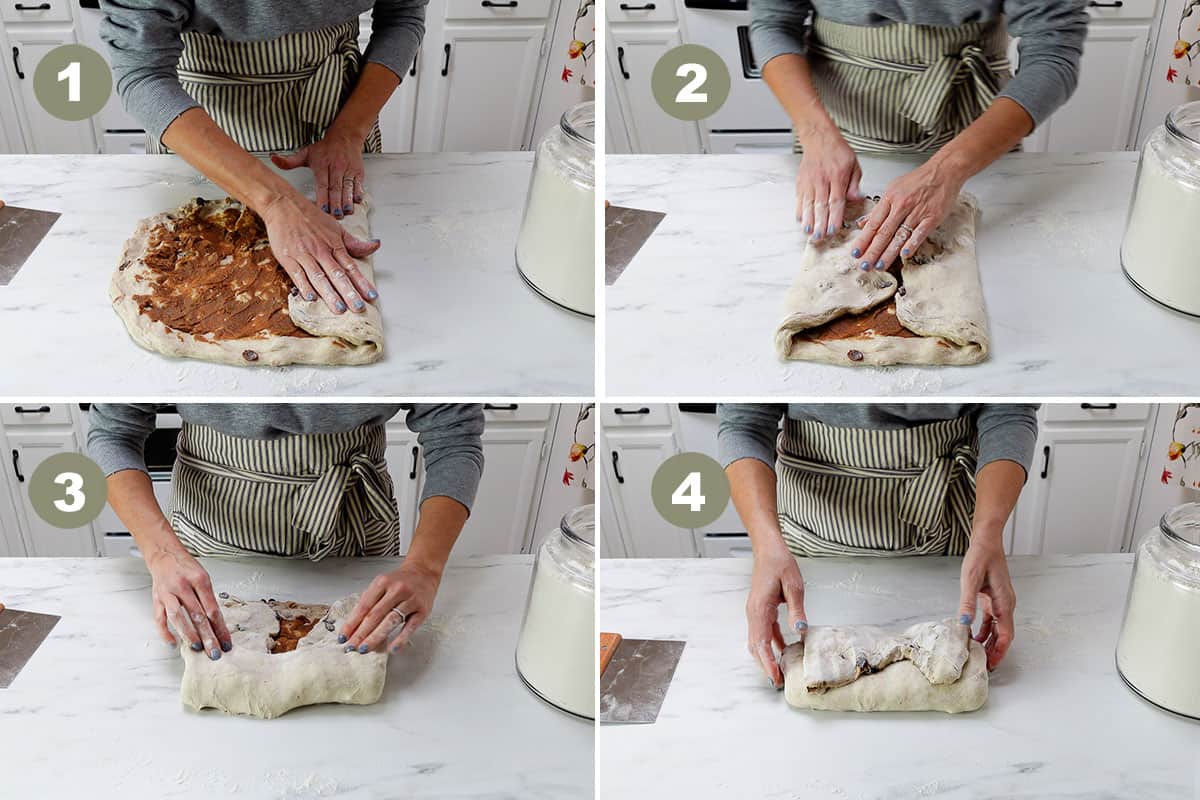
Pick the top side up and fold it towards the center and repeat with the bottom side. (photos 3-4)
Fold the dough in half and then flip it over so that the seam-side is facing down. (photos 5-6)
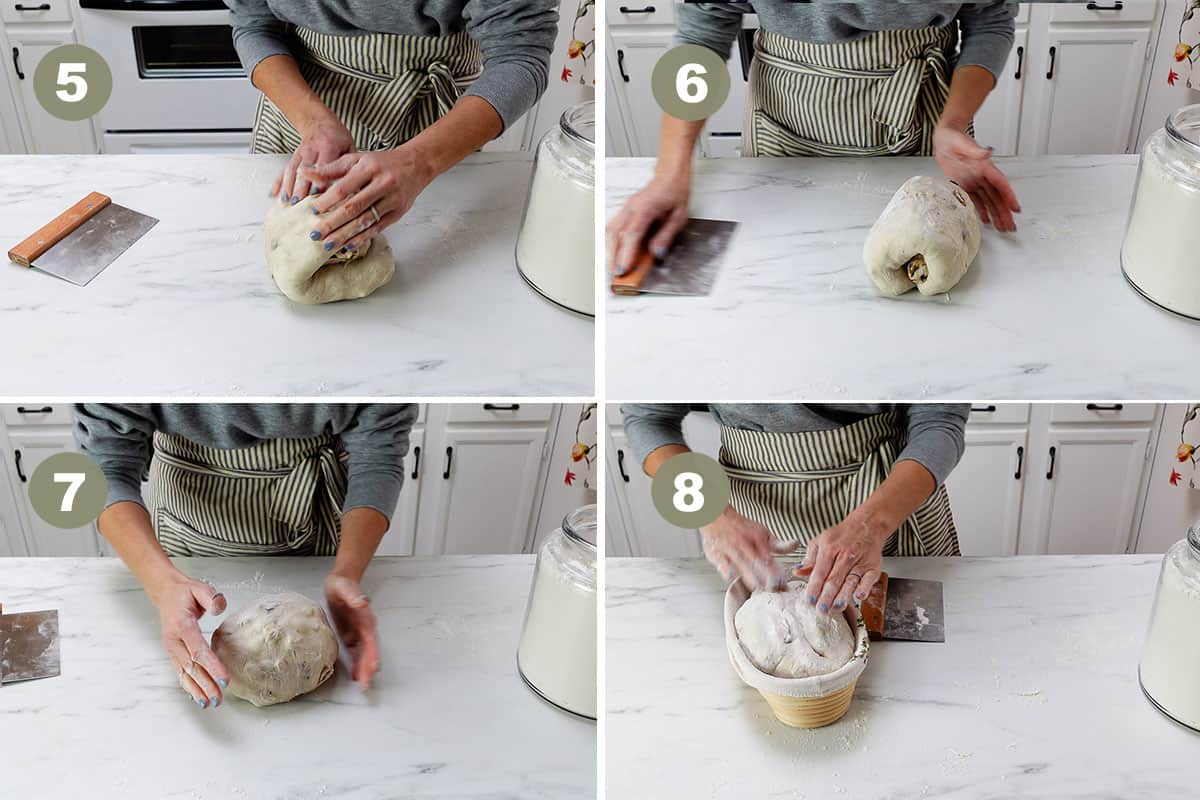
Pull the dough towards you while turning it to create a taut skin on the outside. Dust flour on the outside of the dough and flip it into a lined banneton that has been floured. (photos 7-8)
Cover the banneton with plastic wrap or a damp tea towel.
Step 9: Rise
If you'd like to bake the same day, allow the dough to continue to rise at room temperature until it has reached the top of the banneton.
For a long ferment, let the dough sit on the counter for 30 minutes before placing it in the fridge overnight.
Step 10: Bake
Preheat your oven to 450°F (232°C) with a dutch oven inside. Once the oven is hot remove the dutch oven and set it on top of the stove.
Turn the dough out onto a piece of parchment paper. Use a razor to make 3 very shallow slits across the top of the dough.
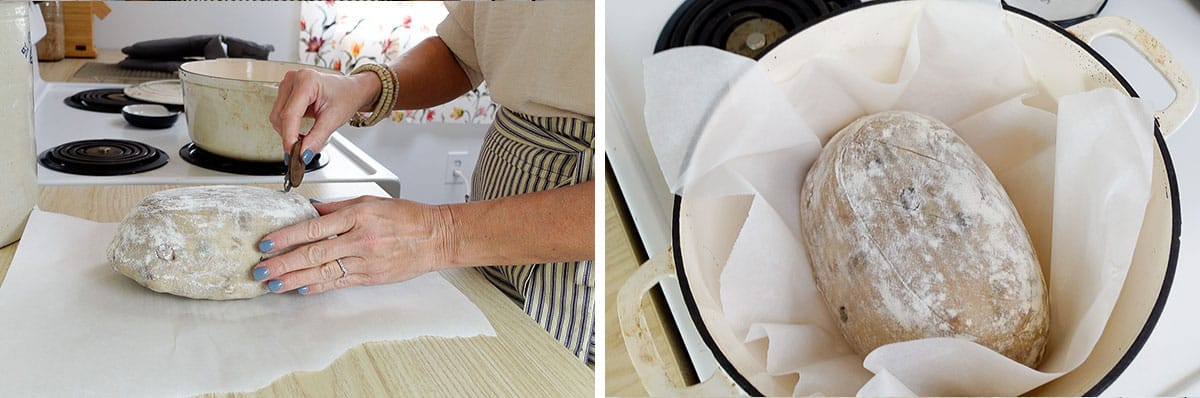
Using the parchment paper as a sling, lift the dough up and into the dutch oven. Bake covered for 30 minutes and uncovered for 20 minutes.
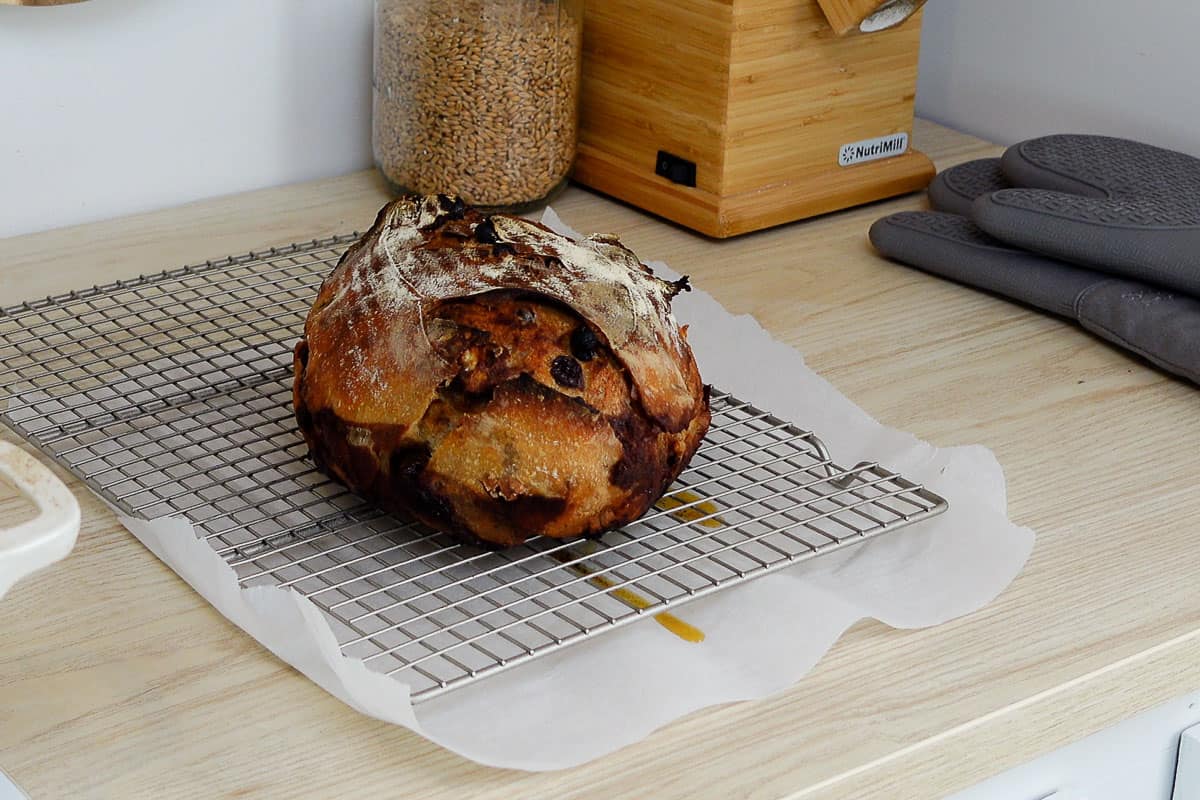
Step 10: Cool
Place a cooling rack onto a piece of parchment paper or baking sheet. (This will catch any melted butter that may drip from the baked loaf.)
Transfer the loaf to the wire rack and allow it to cool completely.
Tips for making cinnamon raisin sourdough bread
As tempting as it might be, don't cut into the bread before it cools. (Trust me, I know it will be hard. Your kitchen is going to smell divine!)
Because there is essentially melted butter on the inside, if you cut it while it's still hot, you'll end up with a gummy mess!
The butter and sugar in the dough will also create a darker crust on the bottom of the bread. I've not found a way to get around this. (Please share tips in the comment section if you have any!)
This cinnamon raisin sourdough bread recipe can be baked in a loaf pan lined with parchment paper. Place it into the loaf pan seam-side down after you have shaped it. Bake at 400°F (204°C) for 35-40 minutes.
How to store and freeze
Store the bread in a plastic bag or bread bag at room temperature for up to 2 days.
I love to store slices of sourdough bread in the freezer. Place small sheets of parchment paper between each slice so that they do not freeze together. Store in a freezer-safe bag in the freezer for up to a month.
When you are ready to eat, simply take whatever portion you need out of the freezer and allow it to thaw to room temperature.
More easy sourdough recipes to try: beginners sourdough bread / sourdough cinnamon rolls / jalapeno cheddar sourdough bread / olive and walnut sourdough bread
Subscribe to our newsletter and we'll send you more fresh recipes, valuable troubleshooting advice, useful tips, and other information we believe will be helpful to you!

Cinnamon Raisin Sourdough Bread
INGREDIENTS
Ingredients to make ½ cup (100 g) of active sourdough starter
- 1 tablespoon (15 g) sourdough starter
- ⅓ cup + 1 tablespoon (50 g) all-purpose flour
- 3 ½ tablespoons (50 g) water
Dough Ingredients
- ½ cup (100 g) active sourdough starter
- 1 ½ cups + 1 tablespoon (375 g) water
- 2 teaspoons (10 g) salt
- 3 ⅓ cups (400 g) bread flour
- ⅓ cup + 1 tablespoon (50 g) whole wheat flour
- ⅓ cup + 1 tablespoon (50 g) rye flour
Add-ins
- ½ cup raisins
- ½ cup walnuts
Cinnamon Sugar Filling
- 4 tablespoons butter (room temperature)
- ¼ cup brown sugar
- 2 teaspoons cinnamon
- ½ teaspoon vanilla extract
- pinch of nutmeg
INSTRUCTIONS
Feed your starter
- 12 hours before you plan to mix the dough, add the ingredients to make ½ cup (100 g) of active sourdough starter to a clean jar. Stir until combined, loosely cover the jar and let the starter rise at room temperature. (The ingredients will create a total of 115 g active starter but, because some of it will stick to the sides of the jar during the transfer, we are making a little more than needed.) The sourdough starter is ready to use when it has doubled in size and there are plenty of bubbles on the surface and sides of the jar.
Make the Dough
- Mix the dough: In a large mixing bowl stir together 100 grams of active sourdough starter, 375 grams of water, and 10 grams of salt. (This step will ensure the starter is evenly distributed throughout the dough.) Next add 50 grams of whole wheat flour, 50 grams of rye flour, and 400 grams of bread flour to the bowl. Use your hands to combine the ingredients until there are no dry bits and the dough looks like a shaggy mass. Cover the bowl and let the dough rest on the counter for 1 hour.
- Prepare walnuts and raisins: While the dough is resting, prepare the raisins and walnuts. Bring a small pot of water to a simmer and turn the burner off. Add ½ cup of walnuts and ½ cup of raisins to the pot, making sure they are covered by the hot water. Allow them to sit in the hot water until it's time to mix them into the dough.
- Stretch and fold: Perform one set of stretches and folds to the dough. To perform a set, while the dough is still in the bowl, pick up one side with a wet hand. Pull it up and over itself. Turn the bowl and repeat this action on 4 sides of the dough until the bowl has come full circle. Cover the bowl and let the dough rest for 30 minutes.
- Add walnuts and raisins to the dough: Drain the water from the raisins and walnuts and then add them to the bowl of dough. Use your hands to mix them into the dough until they are evenly incorporated. Cover the bowl and let it rise 30-50% at room temperature, 3-5 hours depending on the temperature of your kitchen.
- Prepare butter spread: Right before the dough is ready to shape, mix 4 tablespoons of softened butter with ¼ cup of brown sugar, 2 teaspoons cinnamon, ½ teaspoon vanilla extract, and a pinch of nutmeg. Set aside.
- Spread butter mixture on the dough: Turn the dough out onto a floured work surface. Use your hands to press the dough out into a 12 x 10"rectangle. Flour your hands to prevent the dough from sticking. Spread the butter mixture over the dough being careful to keep it 1-1 ½ inches from the edges.
- Shape the dough: Pick the right side of the dough up and fold it towards the center and repeat with the left side. Pick the top side up and fold it towards the center and repeat with the bottom side. Fold the dough in half and then flip it over so that the seam-side is facing down. Pull the dough towards you while turning it to create a taut skin on the outside. Dust flour on the outside of the dough and flip it into a lined banneton that has been floured. Cover the banneton with plastic wrap. (I use a reusable shower cap.)
- Second rise: If you'd like to bake the same day, allow the dough to continue to rise at room temperature until it has reached the top of the banneton. For a long ferment, let the dough sit on the counter for 30 minutes before placing it in the fridge overnight.
- Bake: Preheat your oven to 450°F (232°C) with a dutch oven inside. Once the oven is hot remove the dutch oven and set it on top of the stove. Turn the dough out onto a piece of parchment paper. Use a razor to make 3 very shallow slits across the top of the dough. Using the parchment paper as a sling, lift the dough up and into the dutch oven. Bake covered for 30 minutes and uncovered for 20 minutes.
- Cool: Place a cooling rack onto a piece of parchment paper or baking sheet. (This will catch any melted butter that may drip from the baked loaf.) Transfer the loaf to the cooling rack and allow it to cool completely.
If I put this in the fridge overnight, do I need to let it sit out on the counter for a certain amount of time before baking? Thanks so much!
You can bake it straight from the fridge if it has been shaped and ready to go.
I love the way you layout the time line for this. I liked this bread but it is very salty. 2 tsp of salt seems like a lot. Could I reduce the amount without messing up the recipe?
Yes you can reduce the salt by half.
Thank you Amy for posting this recipe. I am new to sourdough baking and this turned out wonderful. Your clear directions made this easy to make, not to say it was the most delicious cinnamon raisin bread I have ever had. It's hard to eat just one slice. I will be making this over and over.
Right now I am waiting for your hamburger buns to rise. Looking forward to trying many of your recipes.
Hi, I am looking very forward to making this bread! I will do most of the work on Wednesday and then leave it in the fridge till Friday night when I will bake it in order to have a delicious start of the weekend 😊
One question: pre-shaping is not required for this recipe?
Thank you for sharing!
No it is not with this recipe.
You can avoid the dark crunchy bottom crust by putting a small rack in the bottom of the dutch oven.
Yummy! I make ciabatta rolls for a friend, and she asked me if I could add raisins. The hydration of this dough is very close to ciabatta so it fits the bill nearly perfectly.
I have not made this recipe, but would like to know if you can just use regular all-purpose flour?
Yes you can.
I was so close to throwing the starter out and giving up. Because I had all the flours I decided to feed it one more time and this time I placed it on a heating pad at low temp. Later in the evening it was close to double. I jumped on it and made Amy's English muffin recipe, it was amazing. I got the starter out and immediately followed the same procedure and this time made the pretzels, best thing I've ever made, even my grandkids loved them. Then, the grand finale of all bread, I tried the cinnamon raisin bread, it was a request from my husband, OMG it was phenominal....your recipies are my favorite, I will never give up now!
That's wonderful to hear Jane. Thank you for sharing! 🙂
Ive been following Amy for a long time now and have made many of her sourdough recipes. this bread was so delicious! really melt in your mouth cinnamon roll delicious. I cook my breads in a dutch oven and I place a piece or two of aluminum foil on the rack right below the rack I'm cooking on and because of the potential burn I placed a small round trivet on the bottom and placed my bread on that. no more burnt bottoms! Thank you Amy for your clear instructions and great recipes! I only wish I could post a picture because the loaf is also very beautiful.
Thank you Bonita 🙂
What type of trivet? Ty.
I just wanted to chime in to say I have always put a baking sheet on the rack below my sourdough bread. It works wonders for having a nice and not too dark crust.
This bread recipe is delish! My whole family loves it! I'm new to sourdough bread baking so it does lose its shaped somewhat (comes out a tad flat) for some reason but it's still delicious!! instructions are easy to follow as well!
I made this one for the first time, today. It's still cooling and it smells great.
After reading the other comments, I decided to try using the small trivet that came with the Instant Pot under the bread while it baked. The bottom did not get dark, at all. I always use a cast iron pizza pan on the rack under te rack that the bread bakes on. I think that this helps to maintain a constant temperature in the oven when I open it up to put a loaf in or take the top off.