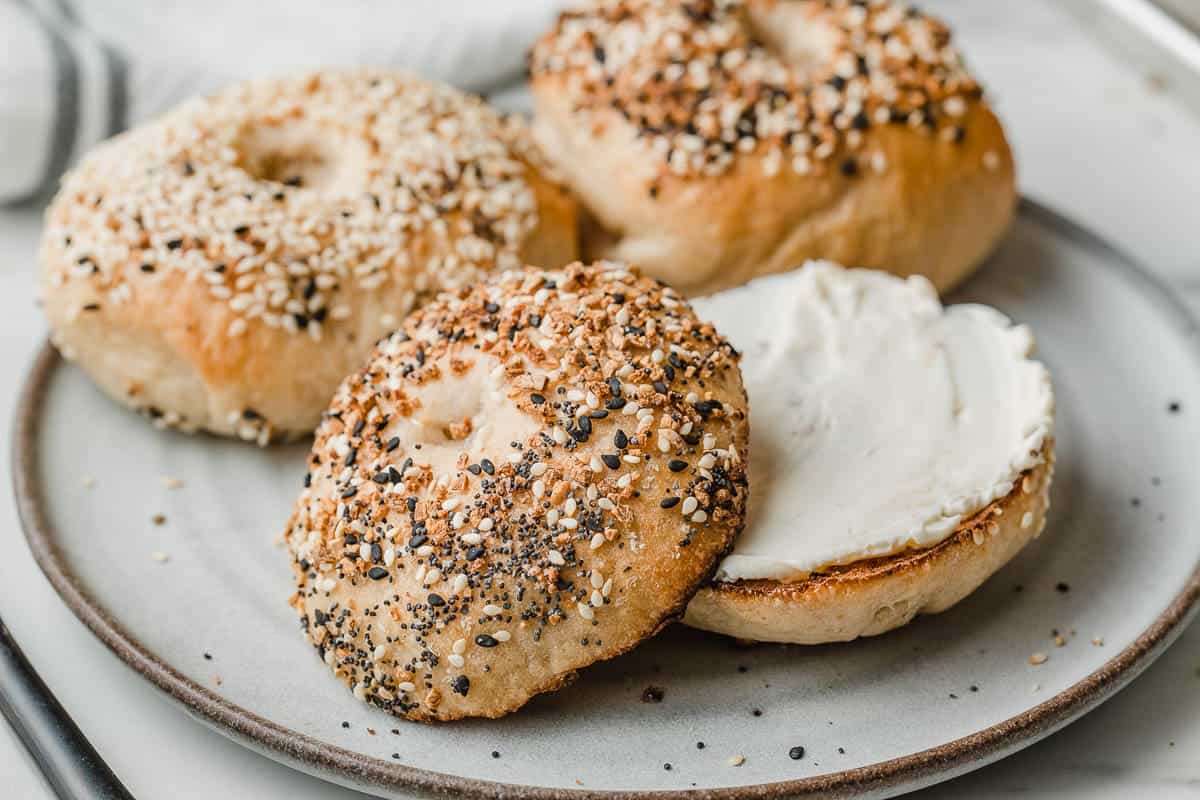
Sourdough Bagels


This easy sourdough bagels recipe makes the most delicious, chewy bagels you'll ever have!
Only a few ingredients and minimal steps are needed for this simple overnight recipe.
I'm so excited to share this bagel recipe with you guys! When I say it's the easiest sourdough bagel you'll ever make, I'm not exaggerating!
Just like our sourdough dutch baby, sourdough english muffins, and our soft sourdough berry sweet rolls, you'll love the minimal steps that stand between you and your sourdough dreams!
The topping choices are endless and you'll love the chewy texture and amazing sourdough flavor in every bite.
Making bagels has never been so easy, so let's get started!
Sample baking schedule
Before we dive into the details, let's look at a typical schedule for making these sourdough bagels.
For reference, the ambient temperature of my kitchen is 68°F (20°C). If your kitchen is colder, fermentation could take longer during each phase. If it's warmer, the phases will be shorter.
- 8 AM - Feed starter. (At 68°F my starter can be used in 8-12 hours)
- 8 PM - Mix bagel dough in a stand mixer, cover, and let sit at room temperature overnight.
- 7 AM - Divide bagel dough, shape, and cover with a tea towel.
- 7:30 AM - Prepare boiling water and preheat the oven.
- 8 AM - Boil bagels, add toppings, and bake.
If your kitchen is warmer than 70°F, the fermentation will be shorter than in the example above. You will need to keep an eye on your starter and your dough to make sure it does not over-prove.
In warmer kitchens, the sourdough starter could be ready to bake within as little as 4 hours.
Adjust the baking schedule to accommodate the ambient temperature of your kitchen. This can take some trial and error!
Step-by-step instructions
Make sure your starter has been fed and is active when you mix the dough. The starter is optimal when used at its peak in the jar!
1. MIX DOUGH AND FIRST RISE
- In the bowl of a stand mixer, stir together the starter, water, honey, and salt with a spatula.
- Add the bread flour and use your hands to bring the ingredients together as best as possible. The dough will be very stiff.
- Place the dough hook on the mixer and mix the dough on the lowest speed for 6-7 minutes.
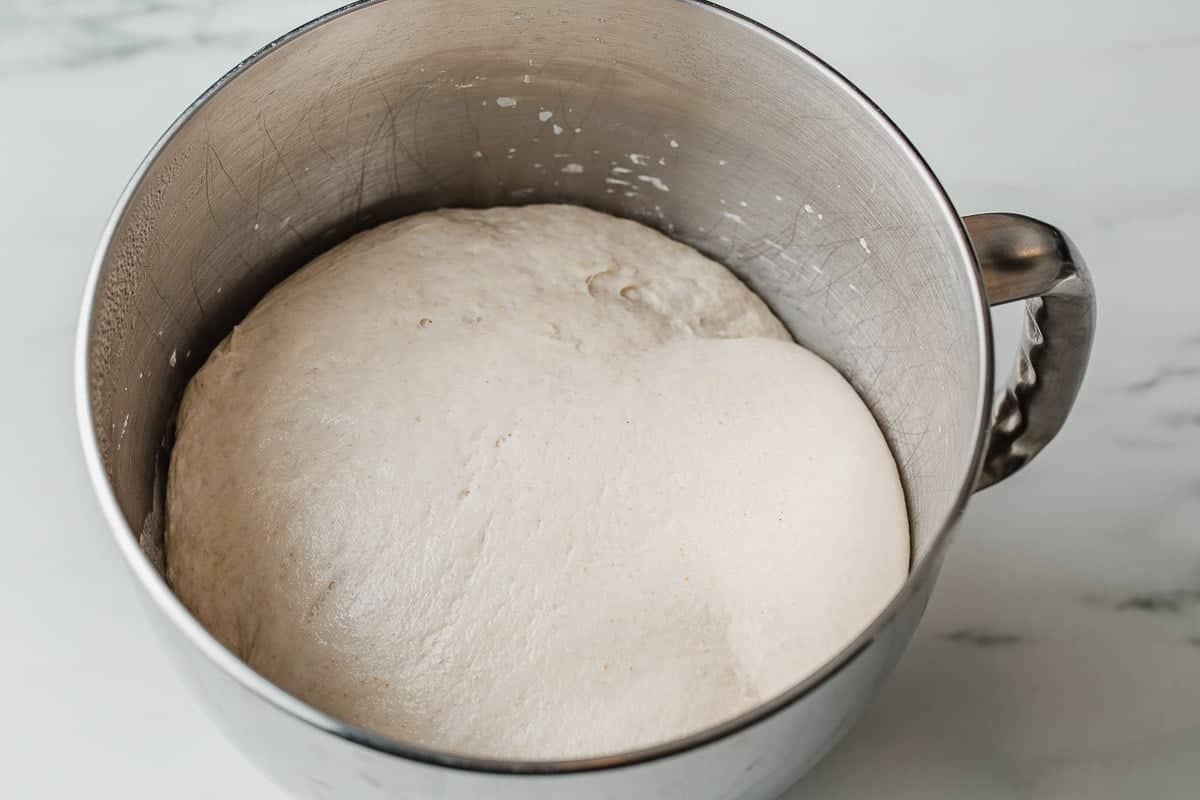
- Cover the bowl and let rest at room temperature for 8-12 hours or until doubled in size.
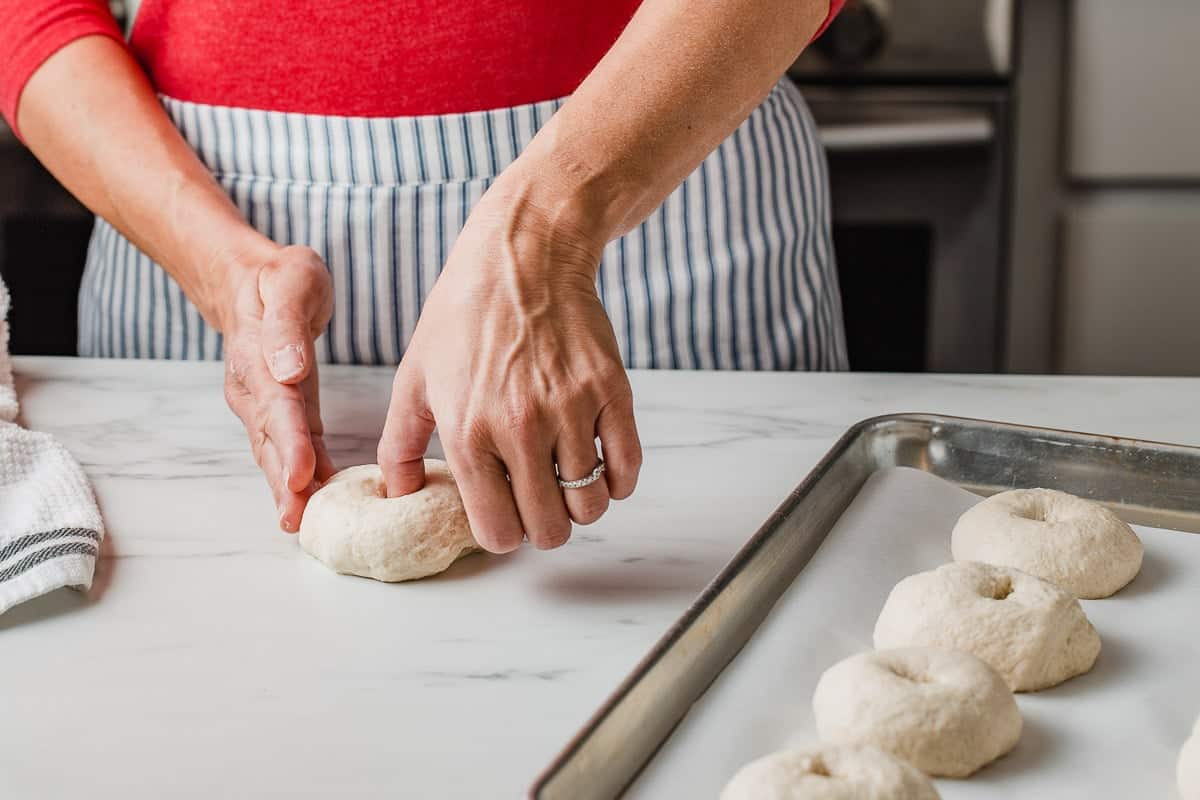
2. DIVIDE AND SHAPE
- Turn the dough out onto a clean work surface and use a bench scraper to divide it into 8 equal pieces.
- Roll each piece into a ball and use your thumb to poke a hole into the middle of each piece.
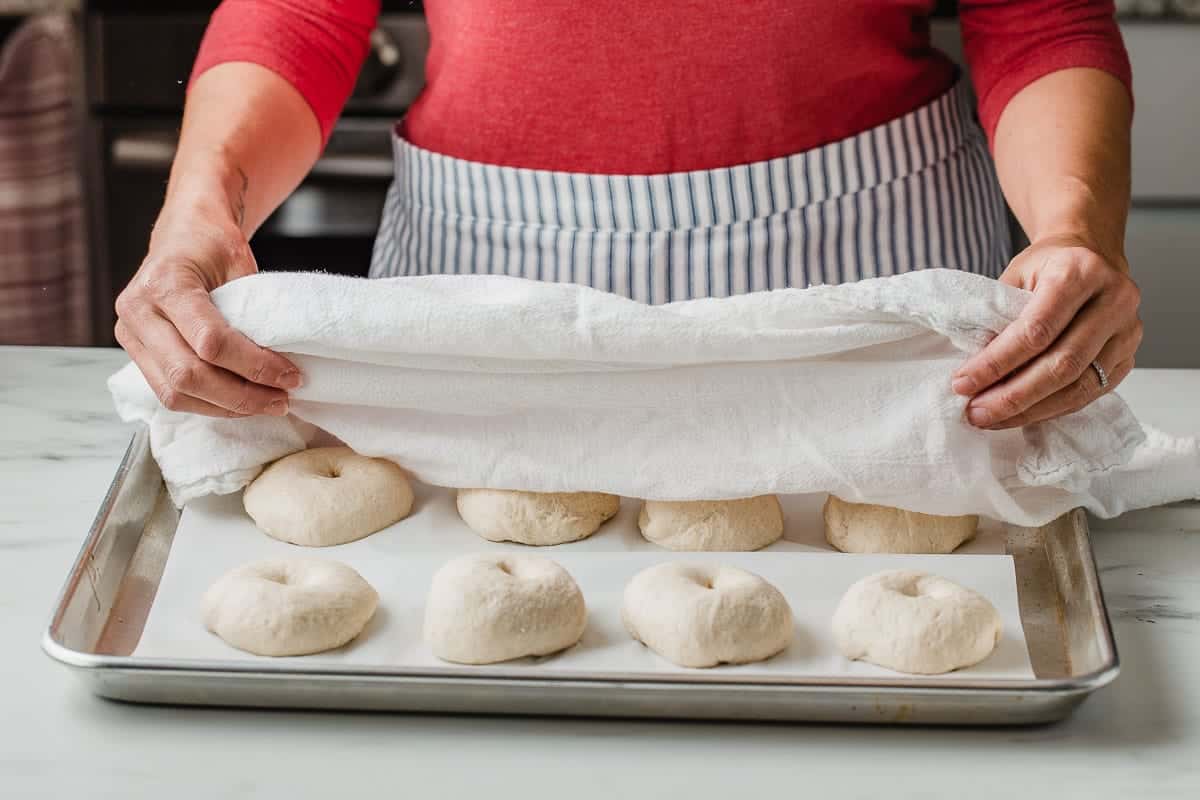
3. SECOND RISE
Arrange the bagels evenly on a parchment-lined baking sheet, cover them with a tea towel, and let them rest for 30-60 minutes or until puffy.
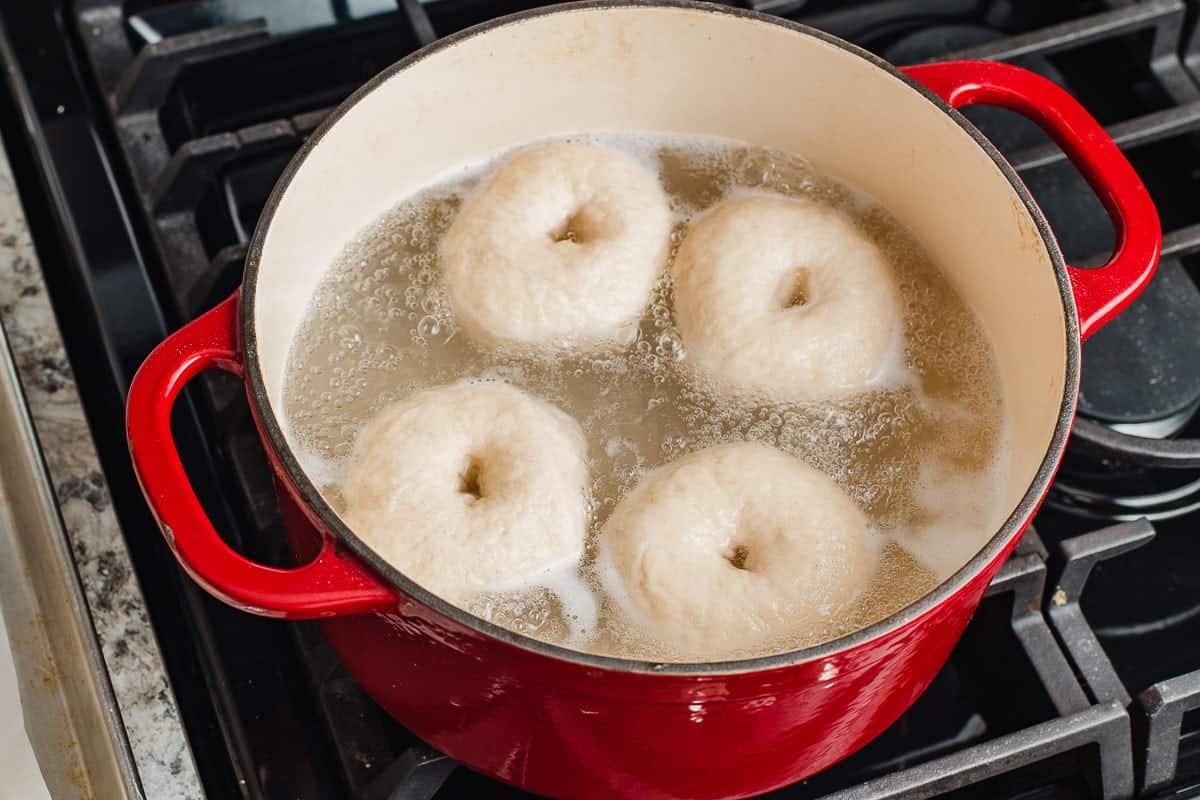
- While the bagel dough is rising, preheat your oven to 425°F (218°) and prepare a pot of boiling water, at least 3" deep, with 1 tablespoon of sugar added.
4. BOIL BAGELS
- Boil the bagels, a few at a time, for 2 minutes on each side and place them back onto the parchment paper.
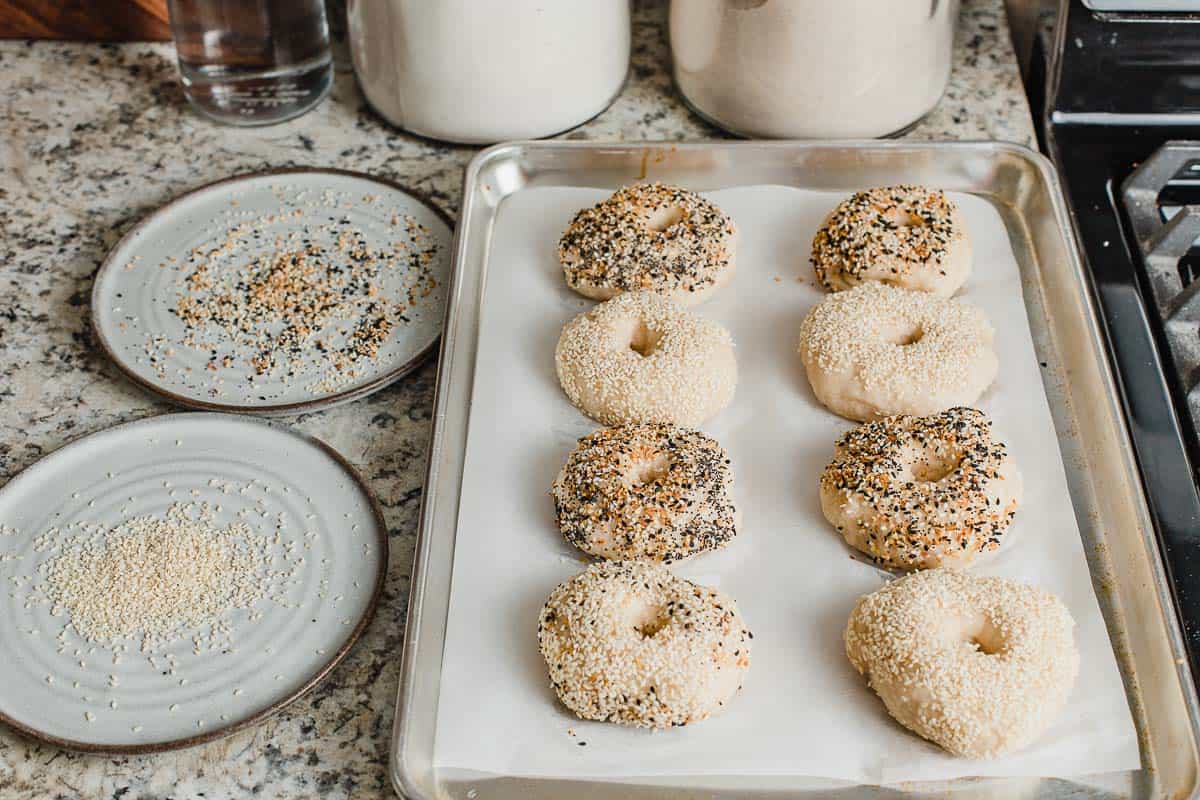
5. ADD BAGEL TOPPINGS
- Let the bagels cool off enough to handle them and dip one side of each bagel in your choice of topping, or leave plain. Place back onto a baking sheet.
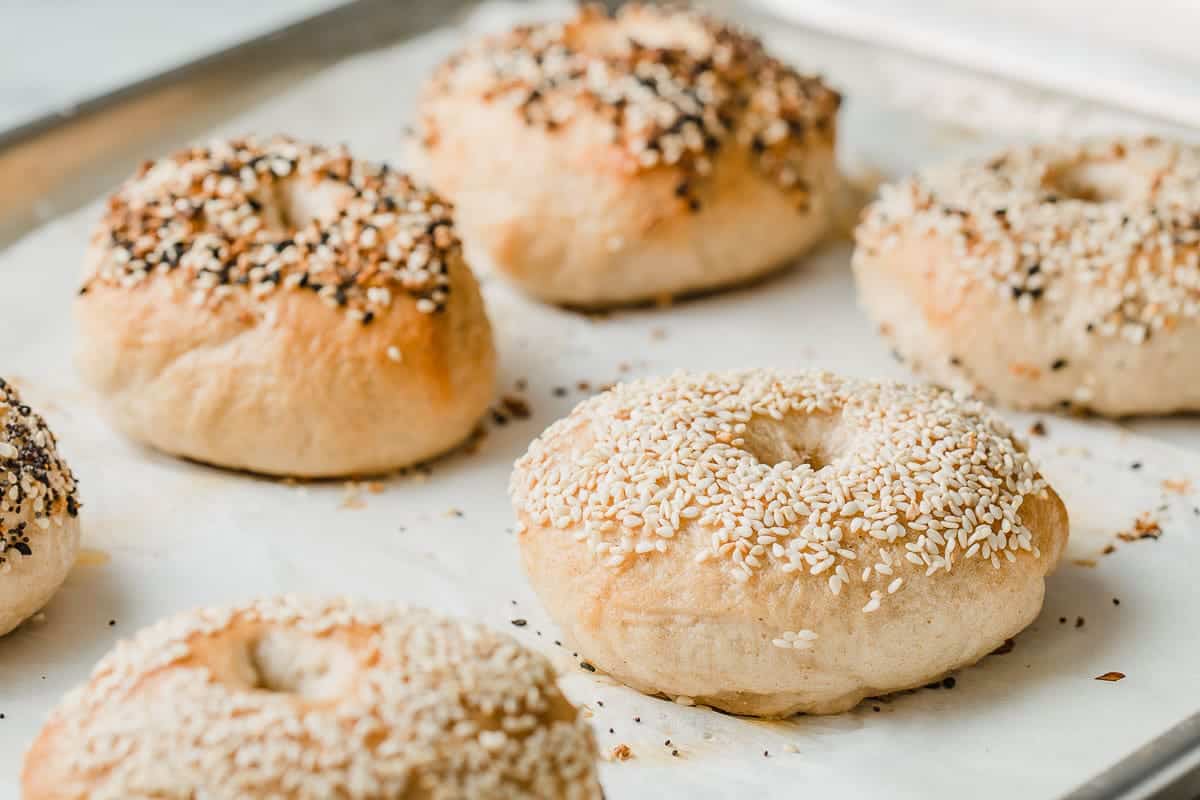
6. BAKE
Bake the bagels for 25 minutes or until golden brown on the outside.
Homemade bagel varieties
Try any of the following or a combination of them.
- sesame seeds
- Everything Bagel Seasoning
- poppy seeds
- salt - sprinkle on top, do not dip!
- shredded cheese
Best bagel toppings
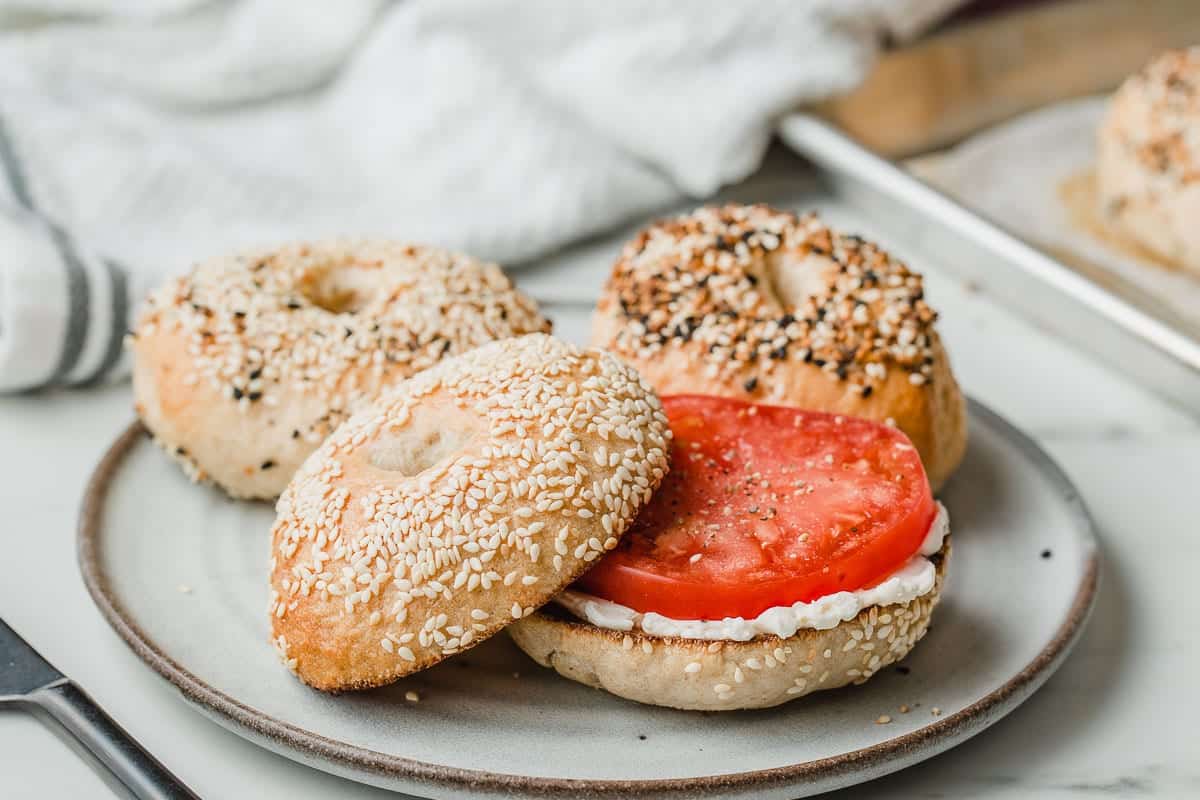
My favorite way to enjoy these sesame seed sourdough bagels is toasted and then topped with cream cheese and a ripe tomato slice. Here are a few other options!
- avocado and eggs over easy
- bacon, egg, and cheese
- sausage, egg, and cheese
- peanut butter and jelly
- Nutella
- ham and cheddar
- pizza bagels
- peanut butter and banana
- bagel burgers
- ham or turkey sandwich
Tips for Success
Why are bagels boiled before baking? Boiling the bagels quickly cooks the outside of the bagel which ensures that they hold their shape during baking.
Boiling also causes the starches to release and become gelatinous on the outside of the bagel. This sticky coating helps the toppings to stick before baking and gives the bagels that shiny, crispy exterior we all love.
Why do you add sugar to the water when boiling bagels? The sugar adds caramelization and crispiness to the outside crust.
If you don't have a stand mixer, knead the dough by hand for about 10 minutes. The dough is very thick and requires a lot of elbow grease.
Don't have a kitchen scale to measure flour?
Use the scoop and level technique to measure your flour if you do not have a kitchen scale. To do this, use a spoon to fluff up the flour in the bag. Use a spoon to scoop the flour into a measuring cup until it is heaped on top. Take a butterknife and level off the top. This should give you the most accurate measurement for flour.
Because flour is measured by weight in these recipes, if the flour is scooped straight out of the bag with the measuring cup, there will be more flour than is called for in the recipe.
Tips for baking in warm and/ or high humidity areas - When baking in high humidity and/or warmer areas, it's often a good practice to use less water and bake a little longer than the recipe calls for. Reduce the water by 50 grams in the initial mix and then slowly add the remaining water until you achieve the correct hydration level. You may need to bake the bagels a few minutes longer. This will take some trial and error!
How to store and freeze bagels
Store cooked bagels, covered, at room temperature for up to 1 week. Storing in the fridge is not recommended.
To freeze baked bagels, let them cool completely. Wrap bagels individually in plastic wrap and place them in a freezer-safe container for up to 3 months.
To reheat bagels, let them thaw on counter if frozen. Cut in half and heat in a toaster or toaster oven.
Other recipes you may like:
- einkorn sourdough bread
- slow cooker sourdough bread
- sourdough banana nut muffins
- sourdough banana bread
We really hope you enjoy this recipe. Let us know what you think in the comment section below!

Sourdough Bagels Recipe
INGREDIENTS
Ingredients to make ½ cup (100 g) of Active Sourdough Starter
- 1 tablespoon (15 g) sourdough starter
- ⅓ cup + 1 tablespoon (50 g) all-purpose flour
- 3 ½ tablespoons (50 g) water
Bagel Dough
- ½ cup (100 g) active sourdough starter
- 1 cup + 1 tablespoon (255 g) water
- 2 tablespoons (40 g) honey (or sugar)
- 2 teaspoons (10 g) fine sea salt
- 4 cups + 2 tablespoons (500 g) bread flour
Water Bath
- 6 cups water
- 1 tablespoon granulated sugar
Optional Toppings
- sesame seeds
- Everything Bagel Seasoning
- salt ( sprinkle on top, don't dip)
- poppy seeds
- shredded cheese
INSTRUCTIONS
Feed Your Sourdough Starter
- 12 hours before you plan to mix the dough, add the ingredients to make ½ cup (100 g) of active sourdough starter to a clean jar. Stir until combined, loosely cover the jar and let the starter rise at room temperature. (The ingredients will create a total of 115 g active starter but, because some of it will stick to the sides of the jar during the transfer, we are making a little more than needed.) The sourdough starter is ready to use when it has doubled in size and there are plenty of bubbles on the surface and sides of the jar.
Make the Dough
- In the bowl of a stand mixer, stir together the starter, water, honey and salt with a spatula. Add the bread flour and use your hands to bring the ingredients together as best as possible. The dough will be very stiff. Place the dough hook on the mixer and mix the dough on the lowest speed for 6-7 minutes. (Or 10 minutes by hand.) Cover the bowl and let rest at room temperature for 8-12 hours. (See notes for cinnamon raisin bagels.)
- Line a baking sheet with parchment paper. Turn the dough out onto a clean work surface and divide into 8 equal pieces. Shape each piece into a ball. To shape the bagel, place a dough ball on the surface in front of you and use your thumb to poke a hole straight down through the middle of the dough. Pick the bagel dough up, gently shape the ring and place on the parchment paper. Repeat with remaining dough balls. Cover the dough with a towel and let rise for 30-60 minutes or until puffy. (See notes about parchment paper.)
- Preheat oven to 425°F (218°C) making sure that the oven rack in the center position. Bring 6 cups of water to a boil in a large stockpot and add 1 tablespoon of sugar. Once the bagels have finished rising, boil them for 2 minutes on each side. (Only boil 3-4 at a time, making sure not to crowd the pot.)
- Use a mesh stainer to remove the bagels and let rest on the parchment paper until cool enough to handle. Once cool enough, dip one side into your choice of toppings and place back onto the parchment paper.
- Bake the bagels at 425°F (218°C) for 25-28 minutes or until golden brown.
NOTES
- Parchment Paper: I recommend using Kirkland brand parchment paper from Costco. I've used it for years with zero sticking issues with any of my recipes. Flour the bottom of the bagels or the parchment paper after shaping them if you issues with sticking.
- Cinnamon Raisin Bagels: Add 2 teaspoons of ground cinnamon to the dry ingredients. After kneading the dough, add ¾ cups of raisins and knead them into the dough to distribute evenly.
- How to measure flour without a scale: Use a spoon to scoop the flour into a measuring cup until it is heaped on top. Take a butterknife and level off the top. This should give you the most accurate measurement for flour.
- Tips for baking in warm and/or high humidity areas: Reduce the water by 50 grams in the initial mix and then slowly add the remaining water until you achieve the correct hydration level. You may need to bake the bagels a few minutes longer. This will take some trial and error!
- To Store: Keep baked bagels covered, at room temperature for up to 1 week. Storing in the fridge is not recommended.
- To freeze baked bagels: Let the bagels cool completely. Wrap bagels individually in plastic wrap and place in a freezer-safe container for up to 3 months.
- Freezing Unbaked Bagels: After shaping and letting the bagels rise, place them on a baking sheet and freeze for 1–2 hours. Once firm, transfer to a freezer bag, separating layers with parchment paper. When ready to bake, thaw the bagels overnight in the fridge to prevent overproofing. There is no need to bring them to room temperature after thawing; remove them from the fridge, boil, and bake.
- To Reheat: Allow the cooked bagels to thaw on the counter, if frozen. Cut in half and heat in a toaster or toaster oven.
Oh my goodness, these are fresh out of the oven and they smell fabulous! This recipe couldn’t have been easier. Thanks so much for your clear and concise directions. My goal is to work through all your sourdough recipes!
The best recipe I have tried easy to follow and they come out perfect every time outside crust chewy and so soft inside I do a double batch so I always have some in the freezer.
Thankyou
Love all your recipes but this one could use a bit less water, at least for my flour (KA organic unbleached). The dough was very sticky when shaping and even when going to place in water it was sticking to the parchment paper. Its in the oven now, fingers crossed it still tastes delicious.
Just made this recipe this morning, after proving the dough over night. They turned out delicious! The hole did close up a little but over all, these are yum and SUPER easy to make.
I love this recipe! I have made them 3 times already and they’re gone in one day.
Can I use all purpose flour instead of bread flour?
Yes you can.
Love this recipe and how you prepare the sour dough mix the night before...its a great technique!
Good morning! I made my very first batch just a few minutes ago and they have lost their holes 🙁 what is your trick to keeping their shape? I followed your recipe to the T. what am I doing that is not right?? BTW, I LOVE YOUR PAGE!! I've made a lot of your recipes! I even made my own sourdough French bread! I love sourdough SO MUCH! Thank you 🙂
Fantastic!
I've made these a few times, and they've always turned out excellent!
A question about freezing...
If frozen then removed from the freezer to thaw, would you still expect a 1 week shelf life at room temperature? Or would they need to be kept in the refrigerator at this point? And/or potentially not last as long after being frozen?
I'm hoping to freeze a bunch of these ahead of time for a several day camping trip with no refrigeration available.
Thanks!
Hi Don, They should stay good for several days out of the freezer. I would transfer them to a different bag once they have thawed because it will likely have too much moisture inside of the bag it was frozen in. (Condensation from the thawing process.)