Sourdough Country Loaf


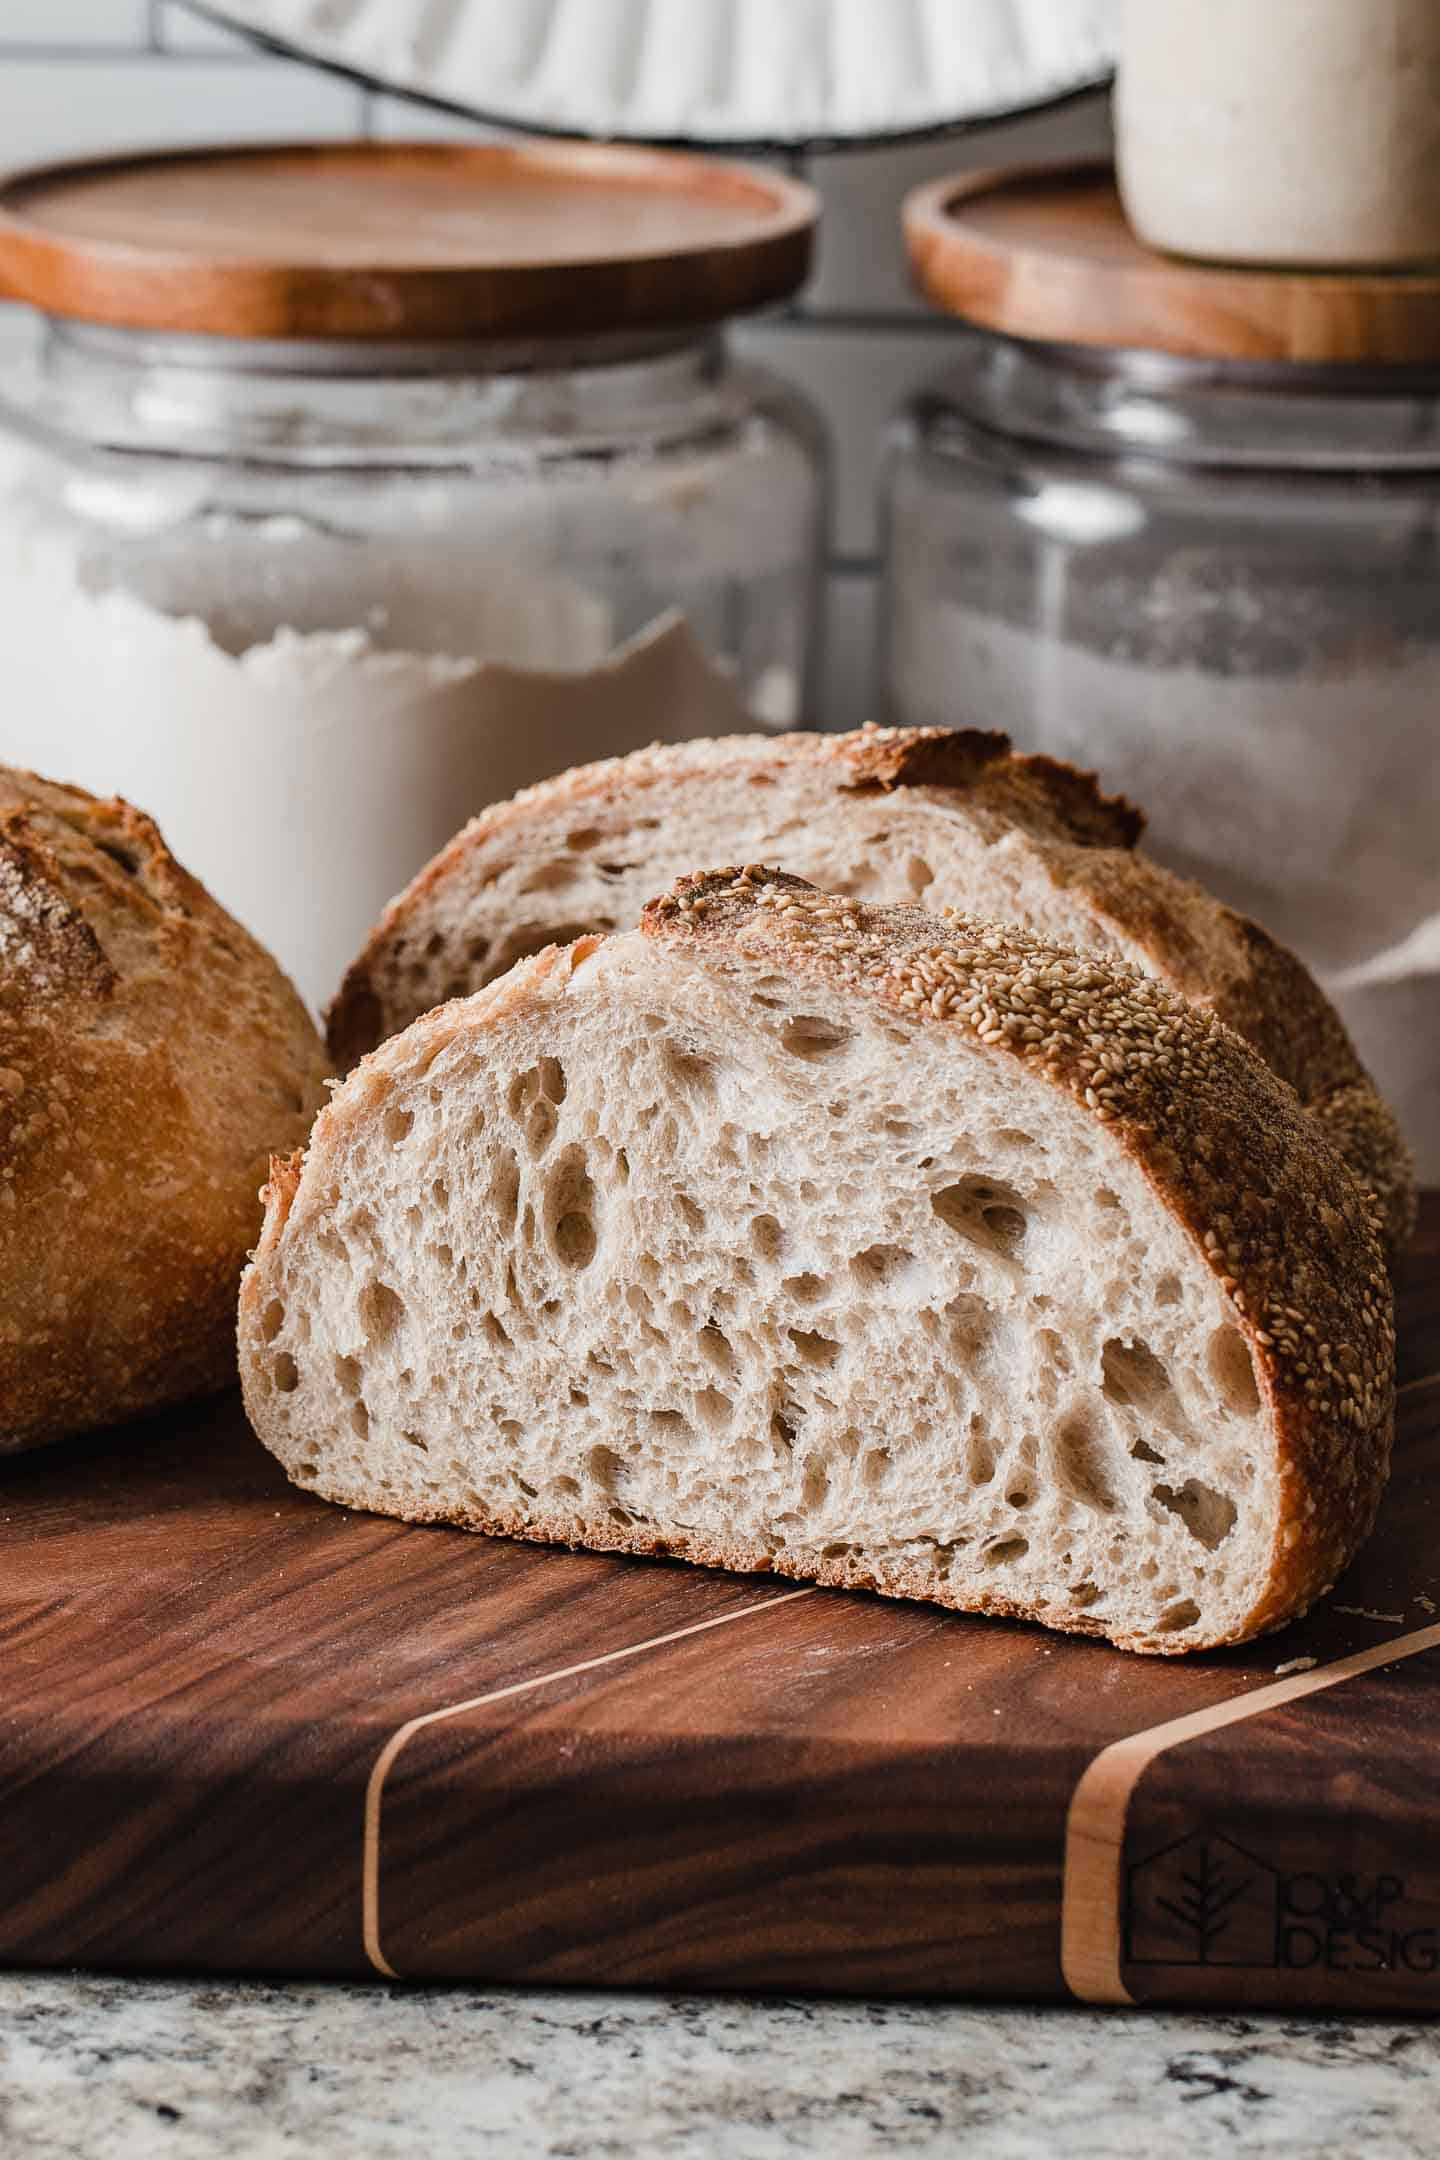
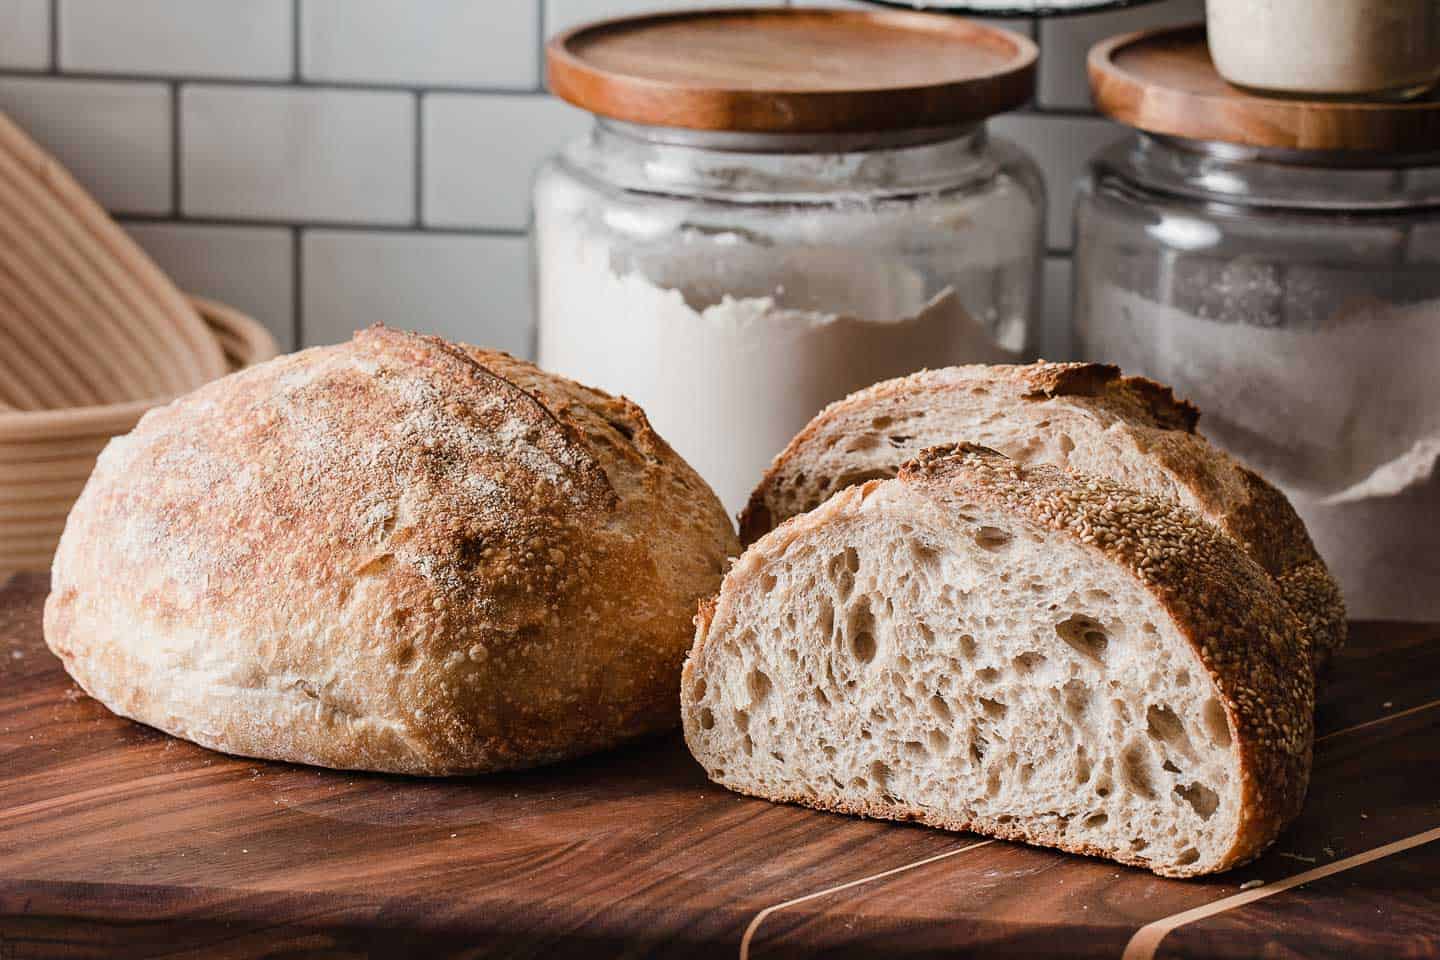
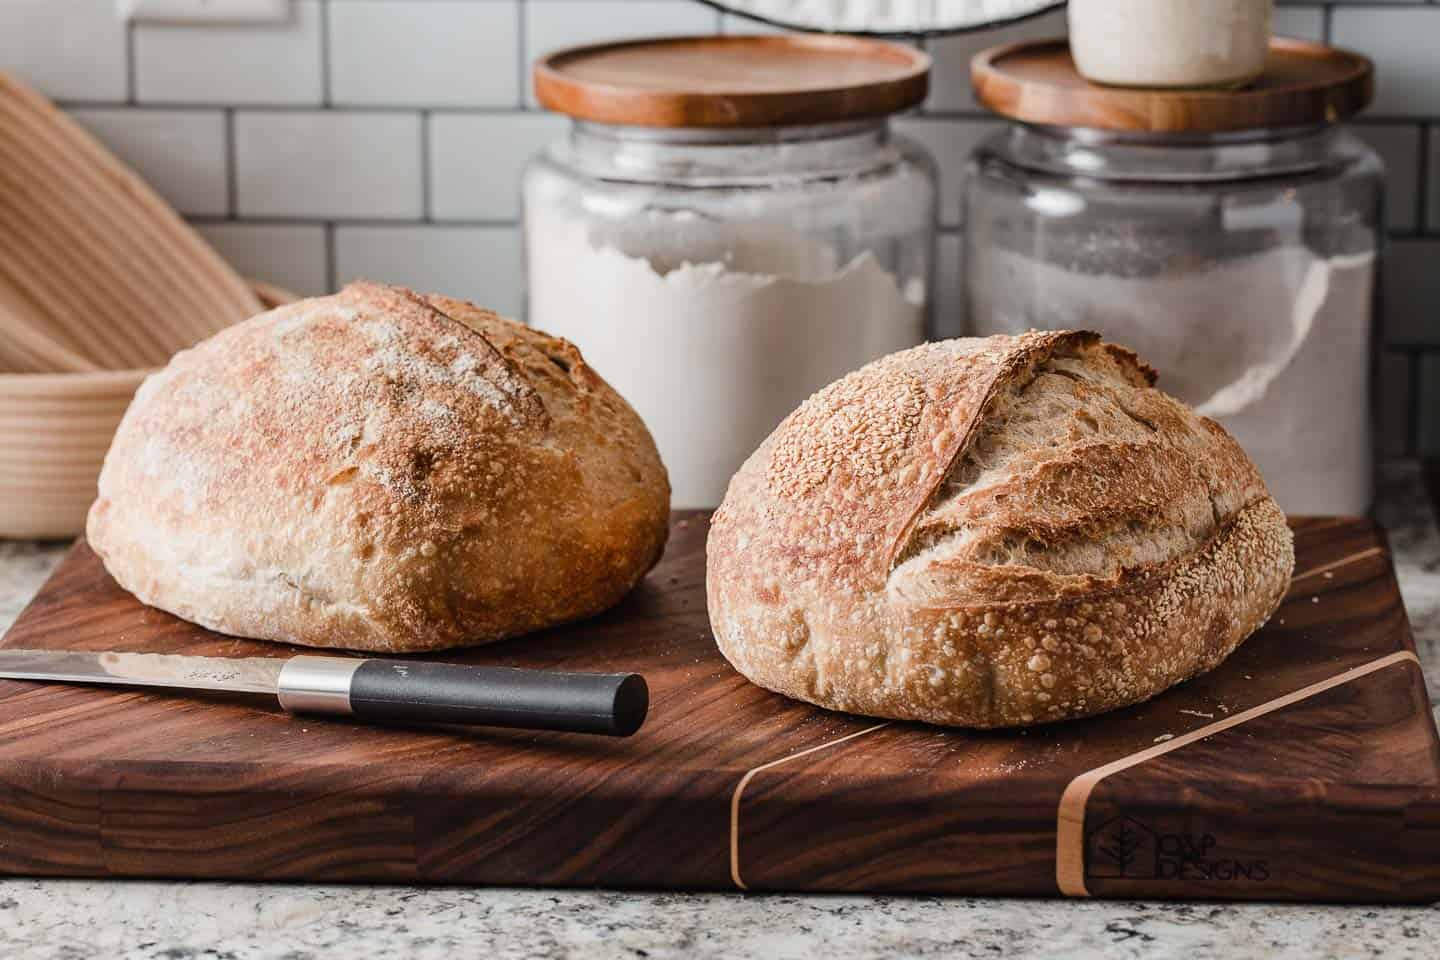
This sourdough country loaf recipe produces a slightly open, even crumb with a mildly sour flavor.
The recipe combines whole wheat flour with bread flour for a delicious loaf that you will enjoy in a wide variety of ways.
Perfect for toast, dipping in soups, sandwiches and more!
This recipe for sourdough country loaf bread is by far my favorite and most produced in my kitchen!
The dough is mixed, bulk fermented over 5-6 hours at room temperature, shaped and kept in the fridge for a long cold ferment before baking.
This process allows the dough to develop amazing sourdough flavors as well as a bread that has a beautiful even and open crumb.
This bread is perfect for making your favorite french toast, sandwiches and much more.
Is your mouth watering yet? Let's get to baking!
Jump to:
How to make sourdough bread
There's a few more steps to take in this sourdough country loaf recipe versus our beginner's sourdough bread recipe.
Let's take a look at the steps involved before we dive into the details!
- Starter - Feed your sourdough starter 12 hours before you plan to mix your dough.
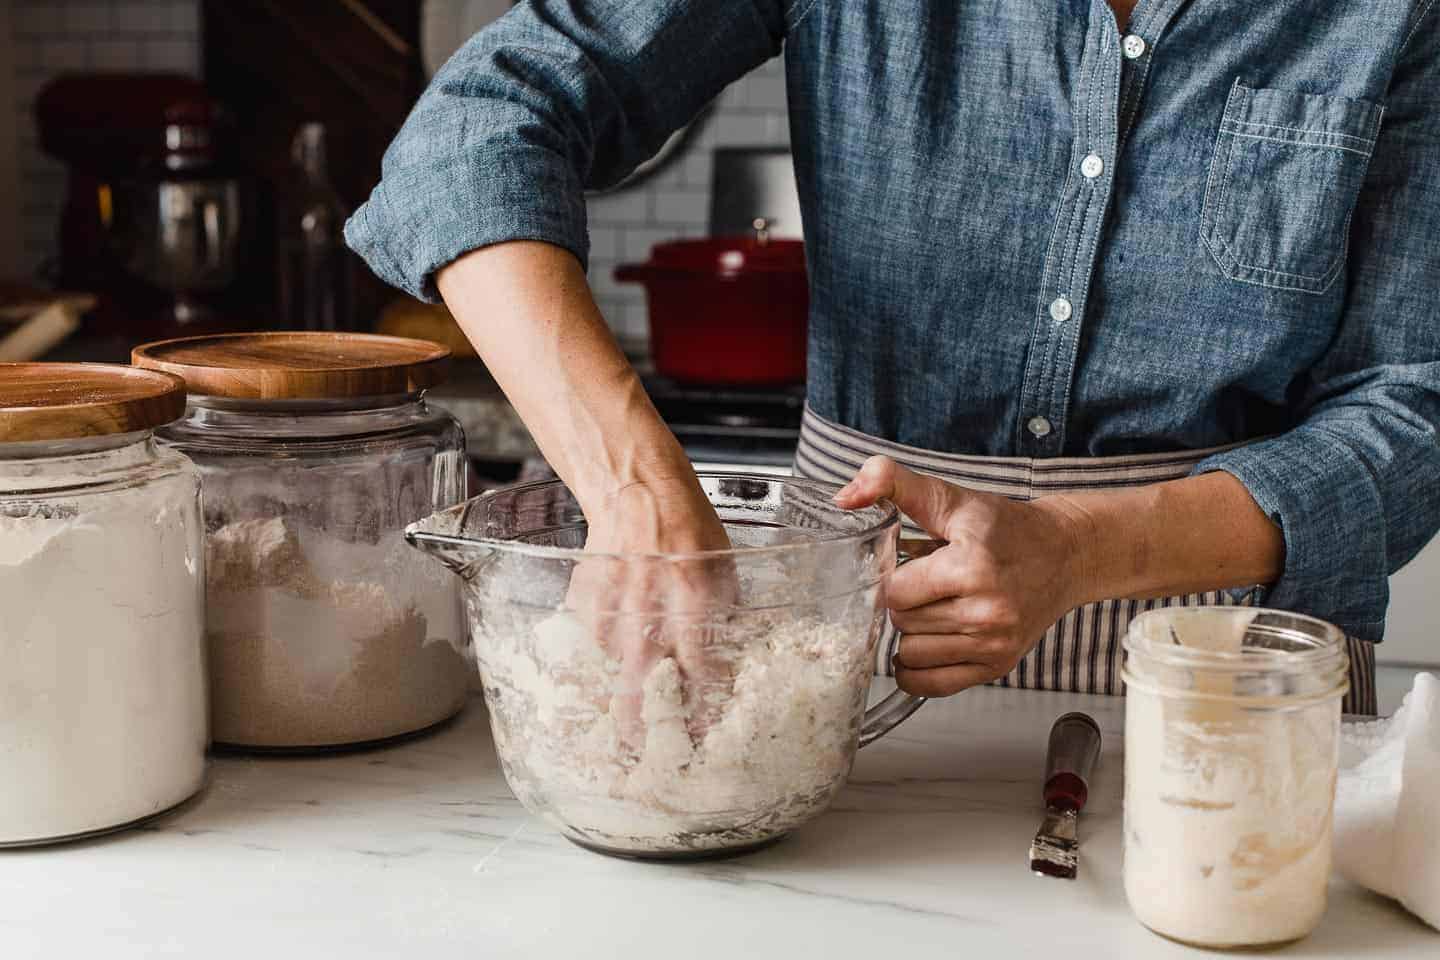
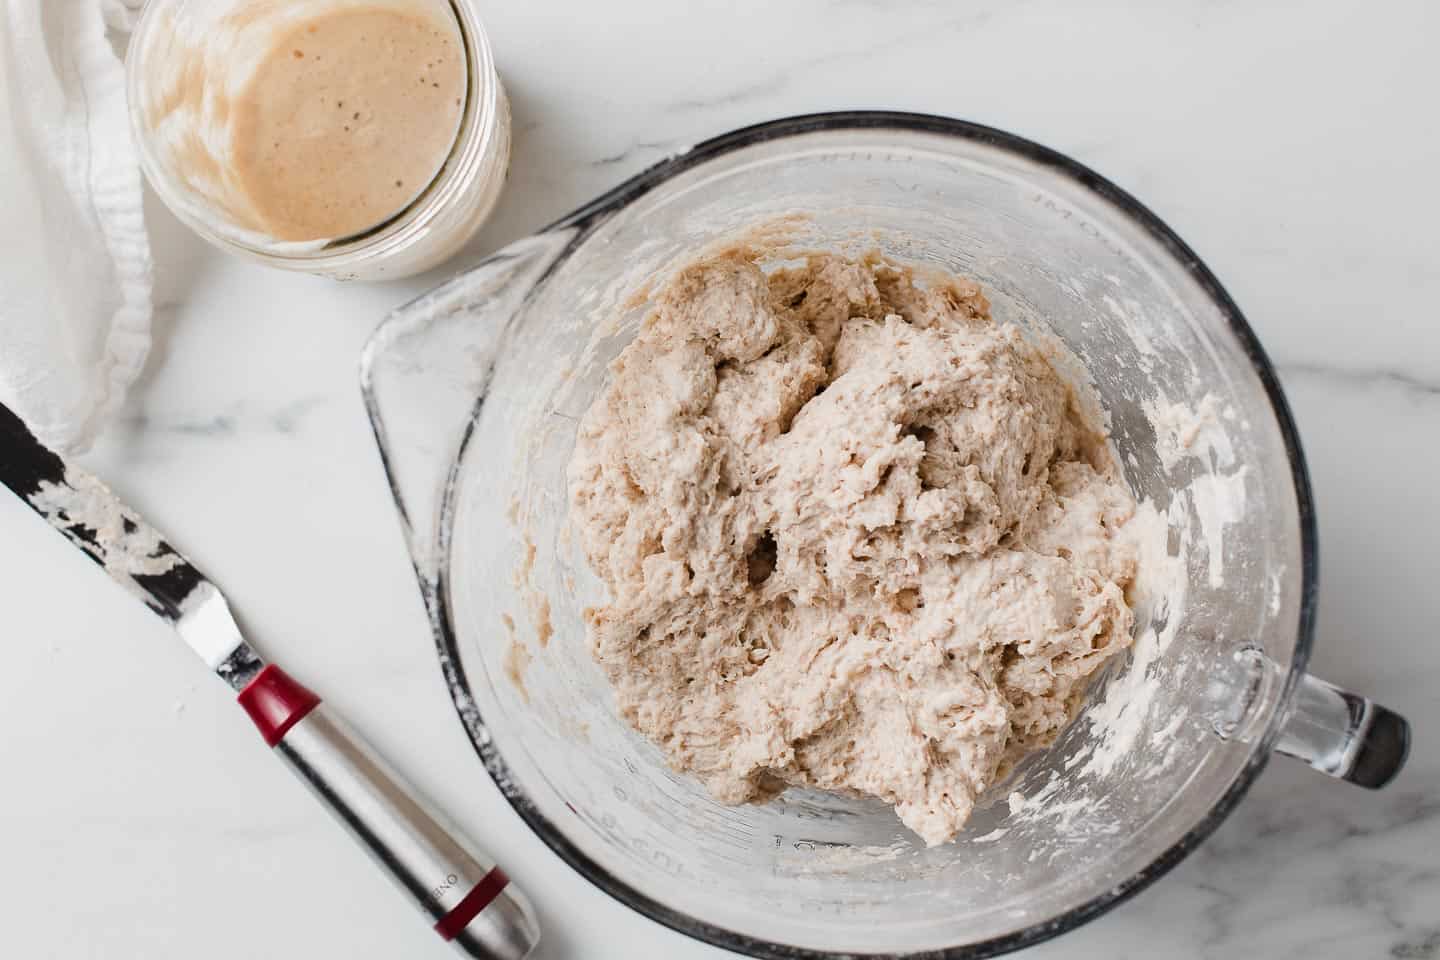
- Autolyse - Use your hands to mix the flour, sourdough starter and water in a large bowl until there are no dry bits. Cover and let rest 1 hour.
- Add salt - Add the salt to the dough and work it in using your hands until well combined. Cover and let rest 1 hour.
- Bulk fermentation - Perform 3 sets of stretch and folds, 30 minutes apart, over the first hour and a half. Cover the dough and allow to ferment at room temperature for an additional 2-3 hours.
- Shape and cold ferment - Pre-shape the dough and let rest, covered, for 20 minutes. Final shape the dough, place in banneton, cover and chill in fridge for up to 36 hours.
- Score and bake - Score the loaf, spritz with water and bake.
Tips for success
Now that we've had an overview of the steps you will take to put your sourdough country loaf together, let's discuss some of them in more detail.
- Flour Selection
- Levain (sourdough starter)
- Autolyse
- Bulk Fermentation
- Shape and Second Rise
- Score and Bake
Best flour for bread baking
It's important to note that I test all my recipes with King Arthur brand flour. When recipe testing it allows for consistent results to help you bake better bread!
Every brand of flour varies in its protein content, which can cause recipes to turn out differently than what you are expecting.
The King Arthur bread flour has a high protein content, 12.7%, which is perfect for bread making.
Of course, feel free to use your flour of preference!
Don't have a kitchen scale to measure flour?
Use the scoop and level technique to measure your flour if you do not have a kitchen scale. To do this, use a spoon to fluff up the flour in the bag. Use a spoon to scoop the flour into a measuring cup until it is heaped on top. Take a butterknife and level off the top. This should give you the most accurate measurement for flour.
Because flour is measured by weight in these recipes, if the flour is scooped straight out of the bag with the measuring cup, there will be more flour than is called for in the recipe.
Sourdough Starter
You'll want your levain, or sourdough starter to be active and bubbly when you mix it with your ingredients.
Feed your starter anywhere from 6 to 12 hours prior to mixing the dough depending on its maturity and the temperature of your kitchen.
My kitchen stays a consistent 68°F (20°C), year round and I mix my starter 10-12 hours beforehand for best results.
If your kitchen is warmer fermentation will take less time and if it's cooler, more time.
What is autolyse?
Autolyse is a resting period of one hour that gives the flour a chance to absorb the water before adding any salt, making the dough easier to work with.
This in turn improves the texture and overall quality of the final product.
Tip - This phase can last longer than one hour if needed to fit your schedule. If this is the case, do not add the sourdough starter until the salt is added in the next step, in order to prevent over-fermentation.
What is bulk fermentation?
In the bulk fermentation phase, otherwise known as the first rise, the dough will start to develop its strength and structure.
During this crucial phase, you will help in the process by performing a series of stretch and folds.
The most important thing to remember is to be gentle with your dough during this step. Do not stretch the dough further that it allows naturally.
While the dough is in the bowl, wet your hand to prevent the dough from sticking and gently pull one side of the dough up and over itself.
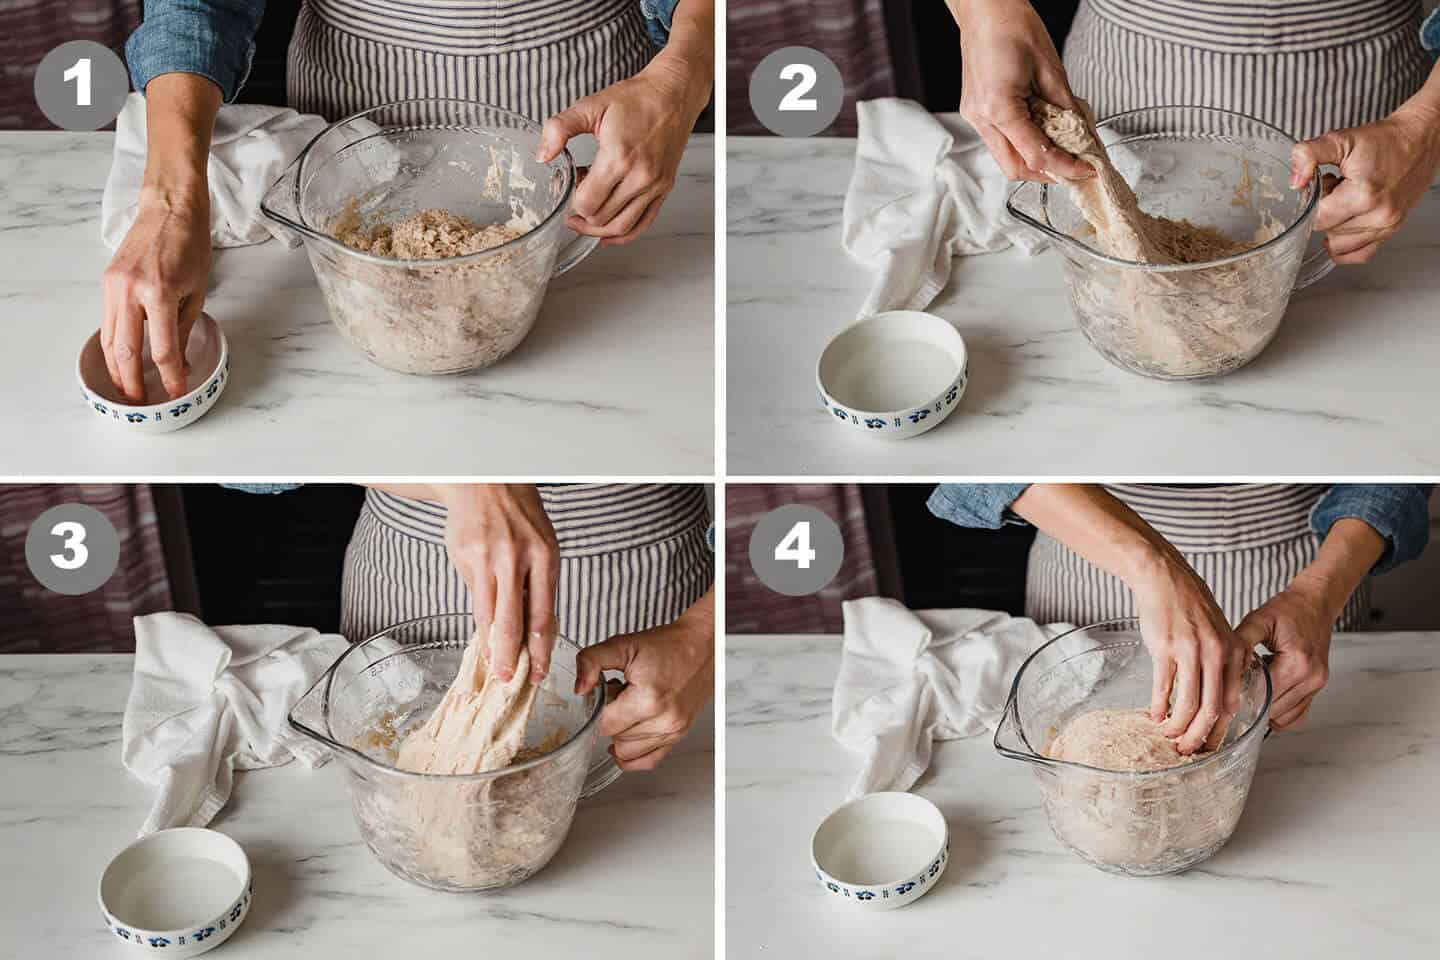
Turn the bowl a quarter turn and repeat this until you've come full circle.
After you have finished 3 sets, 30 minutes apart, cover the dough and allow to ferment at room temperature for 1-3 more hours.
- 68°F (20°C) 2-3 hours
- 70°F (21°C) 2-2.5 hours
- 72°F (22°C) 1.5-2 hours
- 75°F (24°C) 1-1.5 hours
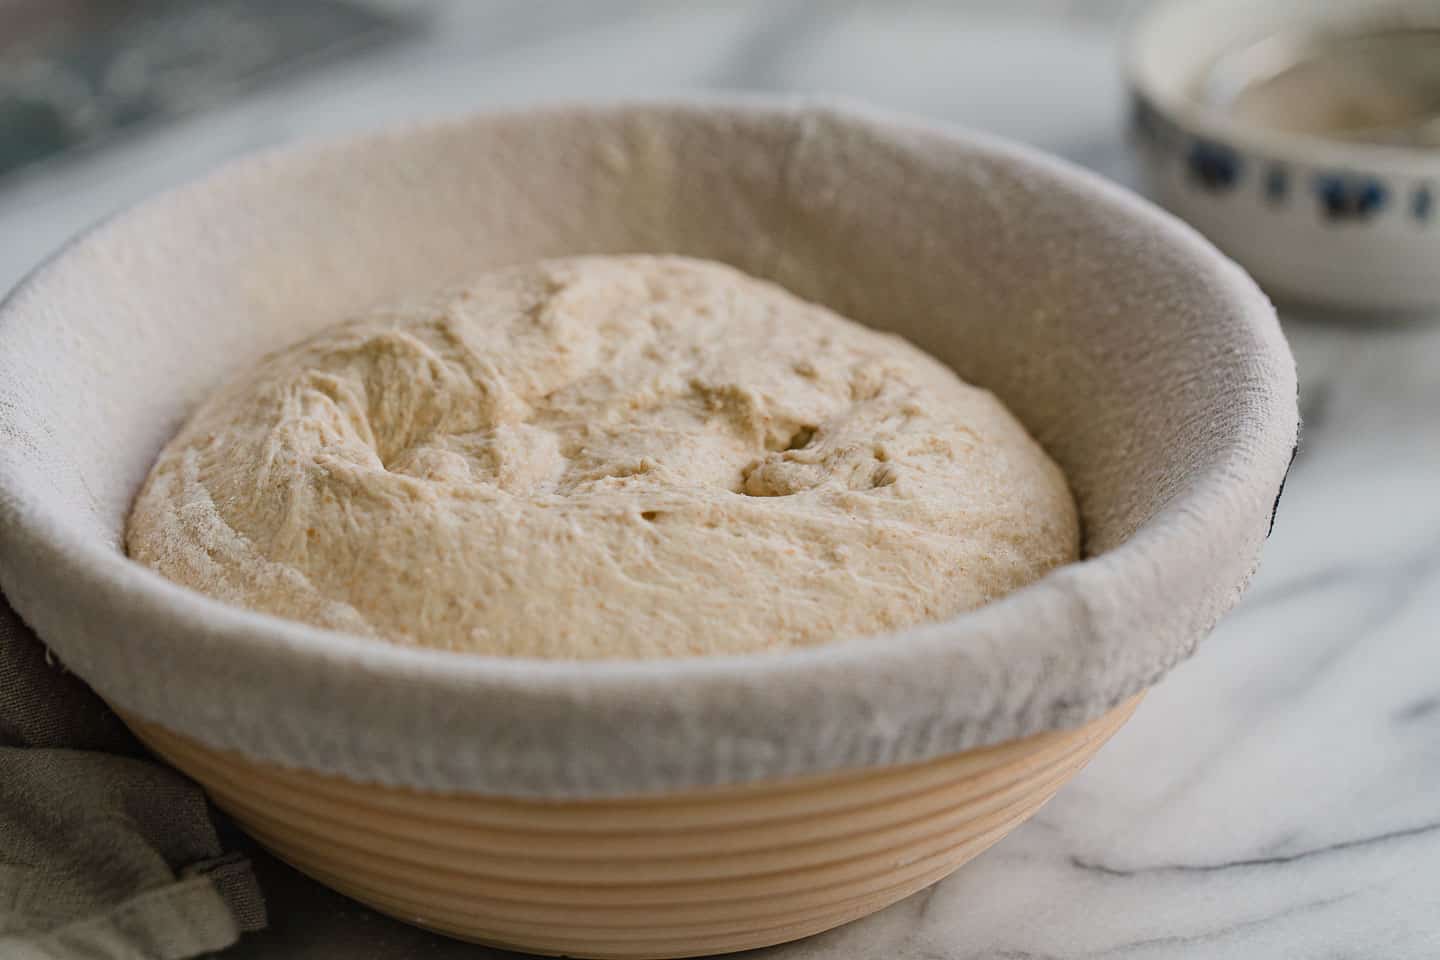
The dough will rise by about 20-30% and form bubbles around the sides of the bowl when ready for the next phase.
Shape and Second rise
Once the dough has been through the first rise, it's time to shape it and get it into the fridge for the second or final rise.
Turn the dough out onto your work surface and use a bench scraper to form it into a ball. Cover and let it rest for 20 minutes.
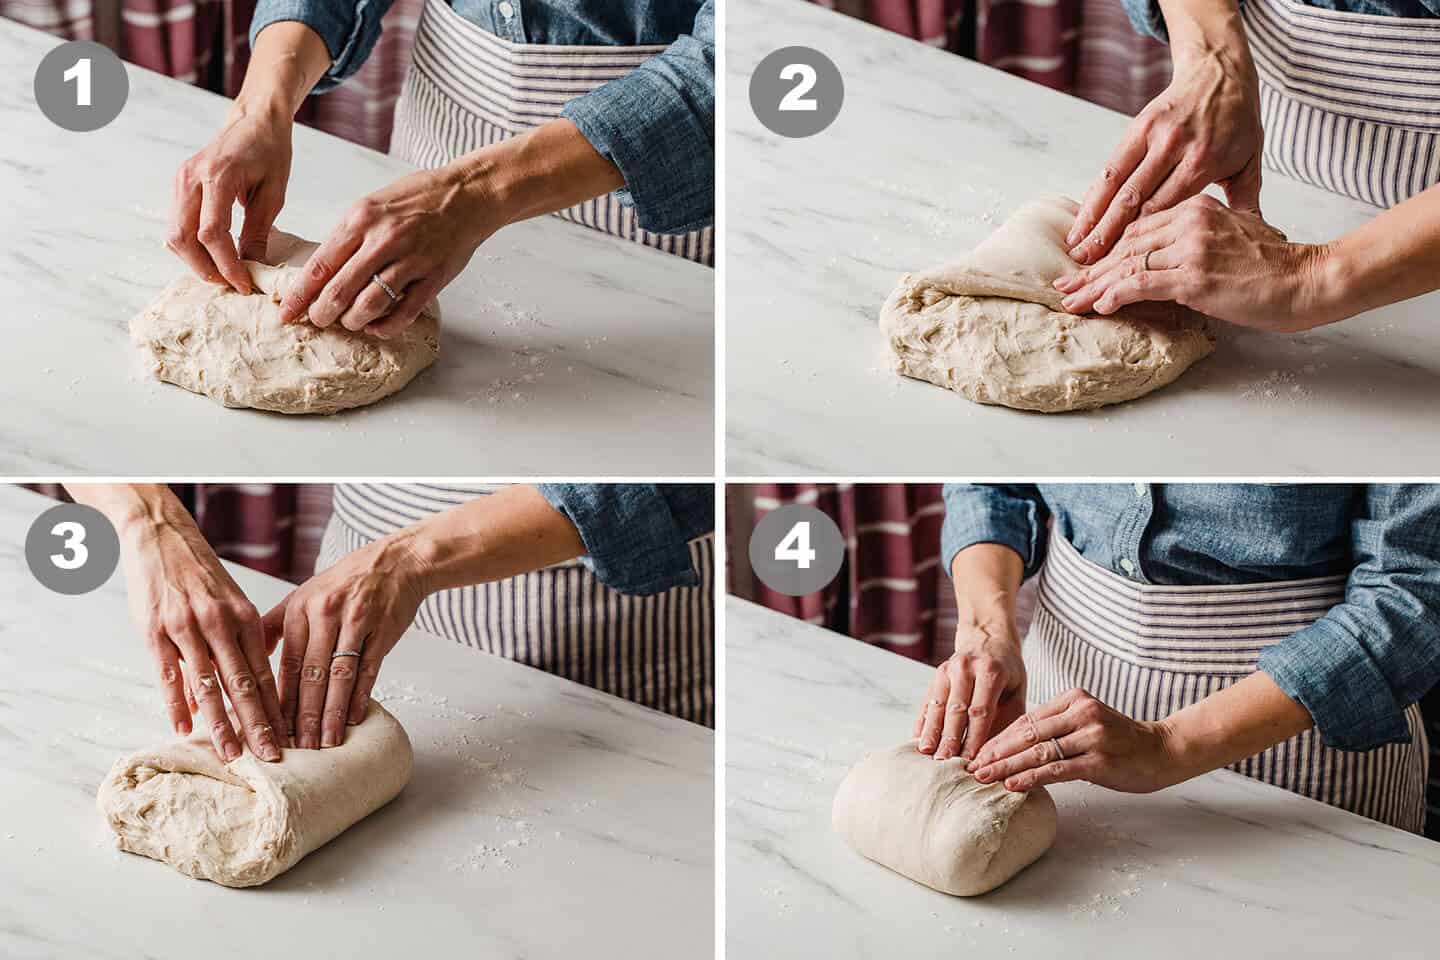
To give the dough it's final shape, lightly flour the top of the dough and turn it over using your bench scraper. Fold the side nearest you up and to the center. Repeat with all four sides.
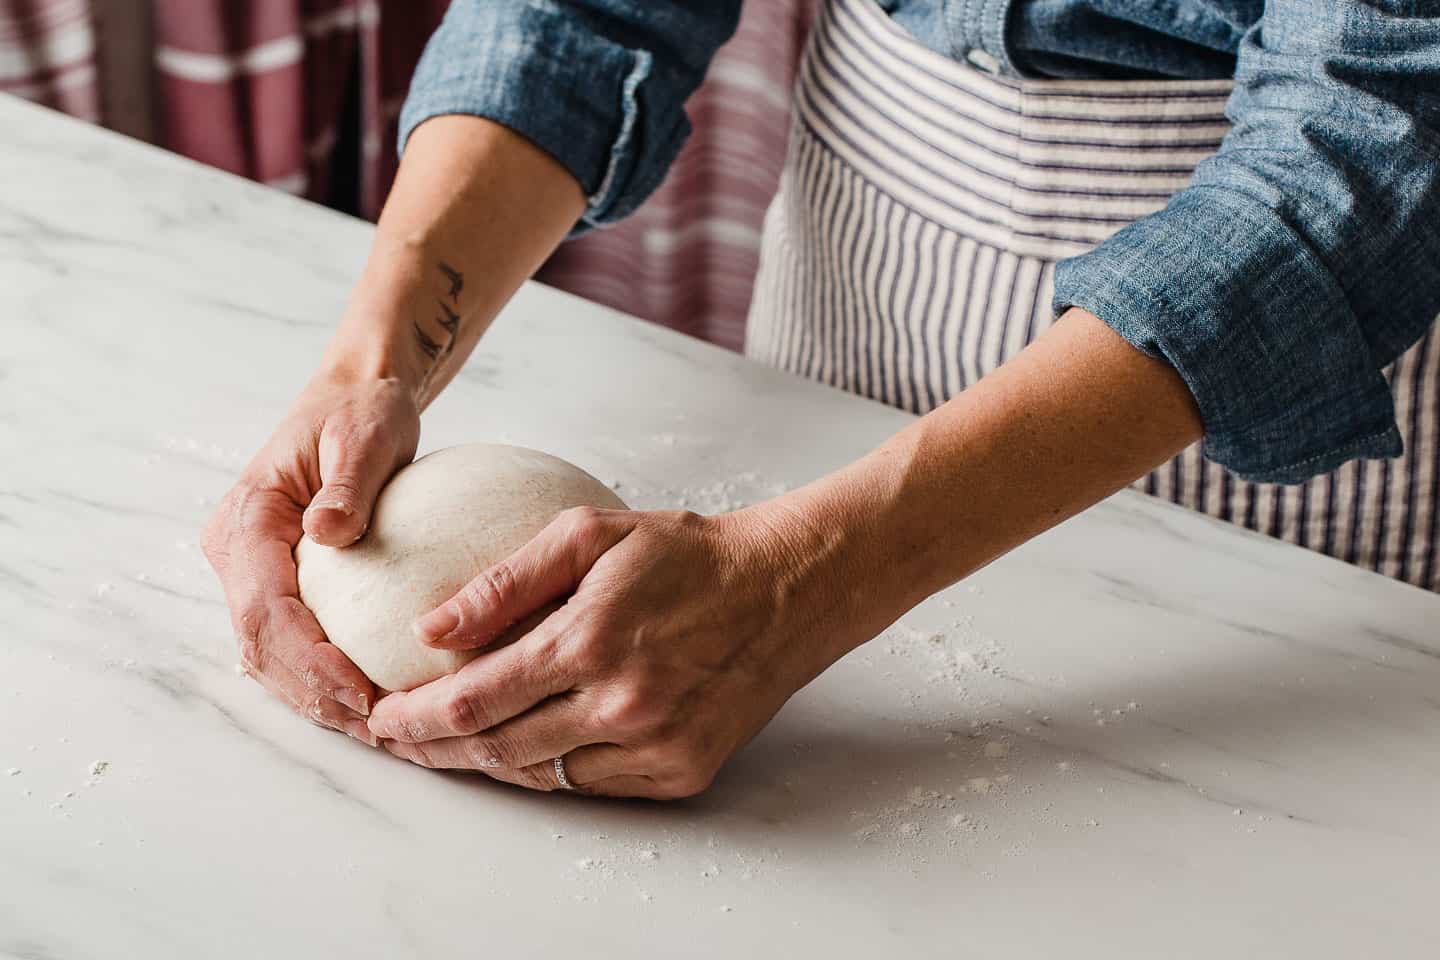
Turn the dough over, cup the dough with your hands and gently pull it towards yourself.
Turn the dough in a circular motion and pull again. This will create a tight skin on the outside of the dough.
Make sure to be gentle with your dough!
Place the dough into a floured banneton, seam-side up, and place it in a plastic bag to keep the dough from drying out in the fridge.
Tip - If you do not have a banneton, use a medium-sized bowl lined with a tea towel to hold the dough during the final rise.
Let the dough rest in the fridge for up to 36 hours before baking.
During this phase, the fermentation will be slower, the gluten will continue to break down and the sourdough flavor will develop further.
Tip - Sprinkle 2-3 tablespoons of sesame seeds in the bottom of the banneton before placing the dough in it. The seeds will stick to the dough and toast up golden and delicious while the bread bakes!
How to score and bake sourdough bread
Scoring the dough before baking is extremely important to control the oven spring.
A sharp razor is used to make a ¼" cut into the top of the dough right before baking which allows the dough to expand in the desired location, otherwise known as the "oven spring".
If you do not control the placement of the oven spring, you run the risk of your dough blowing out at it's weakest point during the first 20 minutes of baking!
Tip - After scoring the dough, lightly spritz it with fresh water before baking. This will help to develop that crackly crust that everyone loves!
Bake the dough in a cast iron dutch oven. The dutch oven holds in the steam that comes from the dough, which is also what helps to produce the oven spring.
I recommend using a Lodge dutch oven combo. It is inexpensive and it can withstand the higher heat of your oven.

If you have an enameled cast iron dutch oven, it is perfectly fine to use. Just note that the enameled surface of the ones I have used, tend to break down quicker with the high heat of bread baking.
I also highly recommend using large silicone gloves to protect your hands and forearms from getting burnt!
After baking, remember to let your bread cool completely before slicing to prevent the crumb from becoming gummy!
Sample Baking Schedule
The times used in this recipe are in line with the ambient temperature of my kitchen, which is usually around 68°F (20°C). Keep an eye on your dough and adjust this time as needed.
Friday:
- 8PM Feed sourdough starter.
Saturday:
- 8AM Mix water, flour and starter. Cover and autolyse 1 hour.
- 9AM Add salt water. Let rest covered 1 hour.
- 10AM First stretch and fold. Cover and let rest 30 minutes.
- 10:30AM Second stretch and fold. Cover and let rest 30 minutes.
- 11AM Third stretch and fold. Cover.
- 11-2PM Bulk ferment at room temperature 2-3 hours, at 68°F (18°C)
- 2PM Pre-shape.
- 2:30PM Final shape. Cover with plastic and let rest 30 minutes.
- 3PM Place in fridge to cold ferment until ready to bake.
Sunday:
- 8AM Score and bake.
How to store and freeze
Store your bread at room temperature, wrapped in a kitchen towel or beeswax wrap. You can also store the bread, slice down, on a cutting board with a cake stand top covering the bread.
It is not recommended to store sourdough bread in the fridge as it will become hard.
Freeze full loaves or individual slices wrapped tightly in plastic wrap and inserted into a freezer-safe container for up to 3 months.
Tips for baking in warm and/or humid environments
When baking in high humidity and/or warm areas, it's often a good practice to use less water and bake a little longer than the recipe calls for. Reduce the water by 50 grams in the initial mix and then slowly add the remaining water until you achieve the correct hydration level. Bake the bread about 5-10 minutes longer with the lid on. This will take some trial and error!
High altitude baking tips
If you live at a high altitude, 5,000-11,500 feet above sea level, you will need to use a sourdough recipe developed for high altitude baking for best results. Visit Butter and Air for their expertise on high altitude sourdough.
My favorite way to eat this sourdough country loaf is as toast. We love to slice the bread into 1" slices and toast it until each side is a nice golden brown.
The result is a wonderful crunch on the outside with a chewy center. It's shear heaven with every bite!
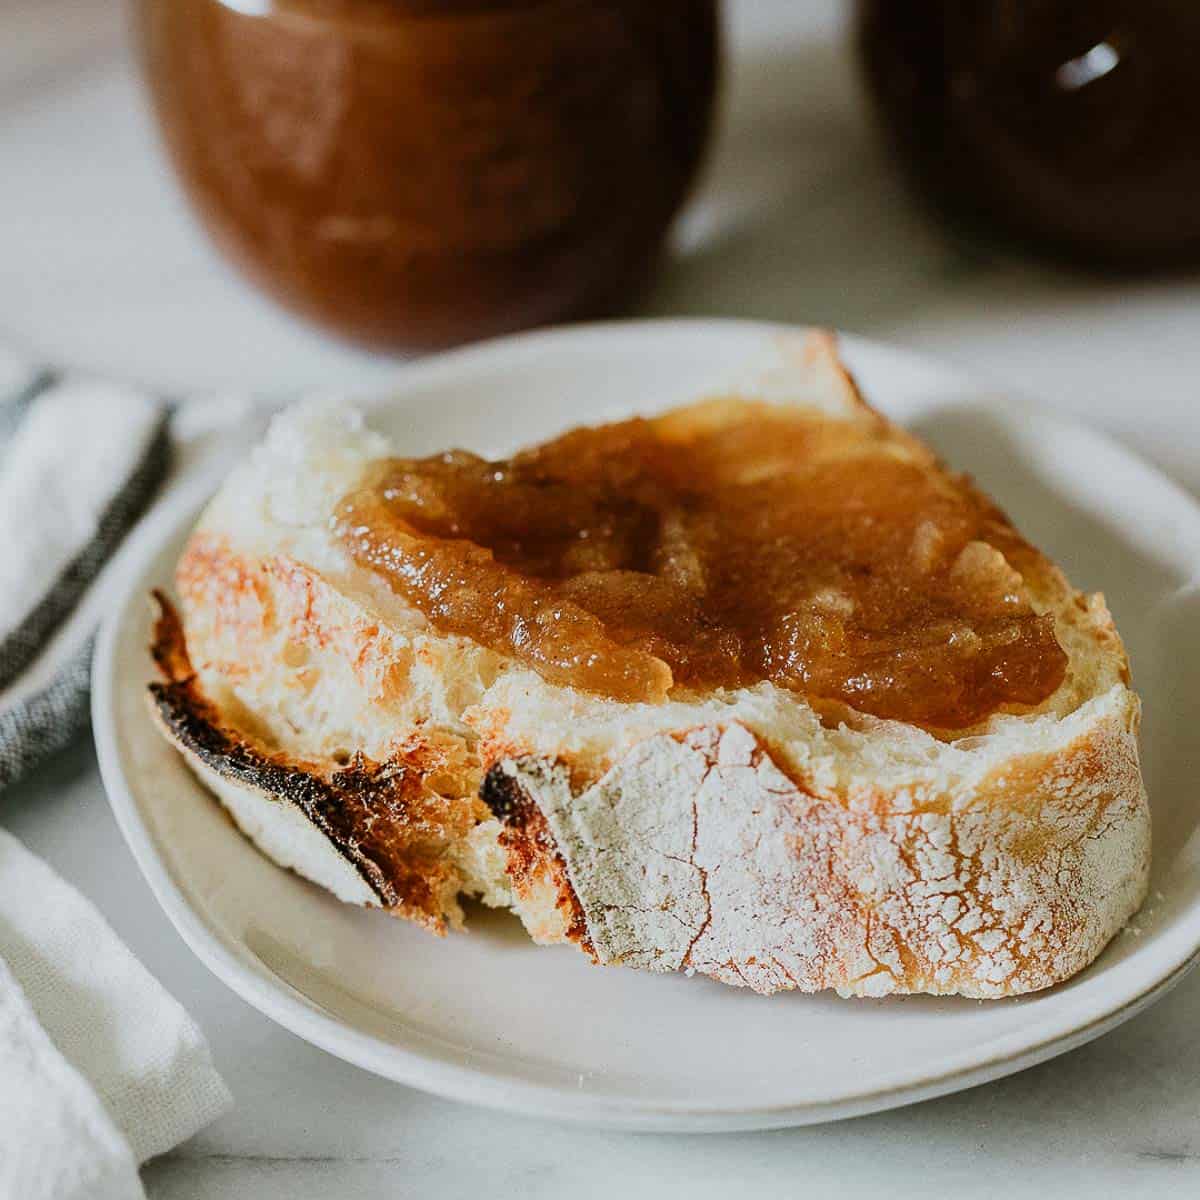
Top with homemade butter, apple butter or enjoy alongside fried eggs!
Recommended kitchen tools
- large silicone baking gloves (affiliate link)
- lodge dutch oven combo (affiliate link)
- proofing basket
Make sure to check out more of our easy sourdough recipes:
- einkorn sourdough bread
- slow cooker sourdough bread
- olive and walnut sourdough bread
- sourdough focaccia with rosemary and garlic
- honey wheat sourdough sandwich bread
I hope you enjoy this recipe. Let us know how it turns out by leaving a message in the comment section below!
Don't forget to pin this recipe for later!

Sourdough Country Loaf Recipe
INGREDIENTS
Ingredients to make ½ cup (100 g) of Active Sourdough Starter
- 1 tablespoon (15 g) sourdough starter
- ⅓ cup + 1 tablespoon (50 g) all-purpose flour
- 3 ½ tablespoons (50 g) water
Dough Ingredients
- ½ cup (100 g) active sourdough starter
- 1 ½ cups (360 g) water (30 grams divided)
- ⅓ cup + 1 tablespoon (50 g) whole wheat flour
- 3 ¾ cups (450 g) bread flour
- 2 teaspoons (10 g) fine sea salt
INSTRUCTIONS
Feed Your Sourdough Starter
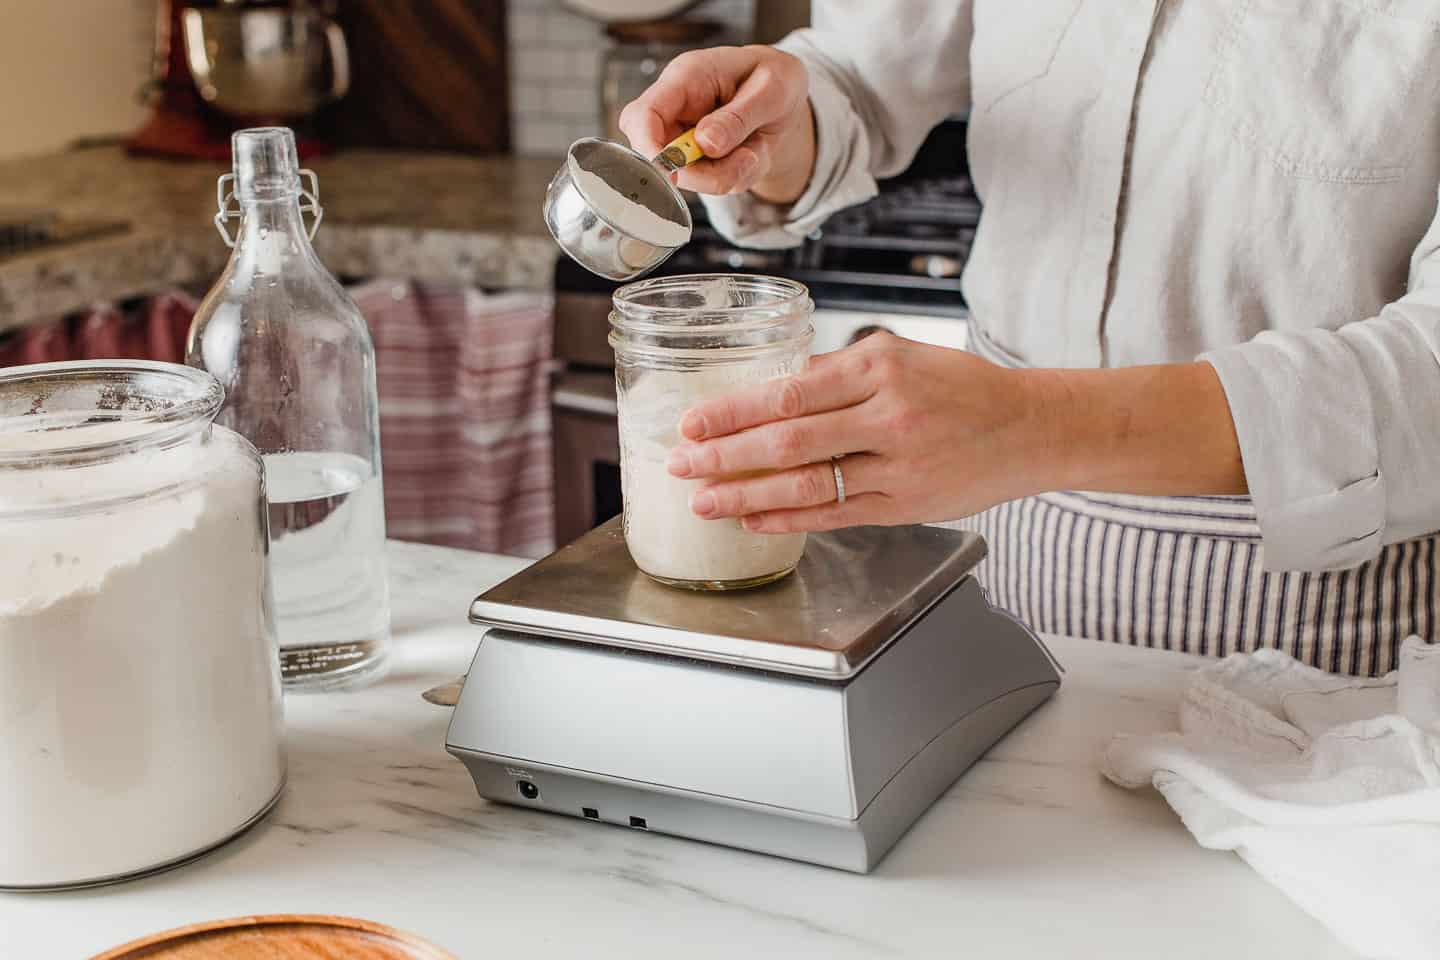
- 12 hours before you plan to mix the dough, add the ingredients to make ½ cup (100 g) of active sourdough starter to a clean jar. Stir until combined, loosely cover the jar and let the starter rise at room temperature. (The ingredients will create a total of 115 g active starter but, because some of it will stick to the sides of the jar during the transfer, we are making a little more than needed.) The sourdough starter is ready to use when it has doubled in size and there are plenty of bubbles on the surface and sides of the jar.
Make the Dough
- Autolyse (1 hour): In a mixing bowl, add 330 grams of water and 100 grams active sourdough starter, stir to combine. Add 50 grams whole wheat flour and 450 grams bread flour and use your hands to combine the ingredients until there are no dry bits and the dough looks like a shaggy mass. Cover the bowl and let the dough rest on the counter for 1 hour.
- Add salt (1 hour): Add 10 grams of salt to 30 grams of water in a small bowl and stir to dissolve. Add the salt water to the dough and use your hands to work it in until well combined. Cover the bowl and let rest on the counter for 1 hour.
- Bulk Fermentation (3-5.5 hours): Perform 3 sets of stretch and folds, 30 minutes apart. To perform a set, while the dough is still in the bowl, pick up one side with a wet hand. Pull it up and over itself. Turn the bowl and repeat this action on 4 sides of the dough until the bowl has come full circle. (See notes)Cover the dough and allow to ferment at room temperature for 1-3 more hours according to the following temperatures. 68°F (20°C) 2-3 hours70°F (21°C) 2-2.5 hours72°F (22°C) 1.5-2 hours75°F (24°C) 1-1.5 hoursThe dough is ready for shaping when it has risen about 20-30% and has bubbles around the edges of the bowl.
- Shaping: Turn the dough out onto a lightly floured surface and use a bench scraper to form it into a loose ball. Cover and let rest for 20 minutes. Lightly flour the surface of the dough ball and use a bench scraper to turn it over. Final shape the dough by pulling the side nearest yourself up and towards the center of the dough. Repeat on all fours sides of the dough. Flip the dough over, seam-side down, and use your hands to twist the dough on the counter. Cup the dough with your hands and gently pull it towards yourself to create a tight skin on the outside. Flour the outside of the dough ball. Flour the inside of a banneton and place the dough ball into the banneton, seam-side up. Cover the bowl with a large plastic bag and let rest on the counter for 30 minutes.
- Second Rise (8-36 hours): Place the covered dough in fridge to cold ferment 8-36 hours.
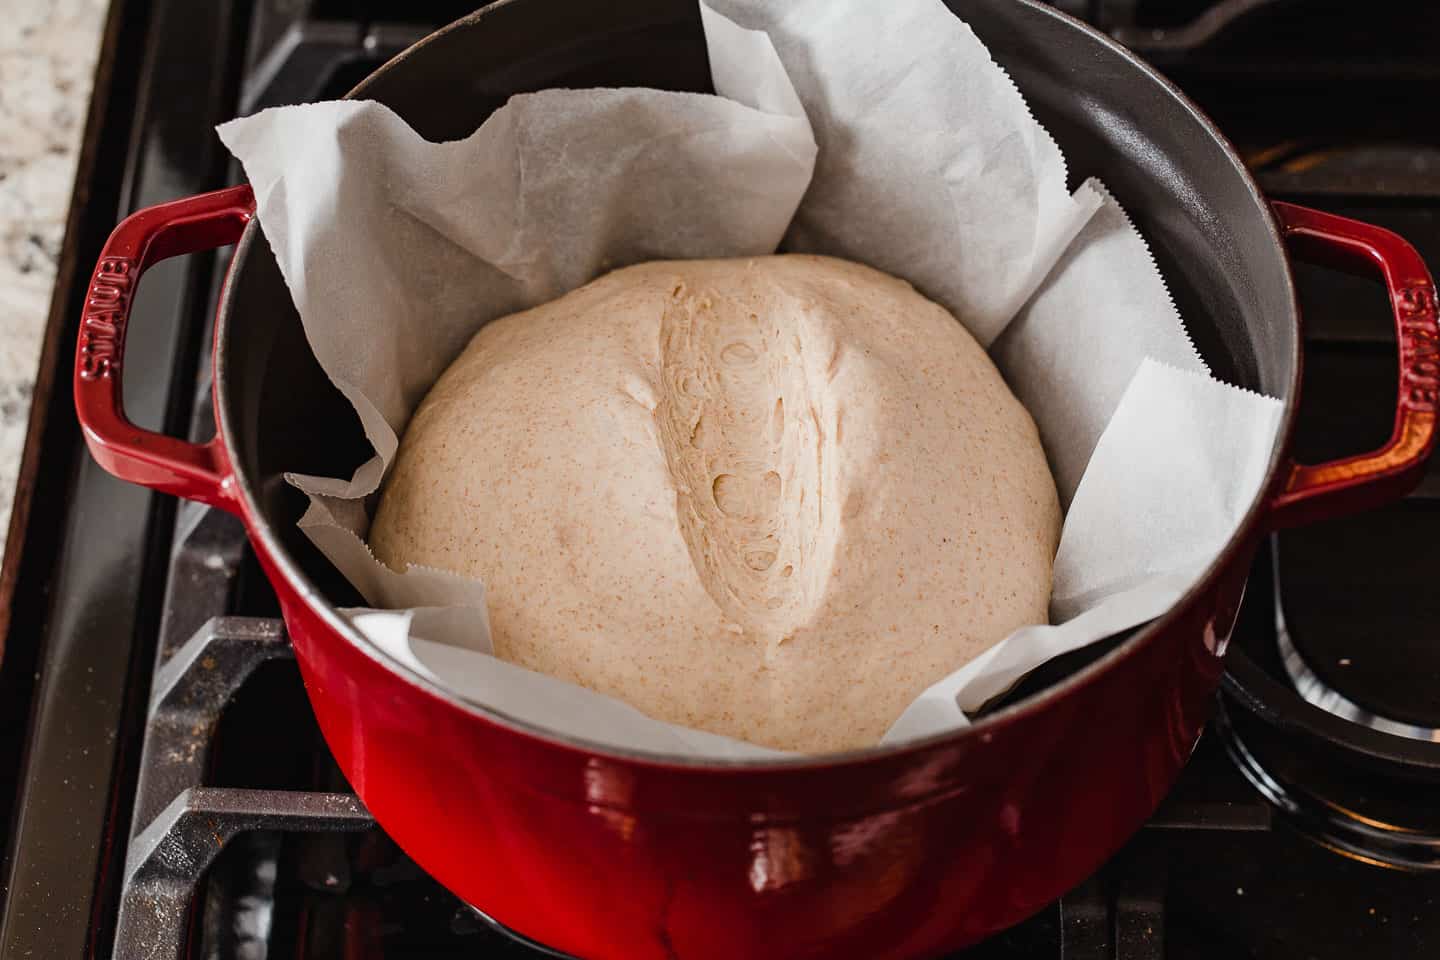
- Score and Bake: Remove the dough from the fridge and let sit at room temperature for 30 minutes. Preheat the oven, with the dutch oven inside, to 500°F (260°C) for 30 minutes.Turn the dough out onto a piece of parchment paper and score the top with a razor. Remove the dutch oven and place on stove-top. Use the parchment paper as a sling and lift the dough up and into the dutch oven. Cover, turn oven down to 450°F (232°C) and bake for 20 minutes. Remove the cover and bake an additional 25-30 minutes or until the crust is at the desired color.
- Let the bread cool on a cooling rack for 2 hours before cutting.
NOTES
- This recipe is my original "Beginners Sourdough Recipe" from Amy in the Kitchen, cut in half. Double the quantities for 2 loaves. (Click on the link for the original recipe.)
- Use the scoop and level technique to measure your flour if you do not have a kitchen scale. To do this, use a spoon to fluff up the flour in the bag. Use a spoon to scoop the flour into a measuring cup until it is heaped on top. Take a butterknife and level off the top. This should give you the most accurate measurement for flour.
- Take care to be gentle with the dough during the stretch and fold process. Only stretch the dough until it starts to tighten and no more. These 3 sets should take 1.5 hours to complete.
- Use large silicone gloves when bread baking to protect hands and forearms from burns.
- During the first rise (bulk fermentation), if your kitchen temperature is warmer than 68°, check the dough 1.5 hours after the last stretch and fold to make sure that it does not over proof. The dough is ready for shaping when it has risen about 20-30% and has bubbles around the edges of the bowl.
- Tips for baking in warm and/or high humidity areas - When baking in high humidity and/or warmer areas, it's often a good practice to use less water and bake a little longer than the recipe calls for. Reduce the water by 50 grams in the initial mix and then slowly add the remaining water until you achieve the correct hydration level. Bake the bread about 5-10 minutes longer with the lid on, remove the lid and bake until done. This will take some trial and errorLet the loaf cool completely before slicing to prevent the crumb from becoming gummy in texture.
- Store your bread at room temperature, wrapped in a kitchen towel or beeswax wrap. You can also store the bread, slice down, on a cutting board with a cake stand top covering the bread. It is not recommended to store sourdough bread in the fridge as it will become hard.
- Freeze full loaves or individual slices wrapped tightly in plastic wrap and inserted into a freezer-safe container for up to 3 months.
Delicious! This recipe was recommended to try as I'm late to the sourdough game, and each time it's baked up perfectly (even if my dough didn't look exactly right). Definitely a keeper!
Thank you Jennifer! 🙂
I love this recipe! This loaf has such great flavor compared to just a simple recipe with only bread flour and room temp fermentation. Delicious! Question though, every time I make this loaf it is a little more sticky than I’m used to, not super wet but is rather loose and hard to remove from my banneton. Even though it doesn’t hold its shape well when I turn it out onto parchment paper, it always rises fairly well in the oven and turns out lovely. Should I try using less water? My starter is whole wheat so maybe that plays into it? I also don’t feed it the same ratio as you suggest (I do 1:1:1) so maybe that’s it?
Hi Amy! This is my favorite sourdough recipe - thanks so much! If I'm not around to do the stretch/folds for the first couple of hours, could I knead it and then leave it to bulk ferment? If so, how long should I knead it?
Thank you!
Hi Susan! Yes, you can knead it for about 10 minutes or until it becomes elastic and stretchy. You are looking to develop those gluten strands!
Hi Amy! My starter has been on pause in my refrigerator. It is still very bubbly and hasn’t deflated. Can I use it straight out of the fridge or do I need to feed it first before starting the recipe? Thanks!!
Hi Angie! That's a good question, and the answer is maybe. If the starter hasn't deflated then it will probably be ok to use. It kind of depends on how strong your starter is. I would give it a try if it was me and see what happens. That way at least you'll know for the next time!
My first attempt at this recipe my dough was so dry prior to adding the salt water and after adding the salt water it would not blend together at all . Not sure where I went wrong .thanks
Hi LuAnn, did you use a scale to measure the ingredients? I find that people run into this kind of issue when they use measuring cups instead of weighing on a scale.
Our family loves this bread and we make it every couple weeks! Every time I make it though, the bottom gets dark and I end up having to slice the bottom portion off. Any recommendations?
Also, do you have a variation for this recipe with cinnamon and raisens?
I place a cookie sheet under the dutch oven while it is baking and it really helps the bottom to get less dark.
This turned out to be one of my best sourdough breads I have made I used Einkorn for the whole wheat. Thank you so much for the recipe and making it easy!
Have made this three times now and always comes out great. Thanks, Amy.
I've baked this loaf many times, and it's always amazing - Especially toasted!
I would like to bake a few loaves ahead and freeze them as whole loaves. After thawing, would it be recommended to warm the loaves in the oven to help make the crust crispy?
Thank you! 🙂
Hello-Does this need to have a lid? I have made it many times but I wonder if it would rise more/better without the lid to bump up against?
Having the lid on during the first part of baking helps with the oven spring. It traps the moisture inside and makes the dough rise more than if it's not on. You can certainly try it and see if it rises to your liking without the lid!