Sourdough Biscuits

Use leftover sourdough discard to make these light and fluffy sourdough biscuits! They're super easy to make, and you can bake them right away or let the dough ferment overnight for extra flavor.

Sourdough baking isn't just for bread! You can make cinnamon rolls, crackers, pancakes or sourdough waffles, and these melt-in-your-mouth buttermilk biscuits with your sourdough starter.
This simple sourdough recipe is great for beginners and home bakers who want to make homemade biscuits anytime you're in the mood.
Serve the biscuits hot from the oven with butter and strawberry jam, or use them for breakfast sandwiches with eggs and cheese!
Sample baking schedule
This easy sourdough biscuit recipe can be baked right away or left to ferment overnight for more flavor. If you want to ferment the dough, mix it before bed and bake it the next morning!
- 8 PM: Mix the biscuit dough, cover, and let rise at room temperature for 10-12 hours.
- 8 AM: Preheat your oven. Add the salt, baking powder, and baking soda to the dough and cut out the biscuits. Bake for 25-30 minutes.
Ingredients needed
- sourdough starter discard: This recipe was created to use leftover sourdough discard, but active starter works just as well.
- all-purpose flour: For the lightest, fluffiest biscuits, use an all-purpose flour with a low protein content. While most all-purpose flours have a protein content of around 12%, White Lily flour has a 9% protein content, which makes for a light and fluffy biscuit. Gold Medal all-purpose flour comes in at a 10.5% protein content.
- butter: These biscuits can be made with regular butter or plant-based butter for a dairy-free option.
- buttermilk: Buttermilk adds extra tang to the biscuits, but you can use any milk, whether regular or plant-based.
- sugar: Granulated sugar adds just a touch of sweetness.
- baking powder and baking soda: These two ingredients help the biscuits rise in the oven. If you're fermenting the dough overnight, be sure to add them right before cutting the dough for baking. Replace baking powder and baking soda every 6 months because they lose their strength over time.
- salt
Equipment
- cheese grater: A cheese grater or box grater is the fastest and easiest way to prepare butter for biscuits and pie crust. If you don’t have a cheese grater, cut cold butter into small cubes with a knife. Then, use a pastry cutter or fork to mix the butter into the flour. You can also use your hands to rub the butter into the flour.
- cast iron skillet: We use a cast iron skillet whenever possible. If you don’t have one, you can place the biscuits on a baking sheet or in a baking dish, leaving about ¼ to ½ inch of space between each biscuit.
- biscuit cutter: You can use a cookie cutter or a regular-mouth mason jar instead of a biscuit cutter.
How to make sourdough biscuits from scratch
These sourdough biscuits couldn't be easier to make. So, let's dive straight into the details and get these delicious biscuits on the table!
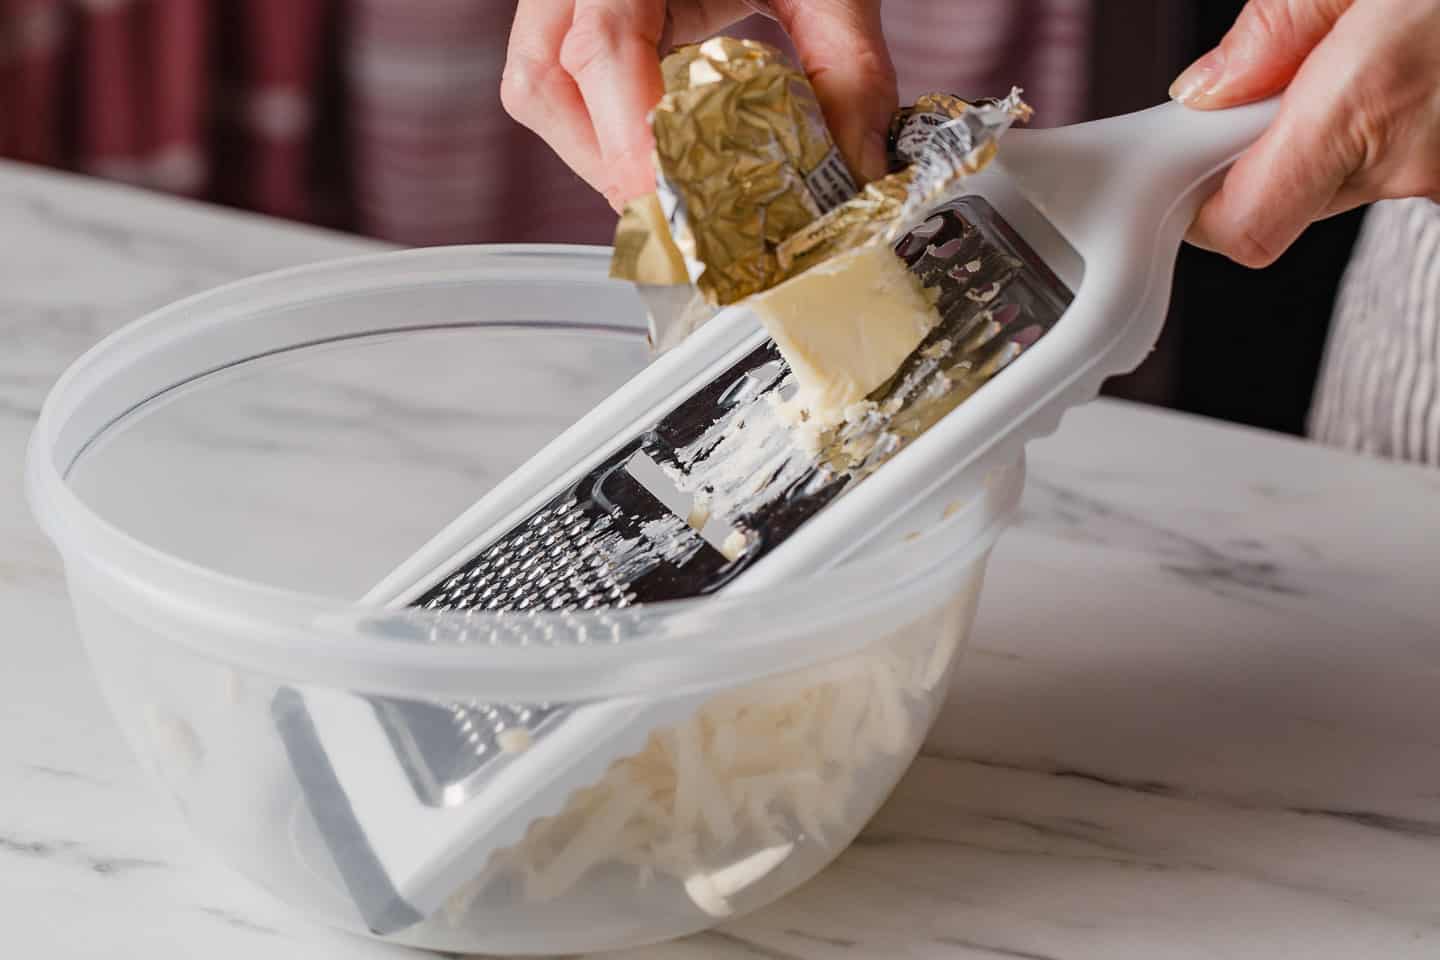
Step 1
Hold a cheese grater over a large mixing bowl and grate the cold butter into the bowl.
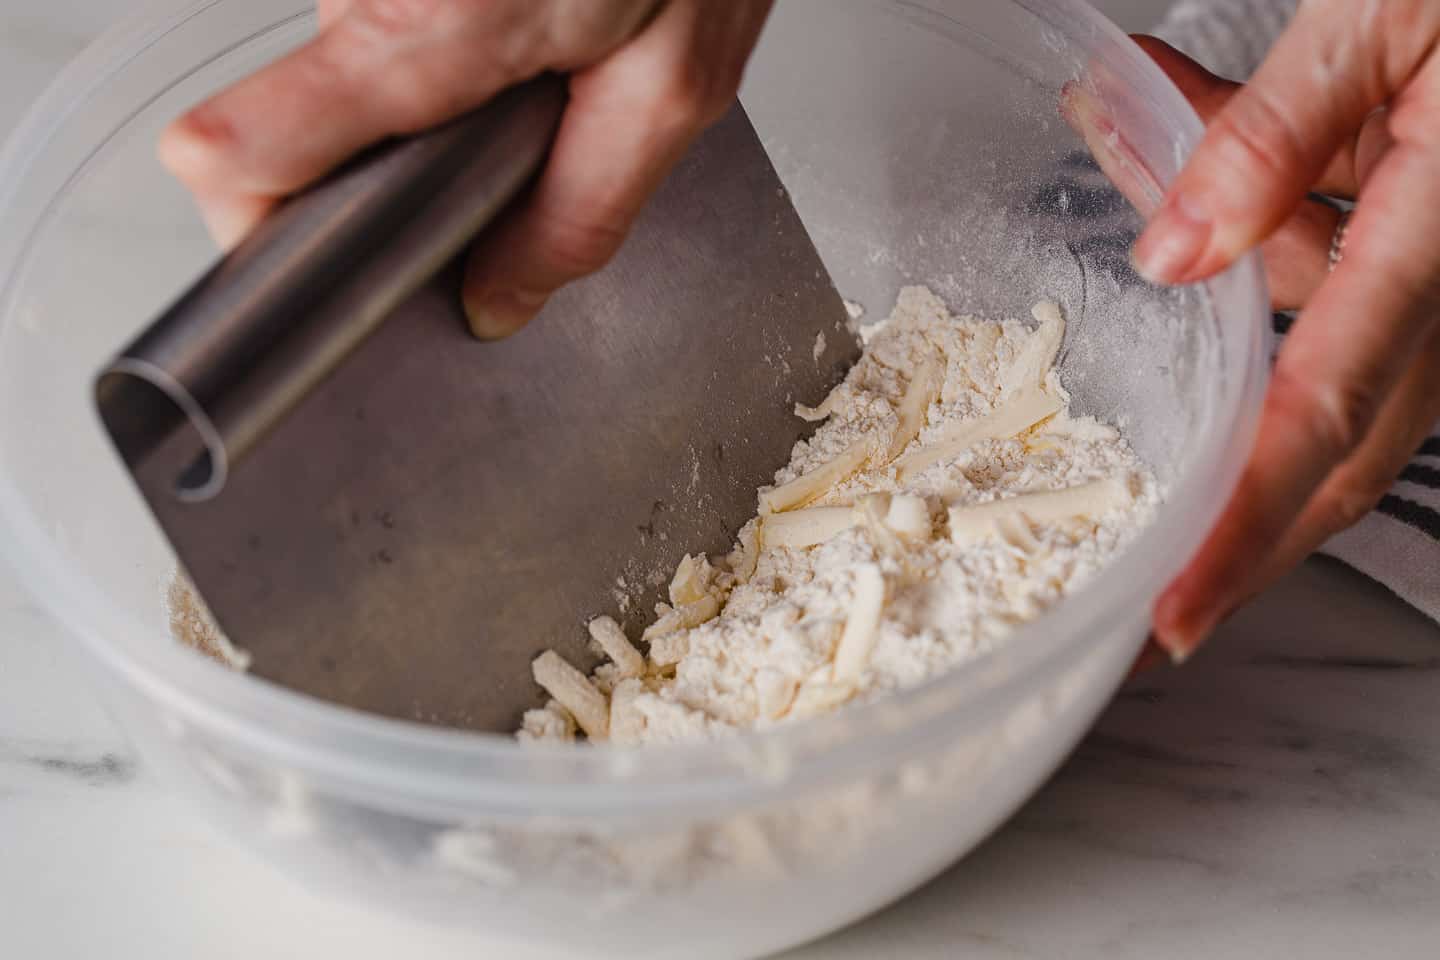
Step 2
Add the flour to the bowl and use a bench scraper to cut the flour into the butter by using a chopping motion.
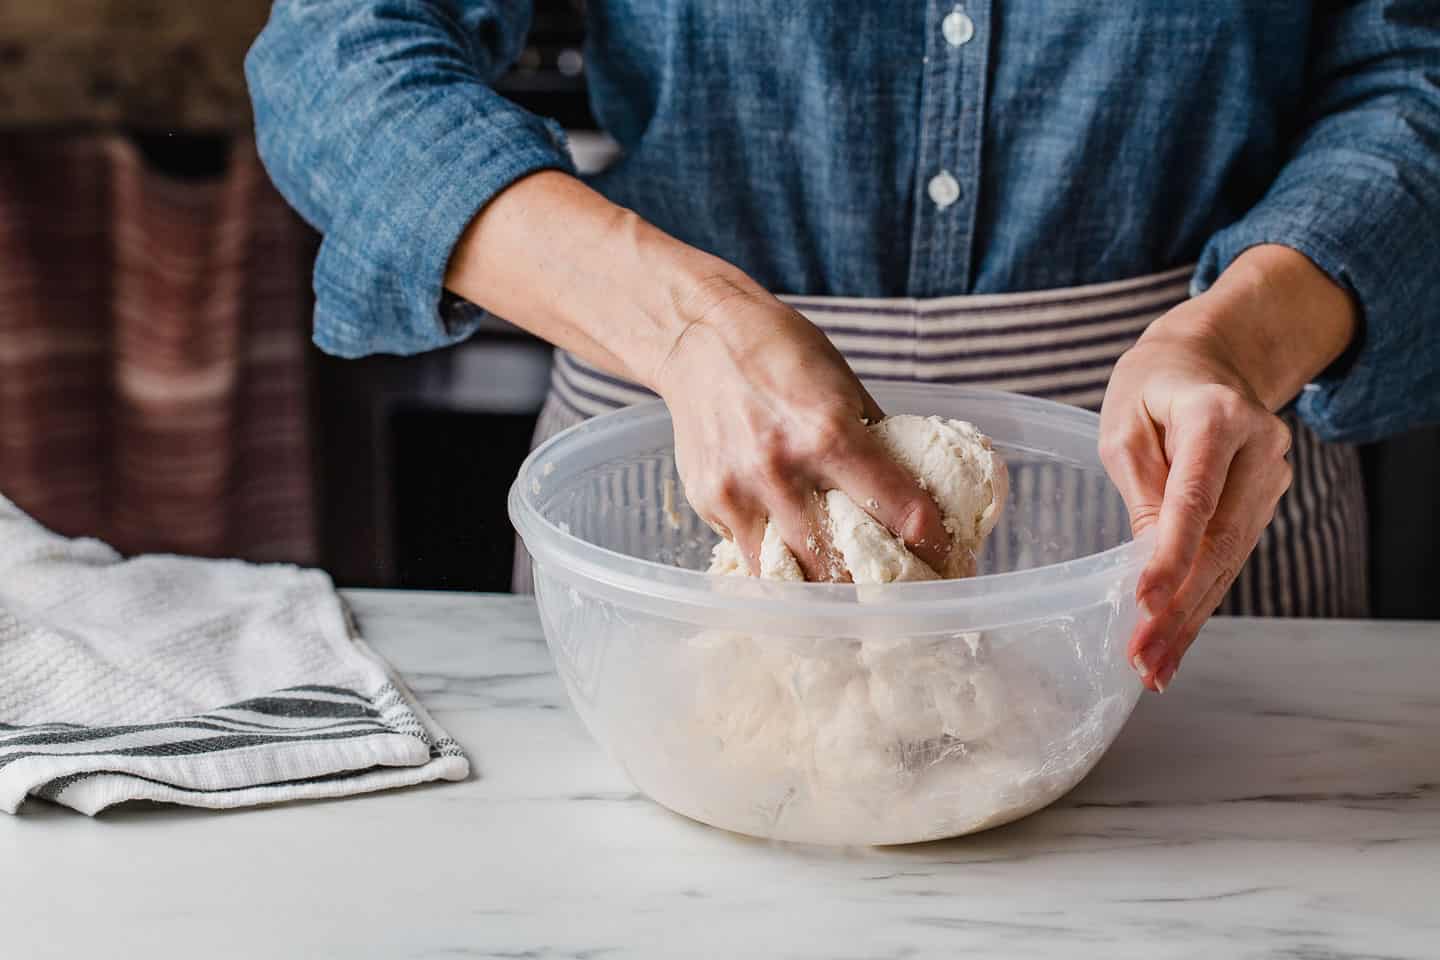
Step 3
To bake right away: Add the buttermilk, sourdough discard, baking soda, baking powder, and salt, and mix until well combined with a stiff spatula, switching over to your hands to bring the dough together.
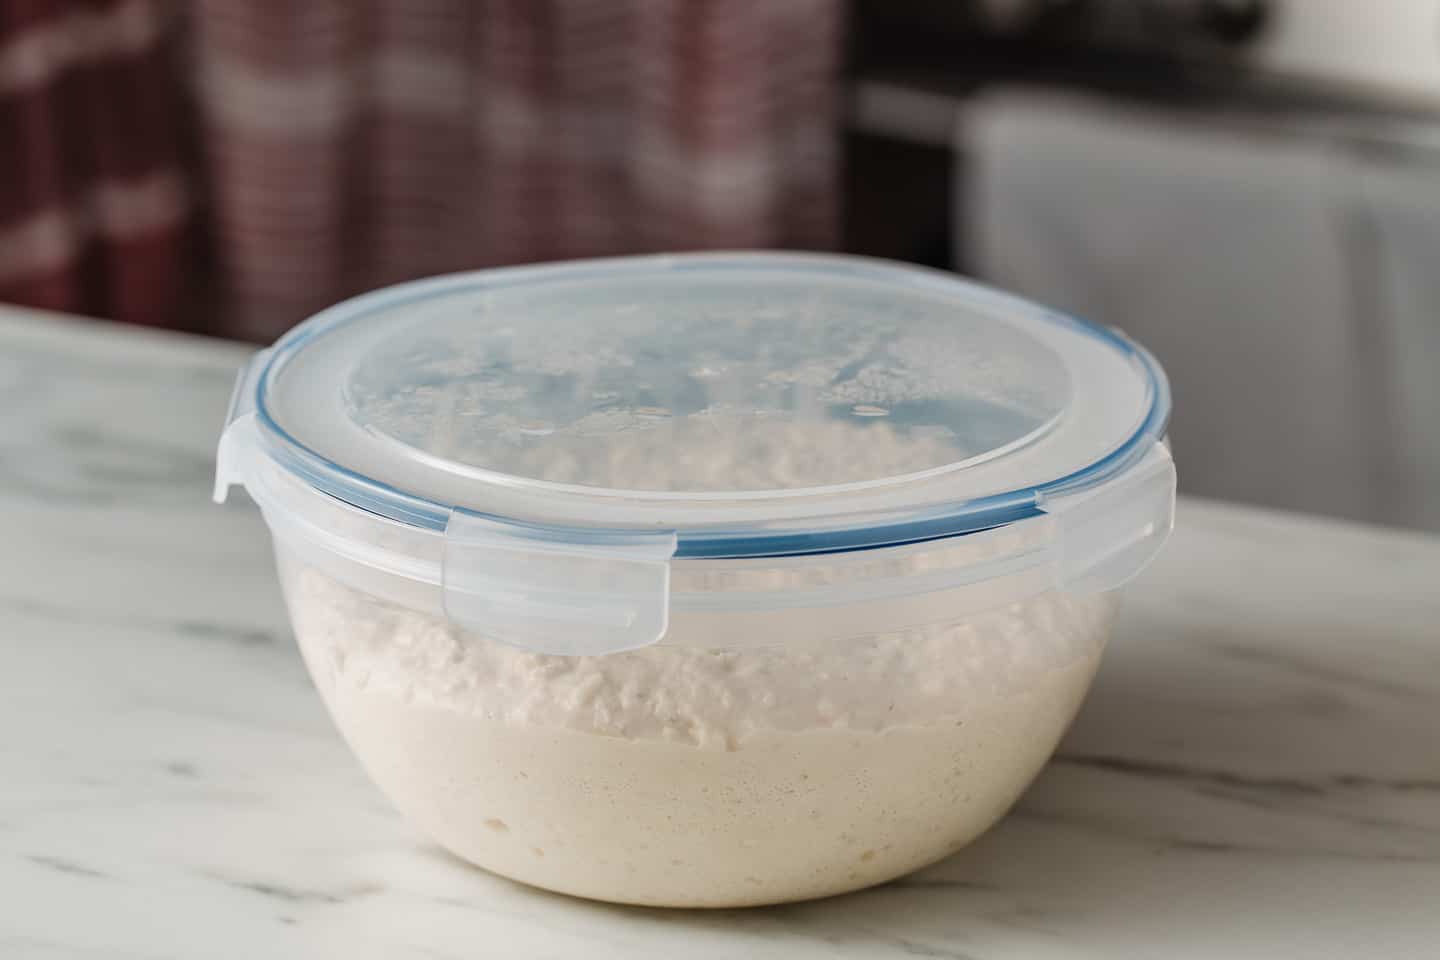
To ferment overnight: Add the buttermilk and the sourdough discard and stir until combined. Cover the bowl and let rise at room temperature for 10-12 hours.
Step 4
Preheat the oven to 400°F (204°C) and lightly grease a 12-inch cast iron skillet.
If the dough has been fermenting overnight, mix the salt, baking soda, and baking powder in a small bowl and then pour them over the dough. Use your hands to mix them well.
If you don't break up the lumps of baking soda and baking powder before adding them to the dough, your biscuits might end up with brown spots.
Step 5
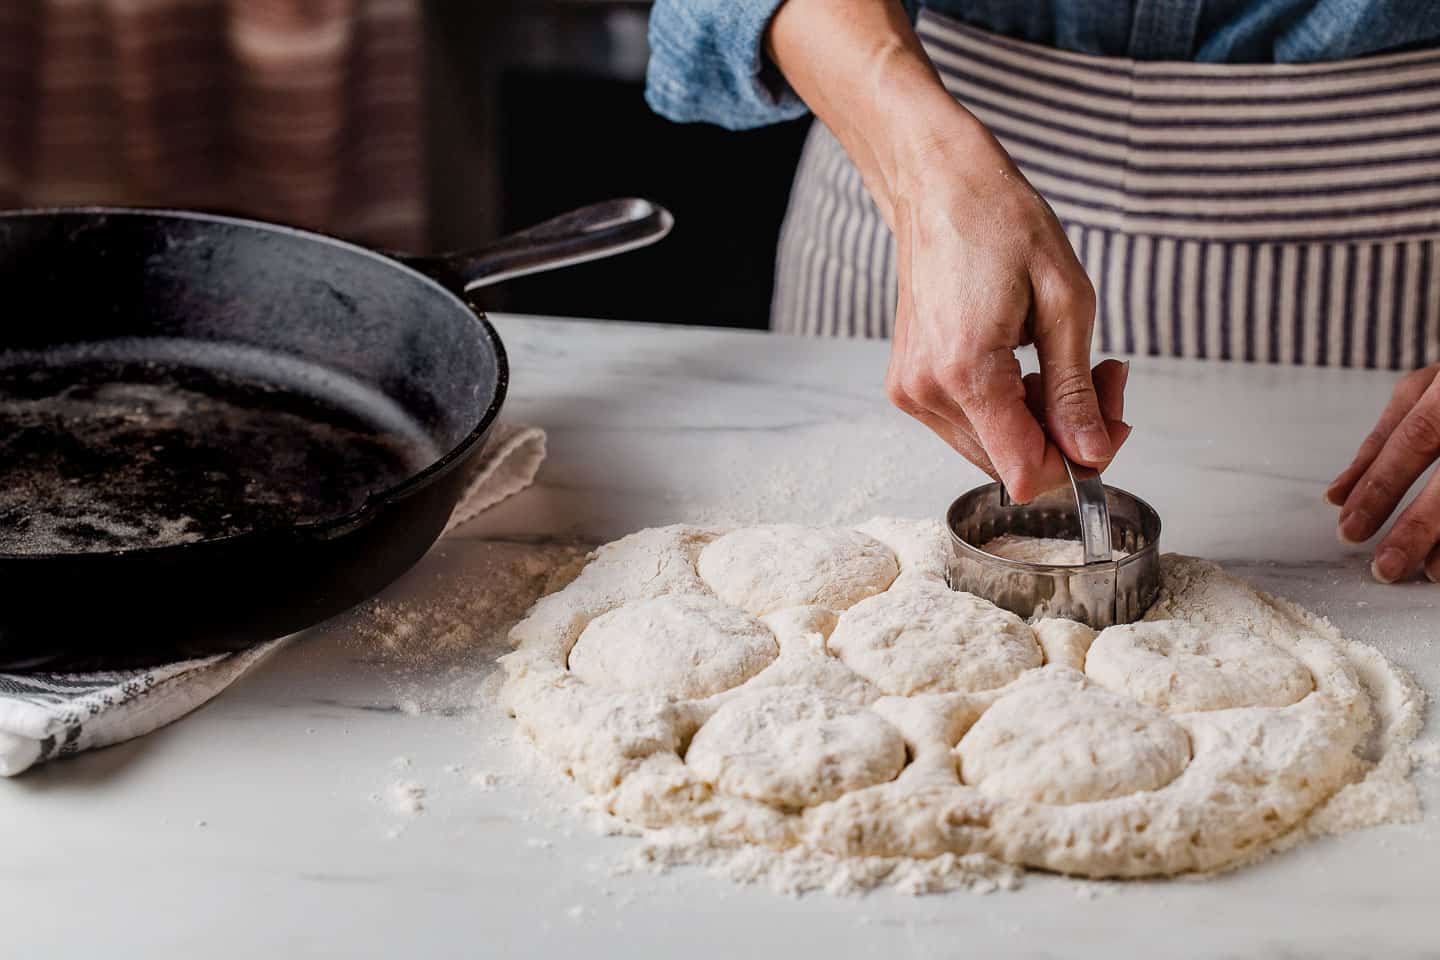
Flour your work surface generously and turn out the dough. Sprinkle flour on top of the dough, then pat it into a 1-inch thick rectangle. Cut out biscuits and gather the scraps to cut more until you have 12 biscuits.

Step 6
Arrange in a cast iron skillet and bake for 25-30 minutes.
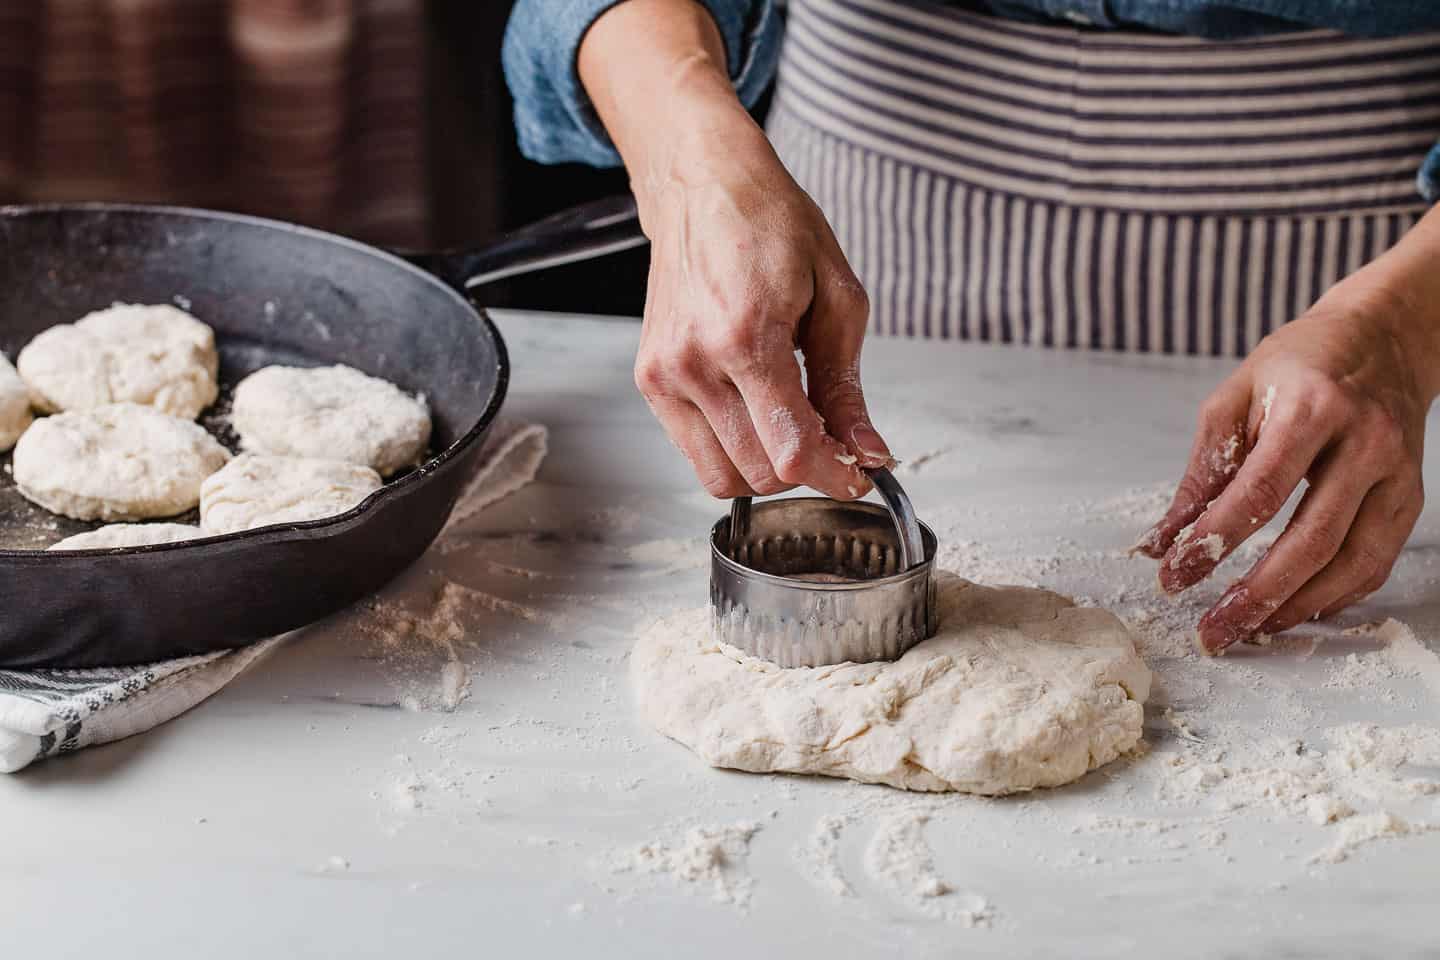
How to cut biscuits
For cutting out biscuits, use a biscuit cutter with a sharp edge. Dip it in flour to keep it from sticking. Press it down onto the dough, wiggle it to separate the biscuit, and lift straight up. Avoid twisting the cutter when cutting as this will seal the edges and prevent them from rising to their full potential!
Serve
Serve the biscuits hot from the oven with homemade butter and honey, or your choice of apple butter, cherry jam, or strawberry jam. They are delicious with sausage gravy and eggs.
They can also be used in our breakfast casserole or blueberry bread pudding.

How to Store
Keep your biscuits at room temperature in a covered container for up to a week. Avoid storing them in the fridge, as they will get hard.
For longer storage, wrap individual biscuits tightly in plastic wrap and place them in a freezer-safe container for up to 3 months.


Subscribe to our newsletter and we'll send you more fresh recipes, valuable troubleshooting advice, useful tips, and other information we believe will be helpful to you!

Sourdough Biscuits Recipe
EQUIPMENT
- Mixing Bowl
- Bench-Scraper or pastry cutter
- 3" Biscuit cutter
- 12" cast iron skillet or baking sheet
INGREDIENTS
Initial biscuit dough mix
- 2 ½ cups (300 g) all-purpose flour (See notes)
- 8 tablespoons (113 g) unsalted butter (cold)
- ½ cup (125 g) sourdough starter discard
- 1 cup (240 g) buttermilk (or milk)
- 1 tablespoon (15 g) sugar (optional)
To add before cutting out
- 1 teaspoon (5 g) fine sea salt
- 1 ½ teaspoon baking powder
- ½ teaspoon baking soda
INSTRUCTIONS
Mix the dough (choose one option)
- To bake right away: Grate the butter into a large mixing bowl. Add the flour and use a bench scraper or fork to mix the butter into the flour until it looks like small pea-sized crumbs. Then add the sourdough starter discard, buttermilk, sugar, baking powder, baking soda, and salt. Stir with a stiff spatula until everything is well combined. Use your hands to ensure there are no dry bits left. Let the dough rest while you preheat the oven.
- To ferment overnight: Grate the butter into a large mixing bowl. Add the flour and use a bench scraper or fork to mix the butter into the flour until it looks like small pea-sized crumbs. Then add the sourdough starter discard, buttermilk, and sugar. Stir with a stiff spatula until everything is well combined. Cover the bowl and let it rise on the counter for 10-12 hours.Right before you are ready to cut out the biscuits, mix the salt, baking soda, and baking powder in a small bowl with a fork, breaking up any lumps. Sprinkle half of this mixture over the dough and work it in with your hands. Then sprinkle the remaining half and keep mixing until everything is fully combined.
Cut out and Bake
- Preheat your oven to 400°F (204°C). Lightly grease a cast iron skillet with butter and set aside.
- Generously flour your work surface and turn the dough out onto it. Flour the top of the dough and use your hands to press it into a rectangle shape that is 1 inch in thickness. Use a biscuit cutter to cut out biscuits, pressing straight down and pulling straight up. *See notes.
- Arrange the biscuits in a 12" cast iron skillet and bake for 25-30 minutes, or until the tops are golden brown. Remove and serve warm.
NOTES
- White Lily and Gold Medal all-purpose flour are low in protein and will give you the lightest, fluffiest biscuits.
- Active sourdough starter can be used instead of discard. Make sure to add the salt to the initial mix. (Omit the baking powder and baking soda.) After cutting out the biscuits, let them rise in the skillet for 60-90 minutes before baking.
- Do not twist the biscuit cutter when cutting out the biscuits. The twisting motion will seal the edges, making it harder for them to rise.
Overall, this recipe had great flavor. I would like it if the biscuits were a bit taller and fluffier. I used the same day recipe so I’m wondering if I allowed them to bulk ferment overnight if that would make a difference. I did freeze my butter before grating it.
I love this recipe and so does my family! I’ve made it too many times to count and it’s my go to for discard biscuits. I do the long fermentation and add baking soda at the end. Thank you for such a great, reliable recipe made almost weekly in our house!
This is my second time making it now. I’m a beginner with sourdough and these are easy to make and delicious. My only addition was to brush butter over them before baking. I mean, what else do you do with the little hunk of butter after you’ve buttered the cast iron, right?
This is my 4th time baking this recipe in the past month. Every single time, the biscuits turn out with light & fluffy insides with a nice light outer crunch.
Without question, my new favorite biscuit recipe. No need to look any further, this is the one!
Easy recipe. Thank you for sharing. I used this as a guide because I had to substitute as I did not have all ingredients and had things to use up to prevent waste.
I used self-rising flour as I was low on AP. I JUST OMITTED THE BAKING POWDER and CUT SALT IN HALF due to this switch.
I raise pigs so I have tons of lard. I substituted lard for butter.
Finally, I didn’t have buttermilk so I used half whipping cream and half water.
I only share the substitutes in case anyone else finds they don’t have specific ingredients and want the same results.
Again, thank you for sharing all your sourdough discard recipes!
Many times! Both ways. The best!
I thought these biscuits were really good - tender & fluffy and crisp on the outside from baking in the cast iron skillet. I followed the “bake right away” instructions and found the dough to be really slack, more like drop biscuits instead of rolled/cut biscuits. I used the 3” cutter as recommended and found the biscuits to be way too large; more like the size of hamburger buns. They had spread when I baked them. I only baked 4 of them and froze the rest.
I think next time I make I’ll add more flour. Amy do you have any suggestions?
Husband grew up in the south and feels he’s an “expert” on biscuits. Through 30+ years of marriage I have tried making them but they were never up to his standard. He said, and I quote ‘these are the best biscuits he’s ever had’. He thought because they were sourdough that they would be dense but they were quite the opposite, super light and soft and went perfect with sausage gravy. I made the dough last night about 5pm and cooked them up this morning at 6:30am letting them bulk ferment in my cool kitchen. I baked in my convection oven for 25 minutes and they were PERFECT!