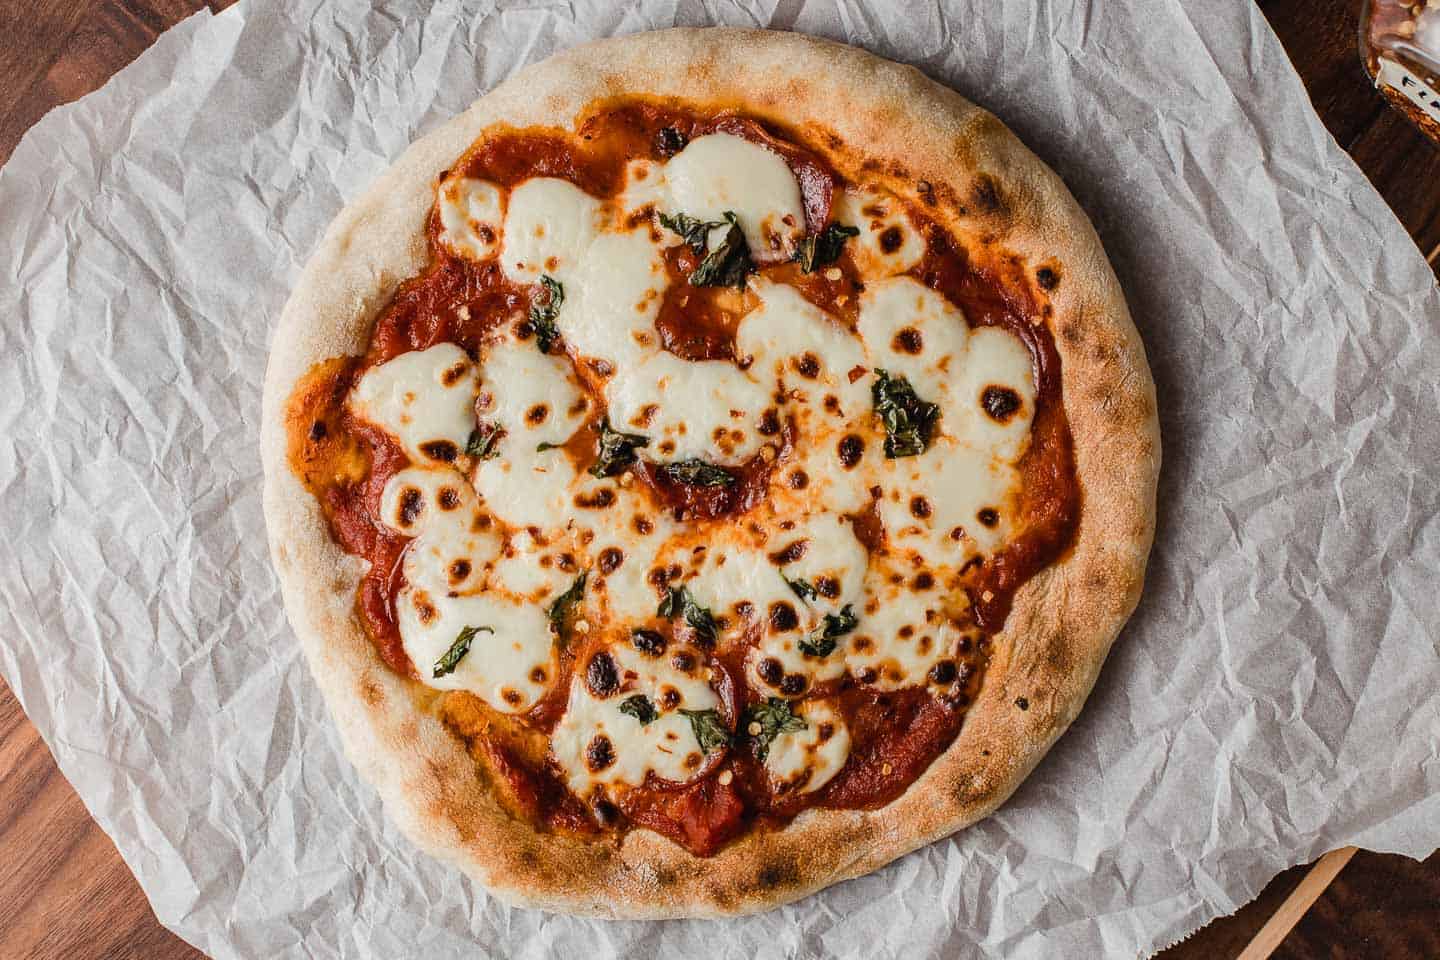
Sourdough Pizza Crust


There's no pizza like sourdough pizza! It has a crispy, chewy crust that is perfectly charred on top and bottom and loaded with all the good stuff. We've developed an easy overnight dough that will hold all your favorite pizza toppings and bake to perfection every time, with or without a pizza peel. Get your stretchy pants ready because you won't be able to eat just one slice!
Jump to:
- Amy's Notes
- Sample baking schedule
- Ingredients & Substitutes
- Equipment Needed
- How to Make Sourdough Pizza in a Cast Iron Skillet
- Tip For Shaping The Dough
- How to Bake Sourdough Pizza on a Pizza Stone
- Tips For Adjusting Hydration
- How to Store and Freeze
- More Popular Sourdough recipes
- Sourdough Pizza Crust Recipe

Amy's Notes
We love all things sourdough around here, and pizza crust is right at the top of the list. Especially when it's this easy to make!
This is the perfect recipe to use with your leftover sourdough starter discard. Just like our cinnamon rolls, pancakes, and sourdough biscuits, plan to make the dough the night before you want to bake.
Let the dough ferment on the counter while you sleep, and then pop it in the fridge the next morning. When you get home from work, your pizza dough will be waiting for you to bake, and you'll be ready to have dinner on the table!
This recipe makes (4) 8” pizza crusts, but you can also divide the dough in half to make (2) 16” pizzas.
Be sure to check out the recipes for homemade pizza sauce and homemade pesto. They are the perfect compliments to your pizza!
Sample baking schedule
Here's my baking schedule for family pizza night!
- 8 PM: Mix the dough the night before, cover the bowl, and let it sit at room temperature overnight.
- 8 AM: Perform one set of stretches and folds. Cover the bowl and place it in the fridge until ready to cook. (8-36 hours.)
- 5 PM: Remove the bowl of dough from the fridge.
- 5:30 PM: Cook pizzas.
Adjusting Your Baking Schedule: We test our recipes in a kitchen that’s 68-70°F. When planning your sourdough baking schedule, use our sample baking schedule as a guide, but adjust as needed. A cooler kitchen will require more time, while a warmer kitchen will speed up fermentation.
Ingredients & Substitutes
- Ingredients: Unfed sourdough discard, all-purpose flour, whole wheat flour, water, olive oil, and salt.
- Using active sourdough starter: If you want to use an active starter, reduce the amount to ¼ cup (50 g).
- Adjusting salt: We use Redmonds fine sea salt weighing 10 grams per 2 teaspoons. If using regular table salt, use 1 ½ teaspoons. If using flaky sea salt, use a heaping 2 ½ teaspoons. If you are on a low-salt diet, reduce the salt by half.
- Flour substitutes: All-purpose flour can be substituted with bread flour or 00 flour. If you make this switch, you will need to adjust the hydration level slightly, as bread flour and 00 flour absorb water differently than all-purpose flour. Add a little more or less water as needed to achieve the right dough consistency.
Equipment Needed
- Cast Iron Skillet: Cooking this sourdough pizza crust in a cast iron skillet makes all the difference! It’s so easy to go from stove-top to broiler, giving the crust a perfect char while keeping it crispy. The skillet helps achieve that golden, slightly crispy bottom while allowing a quick transition under the broiler to melt the cheese and cook the toppings. You will need a 12" cast iron skillet for the stovetop/broiler method.
- Pizza Stone and Peel: If you prefer using a pizza stone, we've got instructions for that too, ensuring a crispy crust and perfectly baked pizza every time! You will need a pizza stone and peel for the oven method.
- Baker's Scale: We use a kitchen scale for precise measurements when developing our recipes. Measuring cups can lead to inconsistent results, so keep that in mind if you’re not using a scale.
How to Make Sourdough Pizza in a Cast Iron Skillet
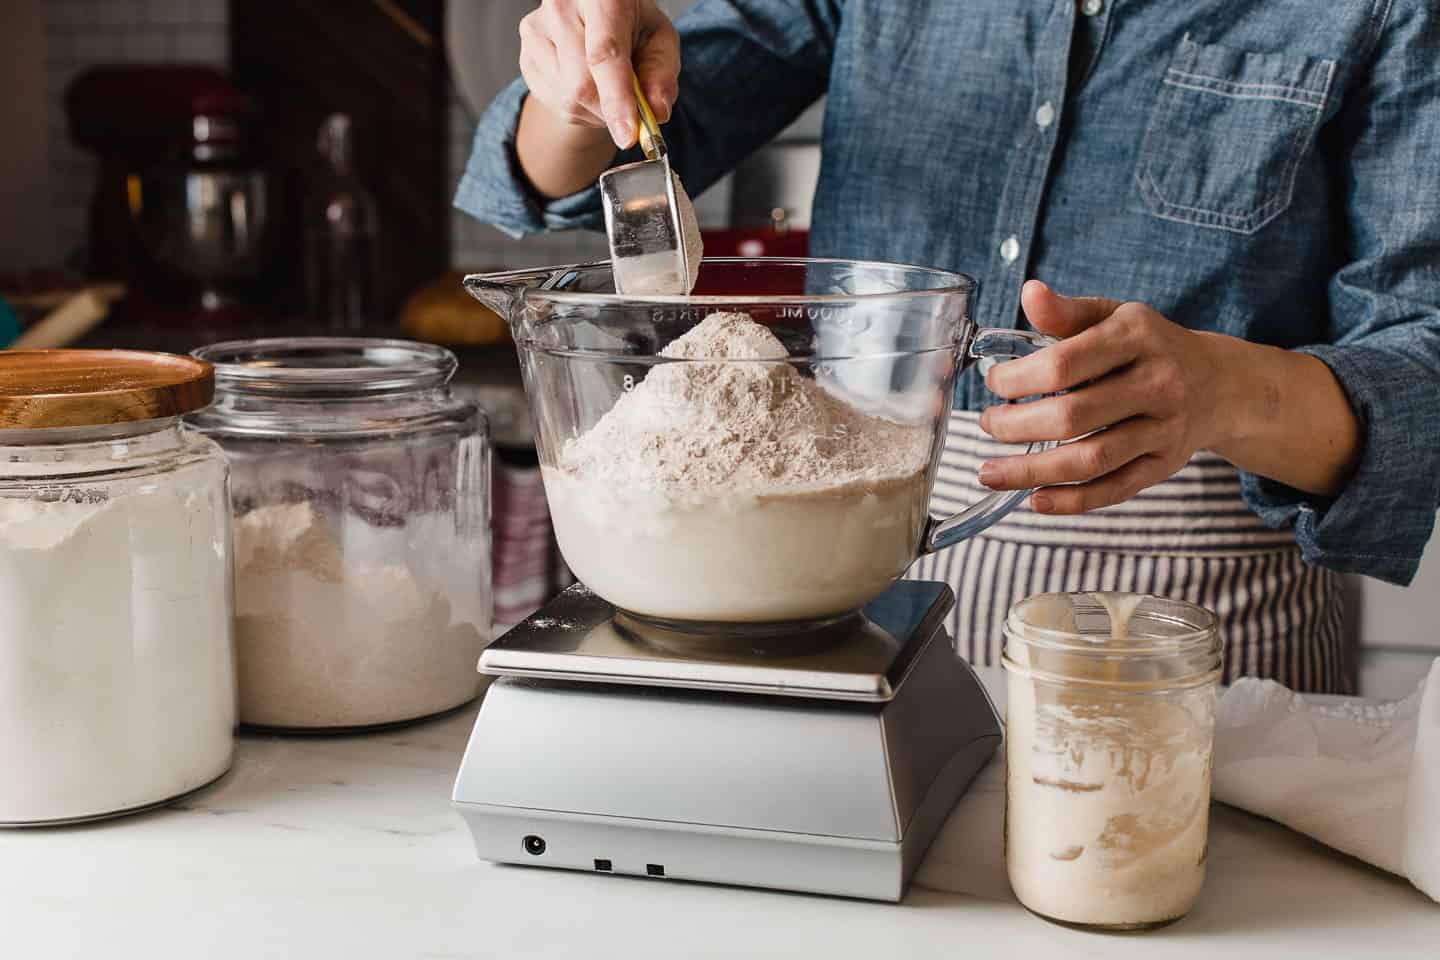
Step 1
Mix the pizza crust ingredients in a large mixing bowl until they come together and form a shaggy mass. Cover the bowl and let it ferment on the counter at room temperature overnight.
Adjusting Hydration: We’ve adjusted the recipe to 70% hydration for easier handling. If the dough feels too sticky, reduce the water by 25 grams next time. If it feels too stiff, add 25 grams.
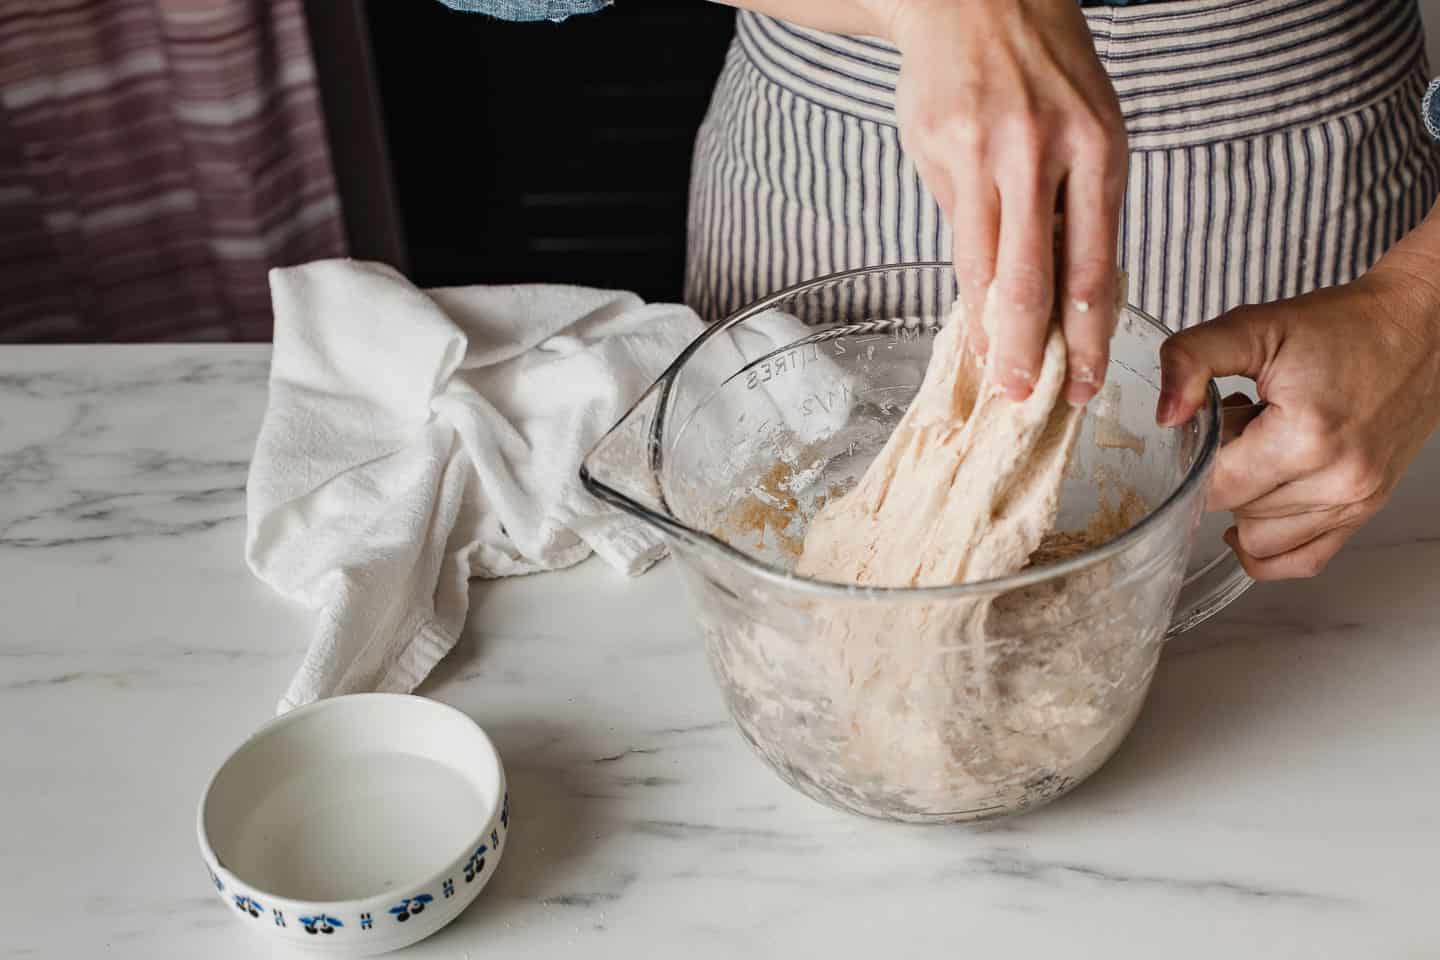
Step 2
The following morning, perform one set of stretches and folds, cover the bowl, and place it in the fridge until ready to bake. (At this point, the dough can be used to make the pizza crust if you don't want a longer ferment.)
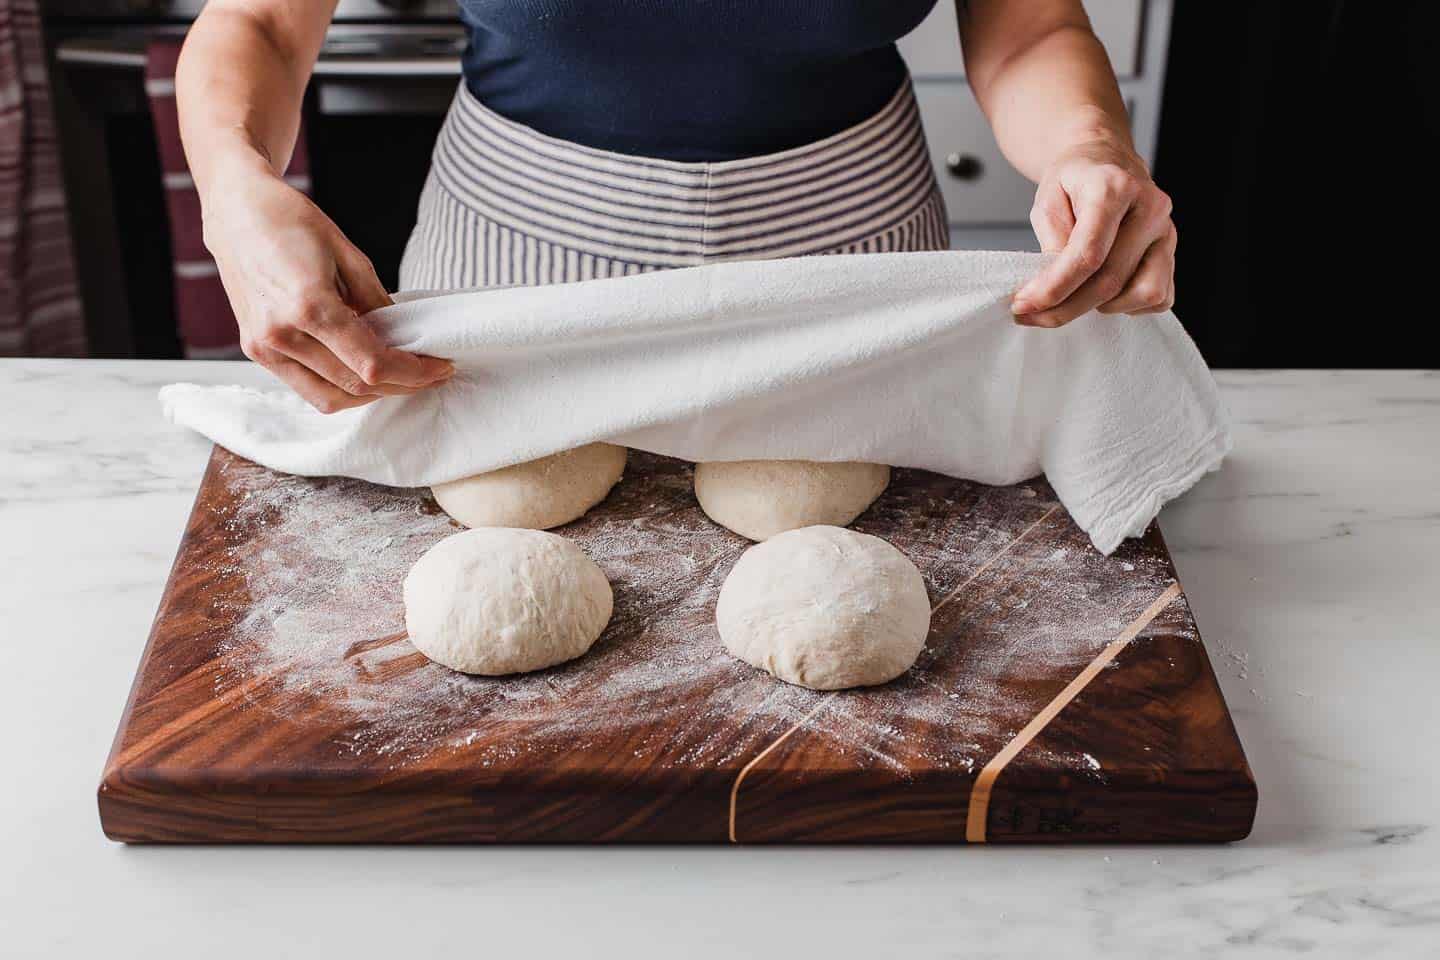
Step 3
Remove the dough from the fridge and let it sit at room temperature for 30 minutes. Divide the dough into 4 equal portions, flour your work surface, and shape each portion into a ball. Cover with a towel and let it rest for 30 minutes.

Step 4
Turn on your oven's broiler to HIGH. On a stovetop, heat a cast iron skillet over medium to medium-high heat. If needed, lightly oil the cast iron skillet to prevent sticking.
Working one at a time on a floured surface, press a dough ball into an 8" wide circle. If the dough is sticky, generously flour the work surface and the top of the dough as needed to prevent sticking.
Tip For Shaping The Dough
If the dough feels stiff and hard to shape, let it rest for 15-20 minutes. This will allow the gluten to relax and make it easier to stretch into a nice round shape.
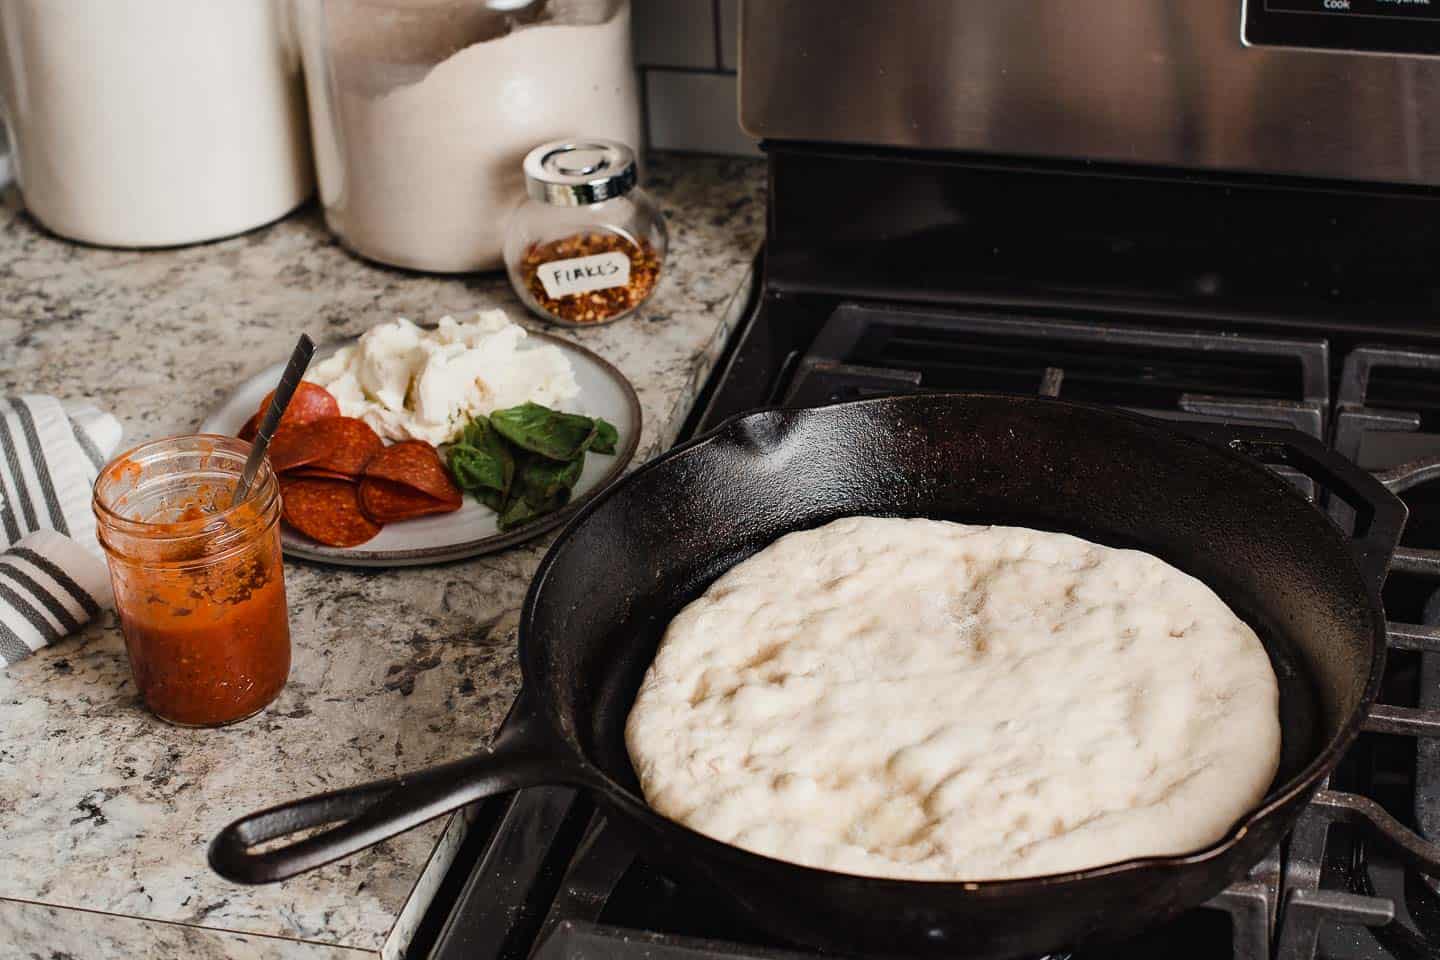
Step 5
When the skillet is hot, lay the circle of dough in it. VERY carefully use your fingers to press the dough's edges to cover the skillet's bottom.
Immediately add the sauce and toppings to the crust and cook for 5-6 minutes or until the bottom starts to char.
Tip: If the dough is too thick, you will need to cook it longer on the stovetop at a lower temperature to ensure the crust cooks through properly. You can also try putting it under the broiler for a few minutes before adding the toppings to help it cook through and avoid the "gum line" in the center.
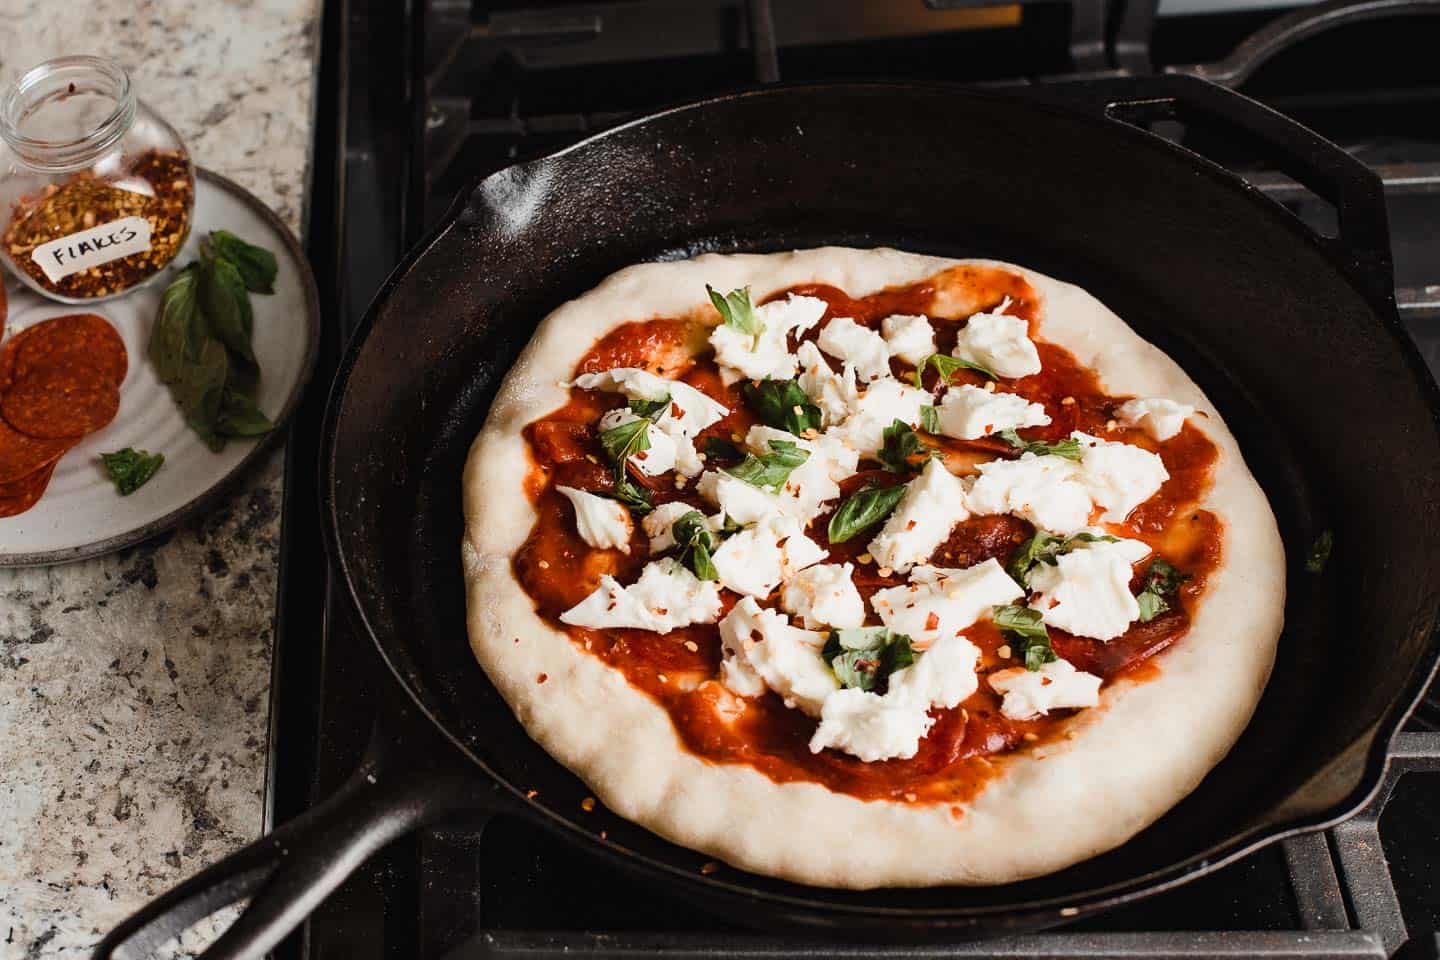
Step 6
Immediately place your pizza toppings on the crust. Cook on the stovetop for 5-6 minutes. Use a spatula to lift the crust to check the bottom for doneness. It should have a nice char.
Once the bottom is well cooked, transfer the skillet under the broiler for 2-4 minutes to cook the toppings. Check on the pizza frequently to avoid the crust and toppings from burning.
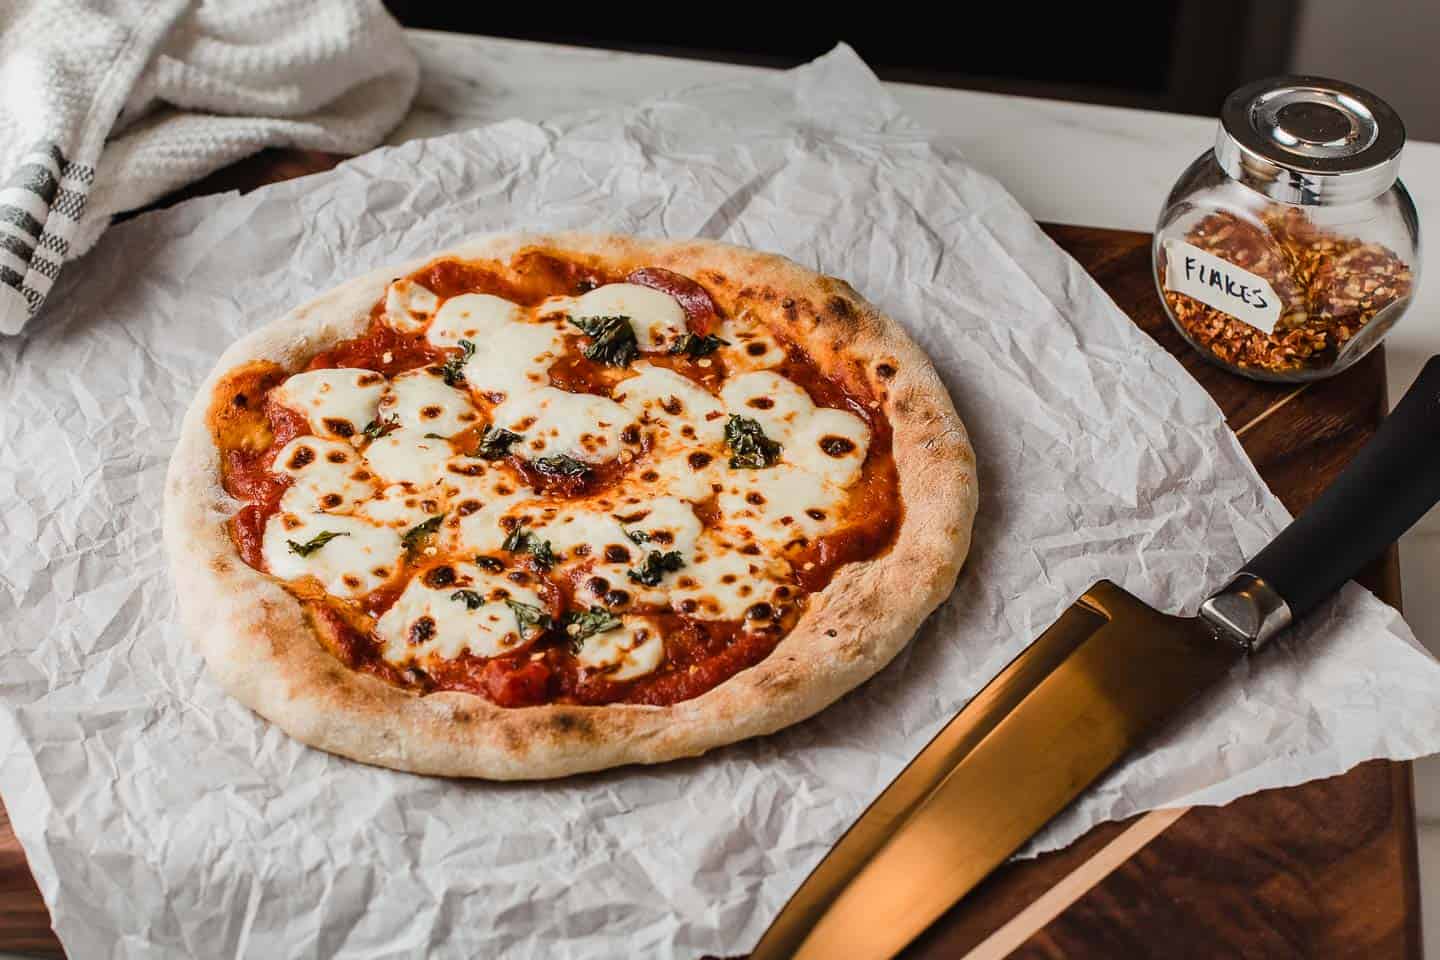
Step 7
Remove the pizza from your oven and cut it into slices!
How to Bake Sourdough Pizza on a Pizza Stone
- Place the pizza stone in a cold oven and preheat it to 450°F (232°C) Press the dough into a crust and add your desired toppings.
- Once the oven and pizza stone are heated, carefully use a pizza peel to transfer the dough directly onto the pizza stone. Be sure to move quickly to avoid the dough from losing its shape. If you don't have a pizza peel, you can shape the pizza on a sheet of parchment paper and then transfer it to the baking stone.
- Bake the pizza for 15-20 minutes or until the toppings are done and the crust is cooked through.
Tips For Adjusting Hydration
- In warmer months, reduce the amount of water in the initial mix by 25 grams. If the dough seems too stiff, gradually add the remaining water until you achieve the desired hydration level.
- For a variation, you can adjust the flour measurements to 75g whole wheat flour and 425g all-purpose flour. Since whole wheat flour absorbs more water than all-purpose flour, this will slightly reduce the dough's hydration level.
How to Store and Freeze
How to Store and Reheat: Store leftover pizza in a closed container in the fridge for up to 5 days. Reheat leftover pizza in a preheated oven at 375°F (190°C) for about 10 minutes, or until heated through and crispy. For a quicker option, microwave on a plate for 30-60 seconds, though the crust may be softer.
How to Freeze Unbaked Pizza Dough: After the second rise in the fridge, divide the dough into 2 or 4 balls and coat them with oil to prevent sticking. Place each one in a freezer bag, removing excess air. Store in the freezer for up to 3 months. To use, thaw in the refrigerator for 12 hours or overnight. Let the dough come to room temperature before shaping and baking as directed.
How to Freeze Baked Pizza Crust: After the final rise in the fridge, shape the dough and cook in a cast iron skillet over medium-high heat for 5-6 minutes. Finish under the broiler for 1-2 minutes. Let cool, then freeze in a freezer-safe bag with parchment paper between each crust. To bake, preheat the oven to 400°F (204°C). Place the frozen crust on a baking sheet (no need to thaw), add toppings, and bake for 15-20 minutes until golden and cooked through.
More Popular Sourdough recipes


Subscribe to our newsletter and we'll send you more fresh recipes, valuable troubleshooting advice, useful tips, and other information we believe will be helpful to you!

Sourdough Pizza Crust Recipe
EQUIPMENT
- 12" Cast Iron Skillet for the cast iron stovetop method
- pizza stone and peel for the oven method
Before You Begin
INGREDIENTS
Sourdough pizza crust
- ⅓ cup (100 g) sourdough starter discard (if you would like to use active starter reduce to ¼ cup (50 g)
- 2 teaspoons (10 g) fine sea salt (see notes if using a different type of salt)
- 2 tablespoons (30 g) olive oil
- ⅓ cup + 1 tablespoon (50 g) whole wheat flour
- 3 ¾ cups (450 g) all-purpose flour (bread flour or 00 flour can be used, see notes)
- 1 ⅓ cups + 1 teaspoon (325 g) water (see notes)
Pizza toppings
- pizza sauce
- homemade pesto
- your choice of toppings
INSTRUCTIONS
How to Make Sourdough Pizza in a Cast Iron Skillet
- The night before you want to bake: Add ⅓ cup (100 g) sourdough starter discard, 2 teaspoons (10 g) fine sea salt, 2 tablespoons (30 g) olive oil, ⅓ cup + 1 tablespoon (50 g) whole wheat flour, 3 ¾ cups (450 g) all-purpose flour, and 1 ⅓ cups + 1 teaspoon (325 g) water to a large mixing bowl and mix by hand until fully combined. Cover and let the dough ferment at room temperature overnight.
- The next morning: Perform a set of stretch and folds to strengthen the dough. Wet your hand with water to prevent sticking. While keeping the dough in the bowl, gently pull one side up and fold it over itself. Rotate the bowl and repeat on all sides until you've completed a full circle. Cover the bowl and refrigerate for 8 to 36 hours. The dough can be used immediately to make your pizza, but the cold ferment is optional and will help develop more flavor.
- When ready to cook: Remove the dough from the fridge and let it rest on the counter for 30 minutes at room temperature. Divide the dough into 4 equal pieces. Shape each portion into a ball on a generously floured work surface. Cover the dough with a tea towel and let them rest for 30 minutes.
- Turn on your oven's broiler to HIGH. On a stovetop heat a cast iron skillet over medium to medium-high heat. If needed, lightly oil the cast iron skillet to prevent sticking.
- While the skillet is preheating, press a dough ball into an 8" circle on a floured surface using your hands. Use more flour as needed to prevent sticking. (If the dough is difficult to shape, let it rest for 15 minutes on the counter to allow the gluten to relax.)
- When the skillet is hot, lay the circle of dough in it. VERY carefully use your fingers to press the edges of the dough to cover the bottom of the skillet. Immediately add the sauce and toppings to the crust and cook for 5-6 minutes or until the bottom of the crust starts to char. TIP: If the dough is too thick, you will need to cook it longer on the stovetop at a lower temperature to ensure the crust cooks through properly. You can also try putting it under the broiler for a few minutes before adding the toppings to help it cook through and avoid the "gum line" in the center.
- Once the bottom has turned brown and charred, transfer the cast iron skillet to the broiler to finish baking the top of the pizza for 2-4 minutes. Remove from the oven, slice, and serve hot. Make sure to keep an eye on it to prevent the toppings from burning, as broiler temperatures can vary. Every oven is different, so individual results may vary.
How to Bake Sourdough Pizza on A Pizza Stone
- Place the pizza stone in a cold oven and preheat it to 450°F (232°C) Press the dough into a crust and add your desired toppings. (The dough can be divided into 4 personal-sized pizzas or 2 larger pizzas.)
- Once the oven and pizza stone are heated, carefully use a pizza peel to transfer the dough directly onto the pizza stone. Be sure to move quickly to avoid the dough from losing its shape. Alternatively, you can shape the pizza on a piece of parchment paper and then transfer it to the baking stone.
- Bake the pizza for 15-20 minutes or until the toppings are done and the crust is cooked through.
NOTES
- Measuring Ingredients: Our recipes use a kitchen scale for precise measurements when developing our recipes. Measuring cups can lead to inconsistent results, so keep that in mind if you’re not using a scale.
- Flour: All-purpose flour can be substituted with bread flour or 00 flour. If you make this switch, you may need to adjust the hydration level slightly, as bread flour and 00 flour absorb water differently than all-purpose flour. Add a little more or less water as needed to achieve the right dough consistency.
- Adjusting Hydration: We’ve adjusted the recipe to 70% hydration for easier handling. If the dough feels too sticky, reduce the water by 25 grams next time. If it feels too stiff, add 25 grams.
- Adjusting salt: We use Redmonds fine sea salt weighing 10 grams per 2 teaspoons. If using regular table salt, use 1 ½ teaspoons. If using flaky sea salt, use a heaping 2 ½ teaspoons.
- How to Store and Reheat: Store leftover pizza in a closed container in the fridge for up to 5 days. Reheat leftover pizza in a preheated oven at 375°F (190°C) for about 10 minutes, or until heated through and crispy. For a quicker option, microwave on a plate for 30-60 seconds, though the crust may be softer.
- How to Freeze Unbaked Pizza Dough: After the second rise in the fridge, divide the dough into 2 or 4 balls and coat them with oil to prevent sticking. Place each one in a freezer bag, removing excess air. Store in the freezer for up to 3 months. To use, thaw in the refrigerator for 12 hours or overnight. Let the dough come to room temperature before shaping and baking as directed.
- How to Freeze Baked Pizza Crust: After the final rise in the fridge, shape the dough and cook in a cast iron skillet over medium-high heat for 5-6 minutes. Finish under the broiler for 1-2 minutes. Let cool, then freeze in a freezer-safe bag with parchment paper between each crust. To bake, preheat the oven to 400°F (204°C). Place the frozen crust on a baking sheet (no need to thaw), add toppings, and bake for 15-20 minutes until golden and cooked through.
Nutrition
More easy sourdough recipes:
You must have forgotten to add commercial yeast in the ingredients? or is it really just the unfed starter? thanks!
Just sourdough starter!
This morning after waiting overnight outside the fridge, the mixture is more like a batter than a dough, so I can’t even do the stretch and folds. I used the weights and a food scale to prep. Is it salvageable by adding more flour, or should I just throw it away?
I would work in flour 1/4 cup to start and see if you can knead it into a smooth ball. Divide and allow the dough to rest before shaping into the pizza crust.
Can you freeze unused portions?
To freeze unbaked pizza dough, form the dough into 4 balls. Coat them with oil to prevent sticking and place each one into an individual freezer bag. Make sure to remove any air from the bag. Store in the freezer for up to 3 months. When ready to use, thaw the dough in your refrigerator for 12 hours or overnight. Once you're ready to bake, remove the dough from the refrigerator and bring it to room temperature. Shape the pizza crust and bake according to the directions.
This is great! I have a huge cast iron skillet that I like to make pizza in. It's too big for the stove top so I baked it from start to finish in the oven. The first time I misread it and used the whole thing for that pizza. It cooked great. Not doughy. I am doing it exactly the same for tomorrow night.
I don’t have a gas stovetop so I don’t use cast iron skillets. Can i bake in the oven on a sheet pan instead of cooking on stovetop?
Yes you can.
Just did the stretch method, plan on baking tonight and can't wait to try it! Quick question: what should I cover the bowl with when it's on the counter fermenting overnight? I just used a linen cloth. Is that okay? Can I also use that to cover it in the fridge or should I go for something like plastic wrap (this bowl doesn't have a lid) or should I transfer it to a bowl with a lid? Thanks so much!! Love your Youtube videos! <3
Hi Marla! I recommend covering the bowl with plastic wrap. This is to prevent the top of the dough from drying out. Sometimes cloth can let too much air in depending on the thickness of the linen.
A shower cap works great for covering sourdough and can be reused multiple times!
We love this recipe! If I bake this on a stone in the oven, what temp should I cook it at?
I usually cook mine around 450°F for 15-20 minutes depending on the toppings.
Wowzers! I just ate another one! I added 450g of water for some reason, but made it up with All Purp and WW til the dough didnt stick to the bowl. ( I used dough hook, because I couldnt even mix with all that hydration.) This is so good! Thinking about making up dough and freezing. My growing teen will eat Pizza for Brkfast,Lunch and Dinner with Pizza for a snack in between so this is really nice! Thank you for a yummy receipe! The size, cooking time, dough is all great! The topping selections will be fun to try out too! Thanks again!
Can I double the recipe and bake on a pizza stonr to make for a larger group? I know it won't be exactly the same. Just want to be able to make a larger pizza.
This recipe should give you two large sized pizzas for a pizza stone.
Can you make the crust using 100% whole wheat flour? If so, hard red, hard white, or a combination of the two? when I tried to do so the dough didn't look as wet as yours, so I added a good deal more water, but the dough was impossible to handle. I'm also wanting to do this without a stand mixer. Thanks.
You can use 100% whole wheat but note that the crust will be very dense and also the dough will not be as stretchy. If you want the crust have the texture of a regular pizza crust, I would use 50% all-purpose and 50% whole wheat.